33 Coupe Interior 8
7/15/04
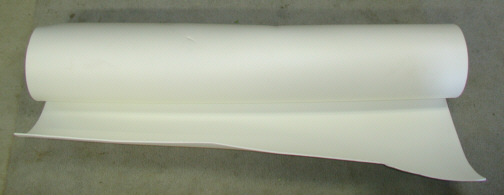
For the larger panels like head liner,
doors, in back of the seats and kick panels, I'm going to be
using this low density foam. This foam is 1/4" thick and can be
shaped and cut very easily. What you do is glue this to your panel, and then
glue your material to the foam. Sounds easy enough but is harder than I
thought.
|
|
|
This is the piece that goes next to my
windshield. The one side goes against the headliner and the other goes
towards the glass. It has a 90 degree bend in it along with a radius in
both ends that transitions into a small corner. I plan on gluing this
one in three steps. The first section will be the side facing you and
the second side will be 90 degrees from that one. I'll be working from
left to right on the first two sides. Once those surfaces have been
covered, I can then glue and wrap it around the back. I sanded the
corner edges
of the foam with 100 grit sandpaper so when the material is wrapped
around towards the back, it won't have such a sharp edge. I'll have to
see how it looks when it's done to see if I'll sand any other panels edges or
not. There are four mounting clips on this panel and I covered the surface
with the clips with cardboard like the smaller panels because the clips
raise the foam enough to see a high-spot. I could sand the high-spots
off but doing so isn't as easy as it sounds because the foam wants to
roll over and not just sand off like other materials. I thought about
cutting away a small section of foam with my Dremel that the clip would
rest on but when you try to glue the two together, you would have no
room for error when it came time to line things up. I might have gotten
away with it on this piece but I didn't chance it.
|
|

|
I glued one half at a time which
worked out good for me. Notice the dark area which is glue that I'm
waiting to set-up so I can stick it to the other surface. You better get
it in the right spot the first time or you'll be sorry. Anything larger
than this piece will require two people so I don't get in trouble. I
placed one end down first, then stretched the material the opposite way
and then stuck the other end down. Then I just smoothed out the material
with my hands and pushed on every square inch to make sure it was
fastened down good.
|
|

|
|
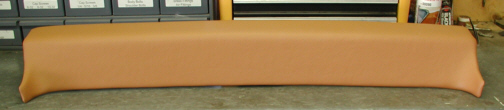
Well the plan worked out just fine. I
learned more about fitting corners while I was doing this piece which
means the next piece should come out even better. The sanded edges look
good too so I'll be doing this on the other pieces as well. Forming the
compound corners wasn't as hard as I thought either. I'm pleased how
this came out so it's on to another-larger piece as soon as I can think
of a pattern to do.
|
|
|
|
1 2
3 4
5 6
7 8
9 10
11 12
13 14 15
16 17
18 19
20 21 22 23
24 25
26 27
28 |
|
29
30
31 32
33 34
35 36
37 38 39 40
41 42
43 44
45 46
47 48
49 50
51 52 53 |
|
54
55
56 57
58 59
60 61
62 63
64 65
66 67
68 |
|