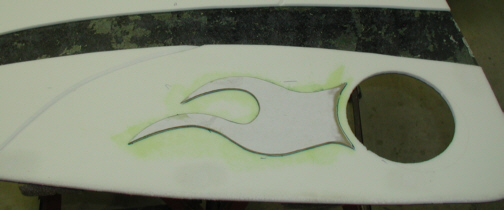
This will give you a better idea of
what I had in mind. I placed the curved part of the flames so they would
match the curved line that's next to it. If your wondering why there is
a gap between the flame and speaker hole, it's because the speaker
grill is going to need a flat area to rest on when it's installed. If I measured right, the
grill will come out right next to the end of the flame. It's almost time to put some material
on the door panels and see how it looks.
|
|
|
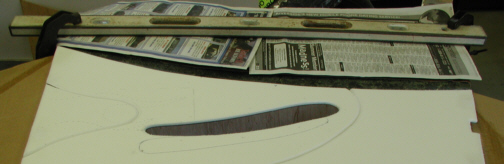
I needed a way to hold the panel from
moving while we worked on it because after the problem we had with the
armrests, I didn't want to find out we needed it after we already
started. What I came up with was to use a scrap piece of wood
and clamp it across the panel and to my two sawhorses. This way it made it
harder to move them (the two sawhorses and panel) as we stretched the
material and glued it down. I used newspaper as I sprayed the
glue on so it didn't end up in the wrong places.
|
|
|
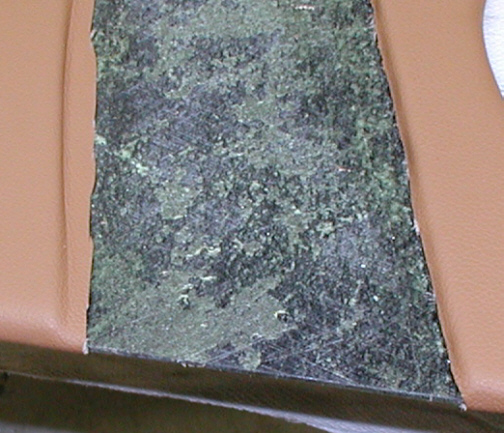
Now that the material is glued on, I
needed to do some trimming. The middle section that you see here is where the contrasting
color will be going so I'll need to make some room for it. The side on
the right has been trimmed and is just to show you how it looks before
things go together. The other side has be rough-trimmed with scissors
which is what I did to both sides once I had all the material on. At
this point, I'm ready to fit the center piece which needs about
1/8" of clearance total. I'll be using rivets like I did on the
headliner to hold it in place.
|
|
|
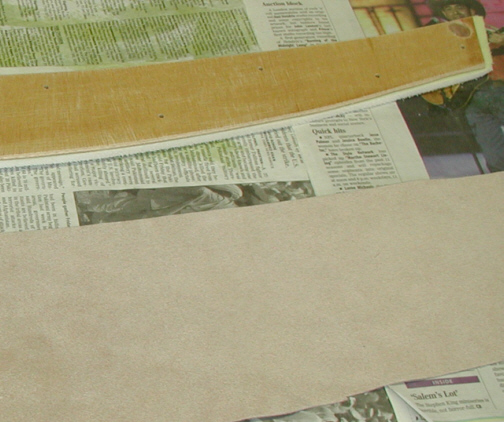
This is the back side of the piece
that will get riveted in place (notice the holes in the wood). I staggered
the holes because of how narrow it is on this end. As I went towards the
larger side, I ended up using them in-line for the last four. Now I need
to glue the material on and do some trimming and fitting.
|
|
|
|
1 2
3 4
5 6
7 8
9 10
11 12
13 14 15
16 17
18 19
20 21 22 23
24 25
26 27
28 |
|
29
30
31 32
33 34
35 36
37 38 39 40
41 42
43 44
45 46
47 48
49 50
51 52 53 |
|
54
55
56 57
58 59
60 61
62 63
64 65
66 67
68 |