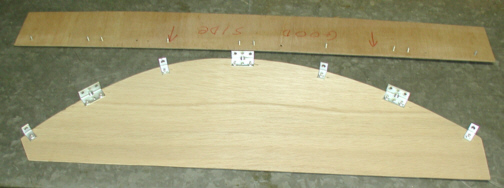
After cutting out some wood pieces, I
screwed them together with some "L" brackets. I fastened the
long thin piece over the other panel so it would fit better. I started
on one end and put in one sheet metal screw at a time so I didn't have any gaps when
I was finished. Those sheet metal screws sticking out are hard on the hands, but are
only temporary.
|
|
|
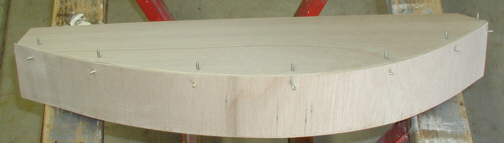
Here you can see the "L"
brackets that I used. The reason that I used some with two holes and the
others with one hole is because the hardware store didn't have enough
brackets with only one hole so I decided to split them up. The brackets
that you see fastened here are held in with pop-rivets. I removed one screw
at a time, then drilled the screw hole out to the proper rivet size and then
installed a rivet with a washer on the back so it would hold better. The
holes in the brackets were a little to big for the rivet to stay
fastened so this
is why I used the washers. On the long thin piece I also drilled the
sheet metal screw holes larger so it would fit a 6-32 screw which is how I'm going
to fasten the two pieces together. I'll use double-nuts to hold them
because I won't be able to hold the screw head once the foam is glued
on.
|
|
|
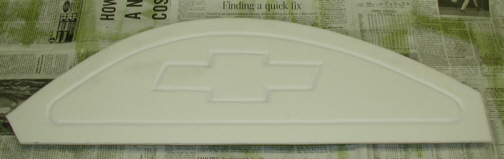
After gluing on the foam, I came up
with this pattern to use. I have no idea if this is going to look good
or not but I hope it does. Cutting out patterns are getting easier now
and I have a better understanding of how leather works.
|
|
|
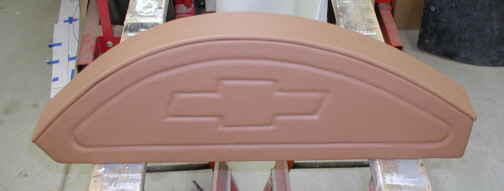
This is what it looks like with the
two pieces together and finished. I had my daughter Angela help me with these
pieces and she did a good job.
Now if the top piece fits this one nice and snug, I'll be in good shape.
|
|
|
|
1 2
3 4
5 6
7 8
9 10
11 12
13 14 15
16 17
18 19
20 21 22 23
24 25
26 27
28 |
|
29
30
31 32
33 34
35 36
37 38 39 40
41 42
43 44
45 46
47 48
49 50
51 52 53 |
|
54
55
56 57
58 59
60 61
62 63
64 65
66 67
68 |