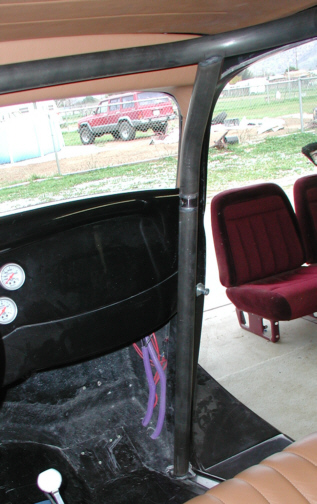
This is what it looks like from the
inside. It's very easy to get in and out of the car with these new pieces in here but
it may be because I have suicide doors too. They also don't block my
vision because the "A" pillars line-up with them pretty well. Only a
couple of pieces left to do and the cage will be finished.
|
|
|
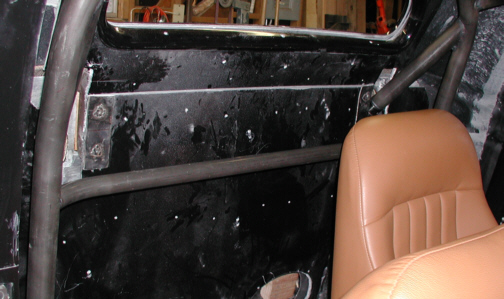
The only piece of the cage that is or
can be a
different size is the cross bar for seat bracing which is also a
shoulder harness attachment point. The tube diameter is 1 1/4" X
.083 wall chromoly. I wont be using it for
bracing my seat but will use it for attaching my shoulder harness. This
bar has to be no higher than my shoulders to 4" below them which
meets the rulebook specs so I split
the difference and put it in the middle. This piece has a bend on both
ends so it wraps around the back of the seats which gives me a few more
inches of room. If I had a tube that was straight across, I wouldn't be
able to move the seat back as far so this why I had it bent this way.
This piece is only tack-welded in at this point and the next time I take
the main hoop out, I'll fully weld it in place. One more piece of cage
to go and it will be completed.
|
|
|
| 12/11/04
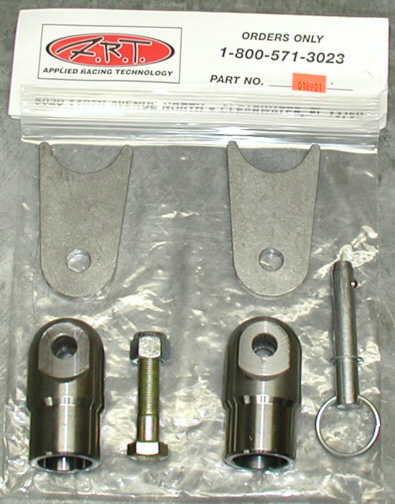
This is a swing-out door bar kit made by
Applied
Racing Technology. What this does is allow the bar that runs from
the main hoop down to the floor by my feet to be removable. The purpose
of a door bar is to protect you from a side impact. It was hard to tell
how this was made when I saw a picture of it but when I received it, I
couldn't believe how heavy it was. Time for a little machining to shave
some weight from it.
|
|
|
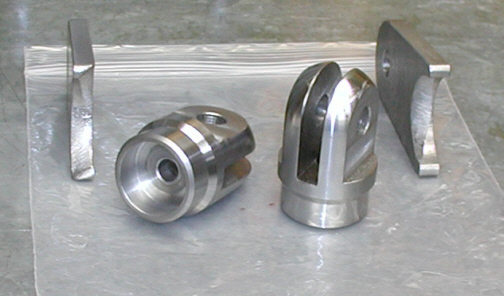
After looking at these pieces for a
few minutes, I found a few places that I could remove material from and
still have them stay very strong. First thing I did was drill a
3/8" diameter hole through them, then I cut the area that goes into
the tube down from 1" to 1/2", went from 3/16" wall down
to 1/8" wall in the same area and then if you notice the sides of
them where the large hole is I went from .425" thick down to
3/8" thick. These pieces are similar to the couplers that I made to
take the cage apart so what's good for the goose, is good for the
gander. Now the plates that get welded on to the cage are 3/8"
thick which is the same thickness that the mating pieces are so it
should still be very strong and it saved me over 3/8 of a pound. I also prepped
the ends of the plates that will be welded to the tubes so it's time to
heat things up.
|
|
|
|
1 2
3 4
5 6
7 8
9 10
11 12
13 14 15
16 17
18 19
20 21 22 23
24 25
26 27
28 |
|
29
30
31 32
33 34
35 36
37 38 39 40
41 42
43 44
45 46
47 48
49 50
51 52 53 |
|
54
55
56 57
58 59
60 61
62 63
64 65
66 67
68 |