|
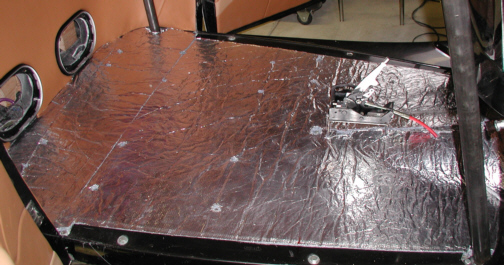
Once the whole floor was covered, I then cut out all the
bolt holes that would be used for the seats and harness so now we're
ready for some carpet.
|
|
|
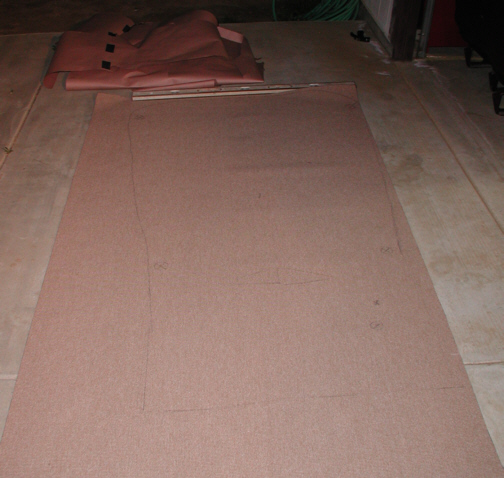
Here's the carpet which has been
marked and is almost ready to be cut out. One thing that needs to be done
before we cut right to the line is the area around the roll cage
cut-outs. My neighbor use to do upholstery awhile ago too and he still
had his sewing machine. He told me that if I ever needed it, that I could
borrow it so I took him up on his offer. This is just what we needed
so Paul started cleaning it so he could do a test piece or two. Notice
the template at the top all carefully folded.
|
|
|
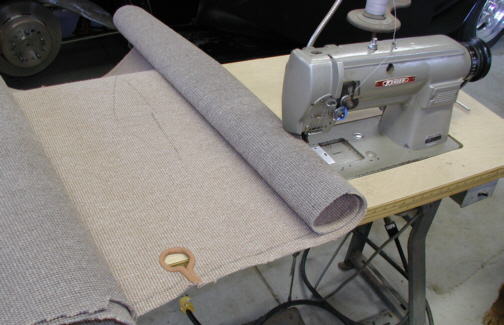
After quite awhile of playing with
this machine, Paul was able to make a stitch or two. We used some scraps
of leather that I had left over and sewed them around the cut-outs for the
cage to pass through. Now this wasn't easy to do because of how large
the carpet is compared to how much room we had to work with in and
around the machine. I held the end of the rolled-up carpet and Paul did
his magic while I walked it around the table on his commands. One of the
things that was happening was the thread kept coming off one of the many
areas that it pass's through on it's way to the needle. If you look close,
you'll see some blue tape on the front of the machine that was used to
keep the thread from coming loose and it worked like a guard. Hey, whatever
works is what I say. The end result came out great and I'm very happy with
it. Once all four places were sewn, it was time to cut the carpet to the
line and see how it fit. Paul
didn't want to cut to the line right away because of how much handling
that needed to be done while it was being sewn. This way all the edges would
still be in
good shape when we finished. The diamond shaped lines that you see will
be the cut-out that goes over the tunnel. When the carpet goes up and
over the the hump, the opening will come together and butt against each
other leaving no gap at all. He ended up with this shape from the
pattern paper that was used earlier. By looking at that shape, it sure
doesn't appear that it would work, now does it?
|
|
|
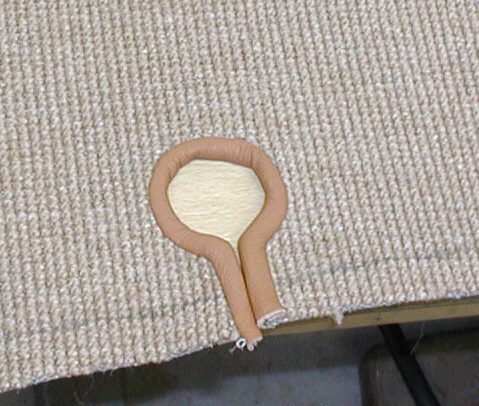
Here's a close-up of Paul's handy
work. The carpet will get trimmed where the line is and then the ends
will get tucked under the panel that is next to it for a nice clean
look. You can't see the seam because it's been wrapped with leather and
then the ends get glued to the back of the carpet. The end result is a
nice clean look that doesn't even look likes it been sewn.
|
|
|
|
1 2
3 4
5 6
7 8
9 10
11 12
13 14 15
16 17
18 19
20 21 22 23
24 25
26 27
28 |
|
29
30
31 32
33 34
35 36
37 38 39 40
41 42
43 44
45 46
47 48
49 50
51 52 53 |
|
54
55
56 57
58 59
60 61
62 63
64 65
66 67
68 |