This is what it's going to look like
once the sending unit is installed. This is just a test fit to see if
everything is going to work or not. Time to put this section away for
now and start welding.
|
|

|
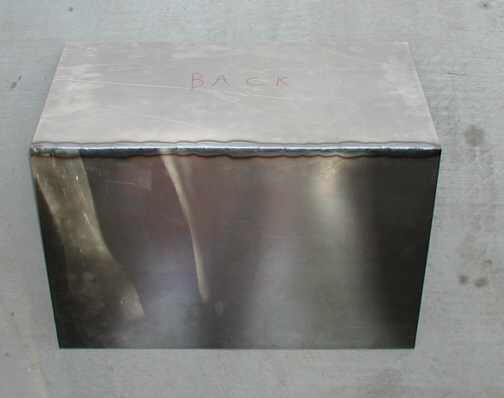
I started on the back and bottom
pieces first. I found out real fast that this isn't the easiest stuff to
weld because of how thin it is. I'm use to material that's a little
thicker so this is going to be a challenge for me. After burning through
in a few places, I had to really concentrate on what I was doing. Let's
move on to the sides now.
|
|
|
|
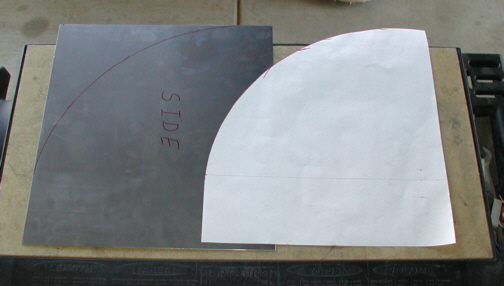
The sides will have a right angle at
the bottom and a radius on the top. I cut out a paper pattern which has
a 12" radius and transferred that shape to my piece of steel.
|
|
|
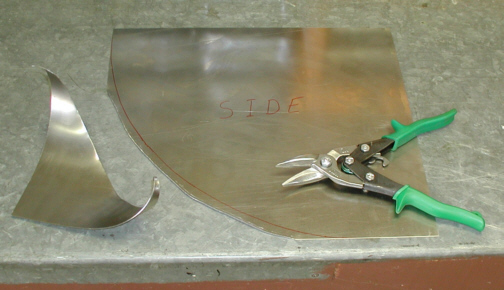
I used sheet metal cutters to rough
out the radius and then used a belt sander to finish it. The reason I
didn't cut right to the line with the cutters is because they tend to
bend the material a small amount right where the cut is. I will need to
have both side pieces exactly the same size so let's do some sanding.
|
|
|
|
1 2
3 4
5 6
7 8
9 10
11 12
13 14 15
16 17
18 19
20 21 22 23
24 25
26 27
28 |
|
29
30
31 32
33 34
35 36
37 38 39 40
41 42
43 44
45 46
47 48
49 50
51 52 53 |
|
54
55
56 57
58 59
60 61
62 63
64 65
66 67
68 |