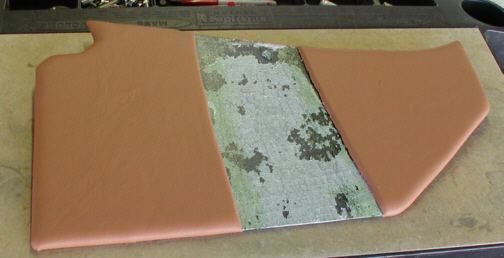
After cutting out the center section,
I covered the ends with material and I'm just about ready to do the
contrasting color. I'm going to do the center the same way as the door
panels which means it will get fastened with pop-rivets. The two sides have been
trimmed and the center is now ready.
|
|
|
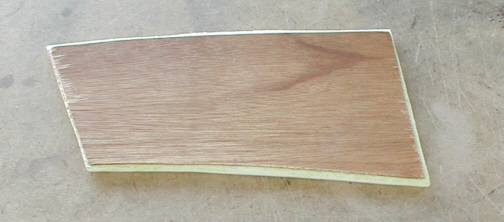
Here's the back of the center piece
that will have my contrasting color.
Notice that it's larger on one end (right side) than the other. This is so it will
match the door panels which has an ever changing size. The 1/8"
thick wood backing has been glued to the foam and is now ready for some
material after I drill holes for the rivets.
|
|
|
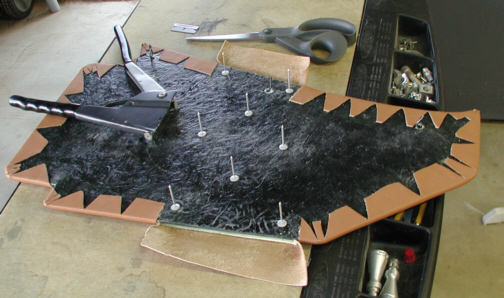
What you see here is the way I'm
fastening the center to the panel. I used eight rivets for
this small piece which is probably over-kill but it's better than not
enough. The transition between the two colors on the ends are a challenge to get to
look right. After trying another way of trimming the material that gets
glued to the back, I found a different way of doing it. By rolling over
the ends of the material before gluing it, I can hide the cut-side where the
two colors come together easier. The only problem with doing it this way
is that you see the double-layer where you fold the material, but it's not
much. This is how I should have done the door panels but you
live-and-learn.
|
|
|
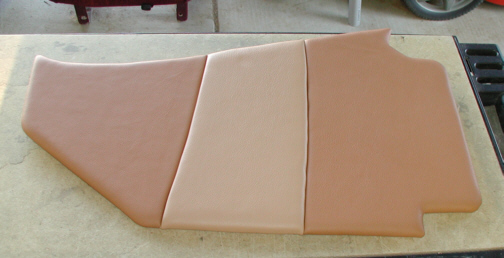
Here is the finished kick panel ready
to be installed. It came out pretty good and I'm happy with it. The two
cut-outs on the right are for wires (bottom) and the other fits
around the bottom contour of the dash. I also added some extra clearance
at the
bottom where carpet will be someday. If I didn't do that now, it
wouldn't fit later. I'll show you what it looks like after I get the
speaker grills finished.
|
|
|
|
1 2
3 4
5 6
7 8
9 10
11 12
13 14 15
16 17
18 19
20
21 22 23
24 25
26 27
28 |
|
29
30
31 32
33 34
35 36
37 38 39 40
41 42
43 44
45 46
47 48
49 50
51 52 53 |
|
54
55
56 57
58 59
60 61
62 63
64 65
66 67
68 |