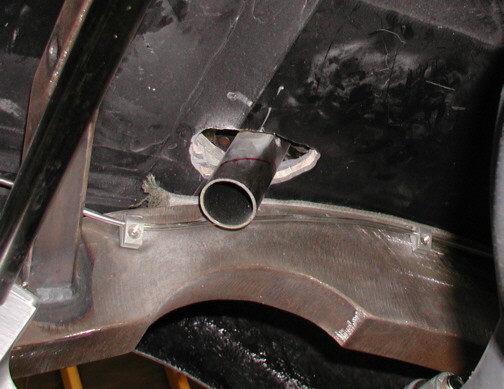
I used my 1 3/4" hole saw and
then used my die grinder to get the shape I needed for the 1/8" tube plate to
clear the floor of the trunk. Here you can see the tube that needs to be
cut and angled and then I need to build a support for it. This is
the other side in case you're wondering because I got ahead of myself
and forgot to take a picture but looks the same.
|
|
|
I unhooked the rear-end and dropped it
down so I could get to the bottom of the tube and bracket easier. I needed to weld a
shelf to the chassis so the tube could be attached to it. Why did I need to do
this instead of fastening it to the chassis? There was a couple of
reasons. One, I already had my upholstery done in the trunk which meant
that I had to work around it (not very good planning on my part) and
two, the angle of the down-bar wasn't enough to end up where I wanted it
because I wasn't able to run the tube from the top of the main hoop.
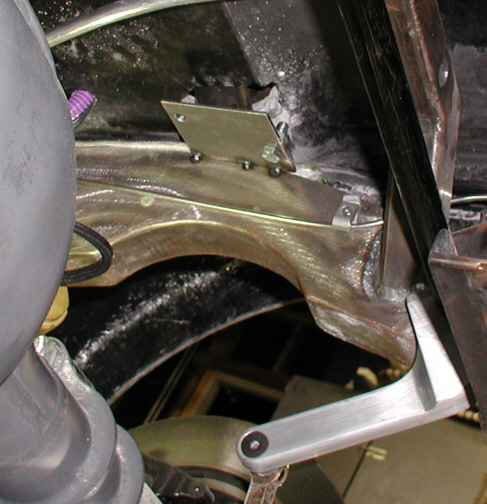
What I plan to do is make a triangular shelf for the tube to bolt too.
Here you can see that I've tack-welded the top piece in place. I first
tack-welded the 1/8" plate to the tube, then I held the shelf plate
up to the tube plate and marked around the tube plate with a marker as
far as I could. Then I removed the shelf plate and marked where the two
3/8" holes needed to be and drilled them. After checking to see if
the holes lined up, I put two bolts through the holes to keep them lined
up and tack-welded the plate in place that you see below. Now I'm ready to make the support
for the shelf. I'll fully weld the plate in place once I remove the body
from the chassis when I'm ready for paint.
|
|
|
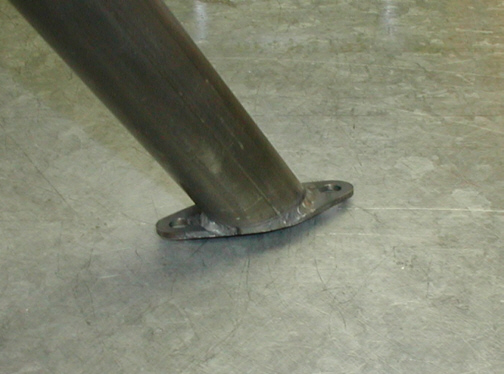
This is the bottom of the down-bar
which has the 1/8" plate welded to it. I welded the plate on at an
angle (you can't tell in this shot) so I could get a nut on top without
it interfering with the tube. If I had welded it on inline with the
tube, I found out that I wouldn't have enough clearance to work
right.
|
|
|
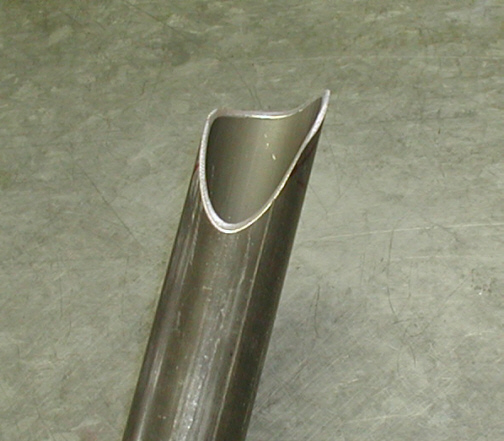
This is the other end of the down-bar
that gets welded to the main hoop. It took awhile to make this cutout
because I used an 4" angle grinder and file to end up with this
shape. To start with I cut the tube at a 45 degree angle and then worked
it from there. Now that the down-bars are cut and fitted to the right
length, I need to cut them in half before I can weld them in place. Why
am I cutting them in half? So I can take it apart when the time comes to
remove the body, along with installing the upholstery.
|
|
|
|
1 2
3 4
5 6
7 8
9 10
11 12
13 14 15
16 17
18 19
20 21 22 23
24 25
26 27
28 |
|
29
30
31 32
33 34
35 36
37 38 39
40
41 42
43 44
45 46
47 48
49 50
51 52 53 |
|
54
55
56 57
58 59
60 61
62 63
64 65
66 67
68 |