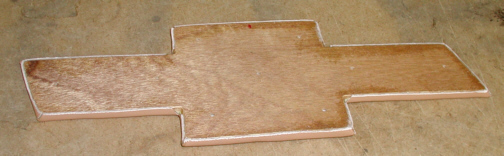
Here you can see that I trimmed the
back flush with the bottom. The edges are glued to the sides and will be
trapped when it's installed against the sides on the headliner.
|
|
|
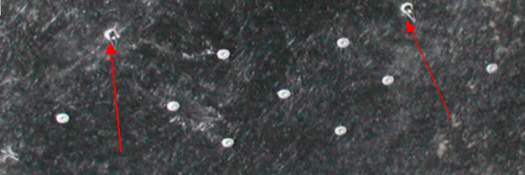
This is a shot of the back of the
headliner to show you how the insert is held in. I used pop-rivets as my
fasteners. I don't know how anyone else does it but this is what I came
up with. If I need too remove it for any reason, I can always drill them out and it
would come right out. The red arrows are showing you two of the many
mounting clips.
|
|
|
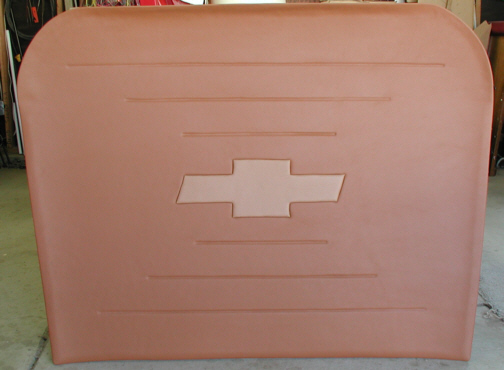
Here it is all finished. I like the
contrast between the two colors. I made the lines an equal distance from
the outside edges which makes them different lengths if you look close.
This was planned if you were wondering because the panel isn't
rectangular. I guess it's not to bad for my
first time and I've learned a lot from it which will help me on my next
panel. Next up, door panels!
|
|
|
| 8/07/04
This is my door panel which is something that most
people look at once they look in the window so I wanted it to look
decent.....or in my case.....as good as I could make it look with my limited skills.
What I plan to do for a pattern is a few lines like the headliner and use two colors
as well. We start this one like the other panels by gluing down the foam first
but in this case, I had to do a lot of fitting before I put the foam on.
The reason for the fitting is because the door panel fit good in some
places and not in others. I used some 80 grit sandpaper on my sanding
block to make all the edges the same. I had to remove up to 1/8" in
some places to make things line-up. Now I can layout a pattern and do some cutting.
|
|

|
|
1 2
3 4
5 6
7 8
9 10
11 12
13 14 15
16 17
18 19
20 21 22 23
24 25
26 27
28 |
|
29
30
31 32
33 34
35 36
37 38 39 40
41 42
43 44
45 46
47 48
49 50
51 52 53 |
|
54
55
56 57
58 59
60 61
62 63
64 65
66 67
68 |