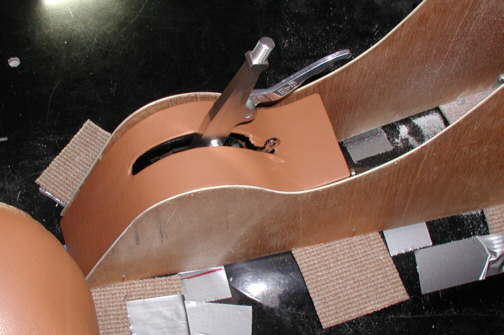
No I didn't cut my aluminum piece in
half, this is just a test piece made out of sheet metal to see how things might look and fit. I
figure this was just a little insurance for things to come. What I did was
bend a small piece out of sheet metal to see how it would look and get
an idea of how I'm going to fasten it to the sides. The sheet metal
bends MUCH easier than the aluminum and really doesn't look to bad. The
only bad thing is that it's only .035" thick so it's not very
strong.
|
|
|
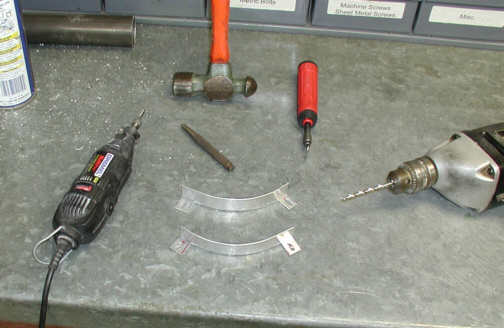
The way I'm going to attach the center
piece is with some pieces of Hook-and-Loop (Velcro). I figure if I get
enough of this stuff on the center piece, it shouldn't slip
or move. What you see below is two of the four pieces that will go on
each side. What I did was start with 3/4" X 3/4" X 1/16"
aluminum angle and cut away some of it but left enough to hold it to the
sides with screws. I also slotted the brackets so I can adjust them up
or down as needed so the top surface of the center piece lines-up with
the top of the sides. You do this kind of thing when you don't know what
your doing so you have every chance of it working.
|
|
|
This should give you a better idea of
what I'm doing. By placing these brackets in an "S" shape held
on by some 1" long 6-32 screws, I'll be sticking the Hook-and-Loop
on to these surfaces to hold down the center piece. These brackets are
3/8" from the edge which is the thickness of the aluminum center
piece + cardboard + two thickness' of material (the piece on top
and the material that gets wrapped around the opposite surface) +
Hook-and-Loop. The screws go through the wood and then I put on a
lock-washer and nut. The bracket then sits on the nut which then gets
another washer and nut on top of that. This way I could tighten the
first nut down so it wouldn't turn once the material is on. I hope this
works because I've never seen or tried this before so keep your fingers
crossed.
|
|

|
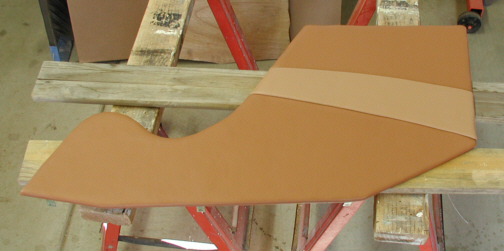
I made the console match the door and
kick panels but on a smaller scale. The lighter color isn't as wide as
the door panels because I didn't have enough material to make them exactly
like the others. I did have just enough material left over to do the
contrasting color but I had to buy more of the darker color so I'd be
able to finish the other panel. While I was buying more material, I went
ahead and bought a 1/2 hide which is more than enough but I have plans
to cover one other thing in the future. Now it's all about waiting for
the material to arrive so I can finish the other panel and see how it
all looks once it's installed.
|
|
|
|
1 2
3 4
5 6
7 8
9 10
11 12
13 14 15
16 17
18 19
20 21 22 23
24 25
26 27
28 |
|
29
30
31 32
33 34
35 36
37 38 39 40
41 42
43 44
45 46
47 48
49 50
51 52 53 |
|
54
55
56 57
58 59
60 61
62 63
64 65
66 67
68 |