|
Rack & Pinion Block With the minimum amount of room to work with, I'm going
to use a rack-and-pinion system to move the lock bolts. What are
lock bolts? Those are the round pins that are placed around the door
that move in and out when you rotate the handle on the outside of
the door. Some safes have them on all four sides, and some have them on
just one side of the door opposite the hinges. It just depends on the
amount of security that you're looking for, which directly affects the
cost of the safe.
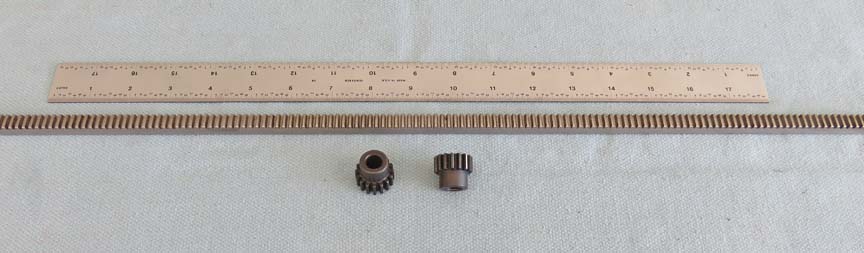
What you see below is a 24" long rack that has 20 teeth per
inch (20 pitch) and a 14 1/2 degree pressure angle. The two spur gears
are the same pitch and pressure angle, has a 3/8" through hole, .900"
diameter X .750 tall and a 3/8" gear face that matches the rack. The
rack will be cut in to four pieces of unknown lengths later on.
|
|
 |
|
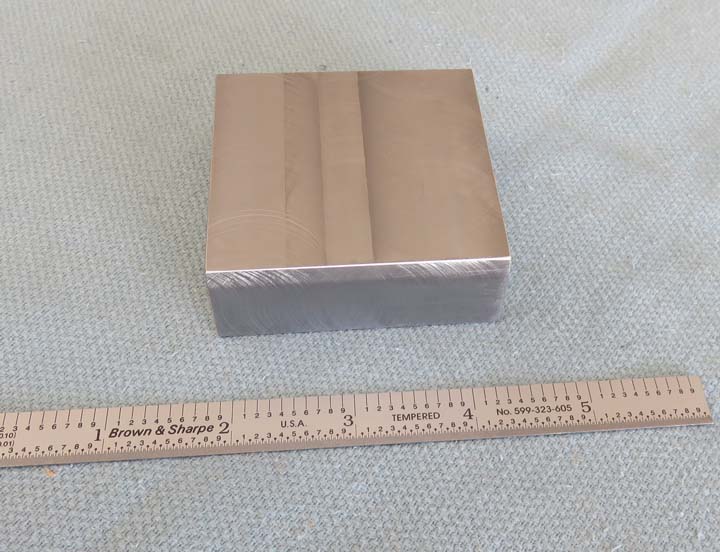
What I plan on doing is using a block that will hold the
gears and guide the racks. This block is made out of mild steel and is 2
1/2" square X .900" thick. I don't know how other safes are made but I
can see this working in my minds eye. In other words, in my head. I'll be
boring holes for the gears, cutting slots for the rack and drilling holes
for some hold-down bolts.
|
|
|
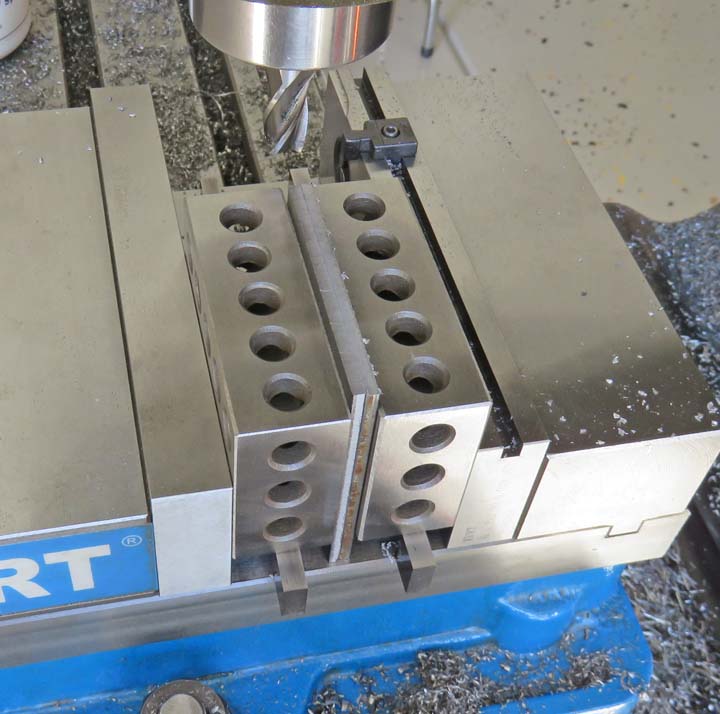
What you see below are two plates that will sandwich the
block above. These are 1/8" thick X 2 1/2" square. They will also
have bolt holes and a hole that will clear the gear in the center. I'm
machining both plates at the same time here, with them being supported by some
1" X 2" X 3" blocks.
|
|
 |
|
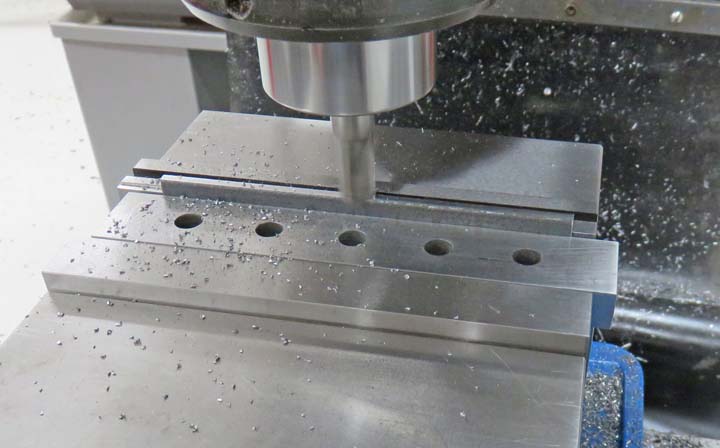
I'll be using four 1/4-20 screws to hold the block and
plates down. The bolt holes are .250" diameter (1/4"), which means
they're won't be much slop between the screws and block. This is to make
sure the block locates in the same place and won't move. The center hole
is being bored here so it clears the smaller diameter of the gear. The
smaller diameter on the gear measures .750" so I made the clearance hole
a couple of thousandths larger. This will all make more sense later.
|
|
 |
|
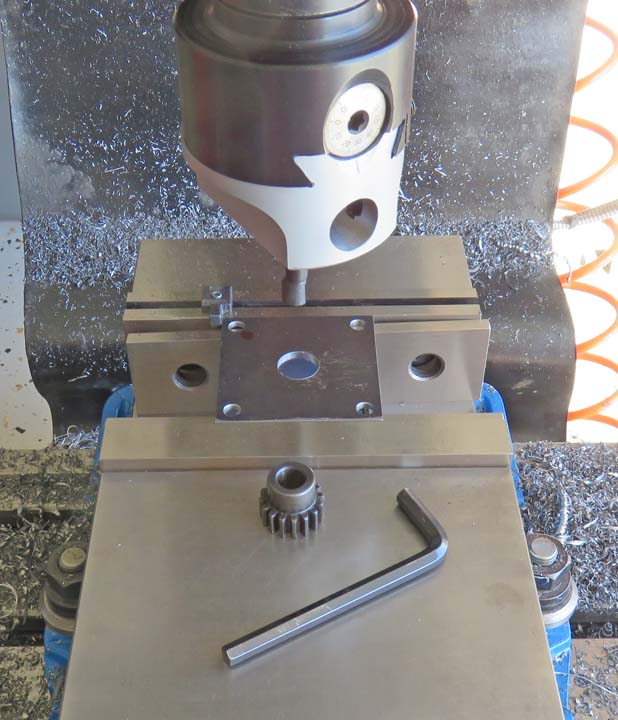
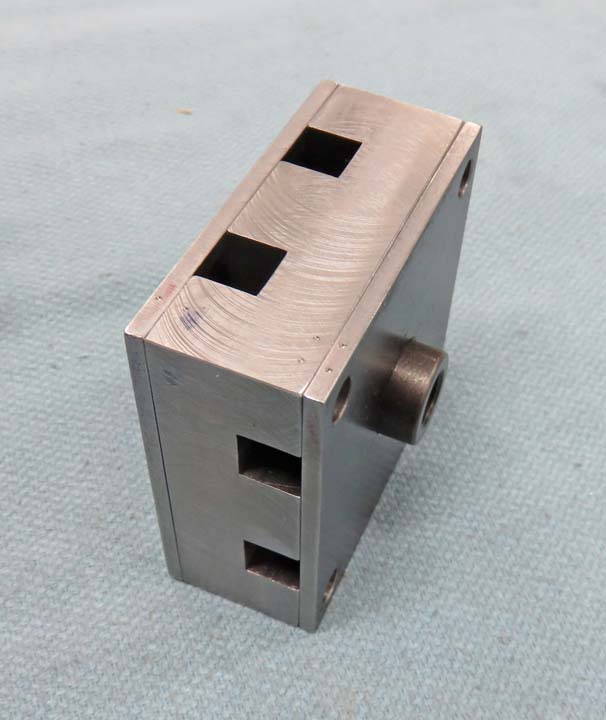
This should give you a better idea of what the block
looks like. You can also see how the slots are placed so that one gear
moves two racks.
|
|
Here is what it looks like on the inside. The gear will rest in the
center as the racks move along the slots.
|

|
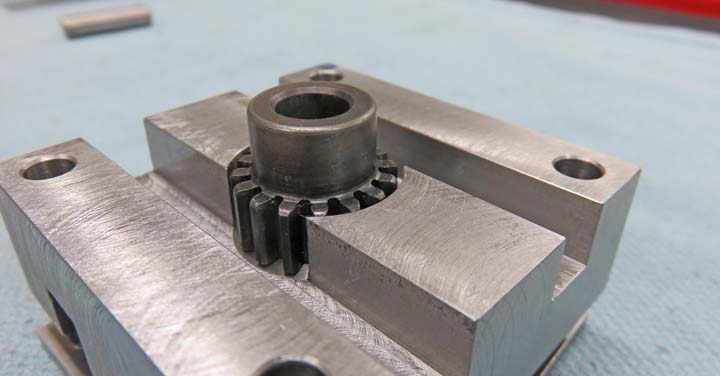
You can see how the gear sticks out enough to engage the rack, which
sits just below the surface. This way the 1/8" plate will clear the gear
teeth but will also trap the gear in place.
|
|
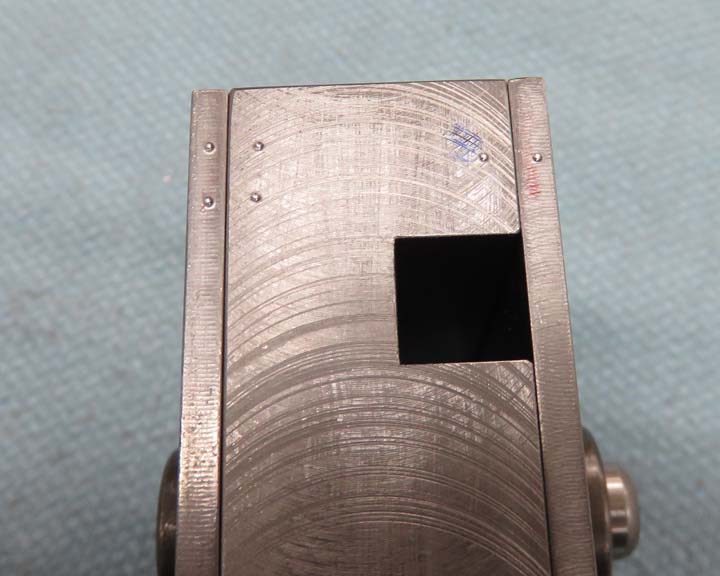
I made sure to mark the plates so they don't get mixed up because when
both gears are in place I want the racks to move like they're designed to.
|
|
|
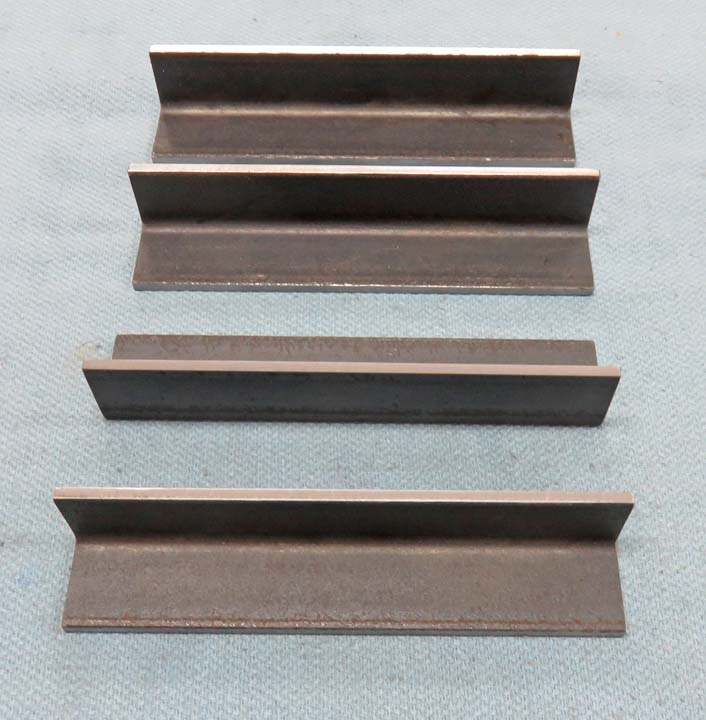
Lock Bolts
The lock bolts will need to fasten to something and to
do that I'll be using some angle iron. I plan on putting two lock bolts
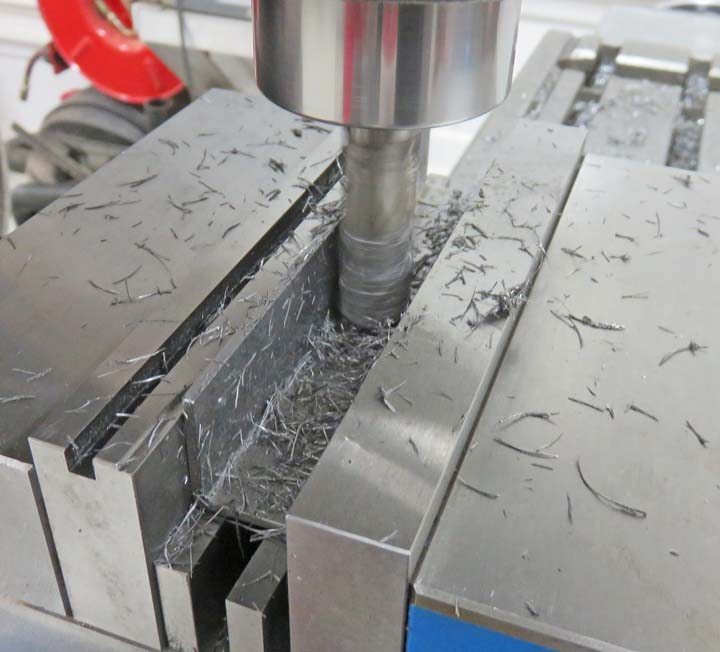
on each piece of angle iron for a total of eight. I'm machined all the surfaces of the
angle iron so they will be square. Below I'm cutting the top edges (two
cuts for each piece).
|
|
 |
This is what it looks like with the top edges cut. The size is 1"X 1"X
5".
|
|
 |
Here I'm cleaning up the top surface (two surfaces each).
|
|
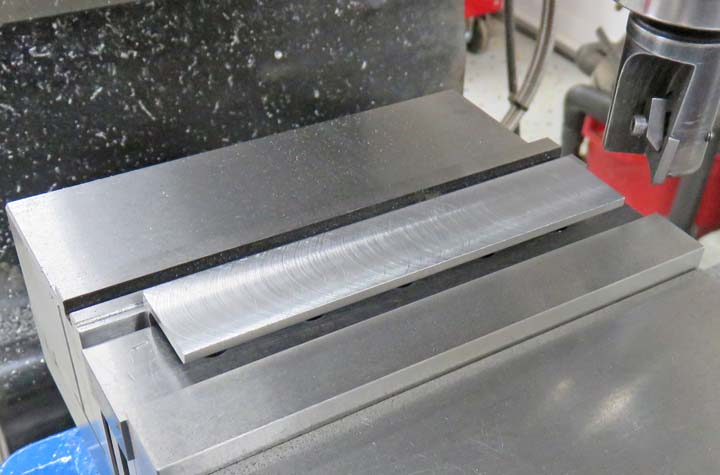 |
And last I'm cleaning up the inner surfaces. This will make it easier to
work with because angle iron isn't square when you buy it.
|
|
 |
|
1
2
3
4
5
6
7
8
9
10
11
12
13
14
15
16
17
18
19
20
21
22
23
24 |