|
Making A Handle
I'll need a handle to open the safe with but after doing
some thinking, it's not going to be exactly what I wanted. I would've
loved to make a handle with three spokes, five would be ideal, but I
just don't have the room to do either of those. So what I settled on is
a single handle, or one spoke. I'll show you why soon.
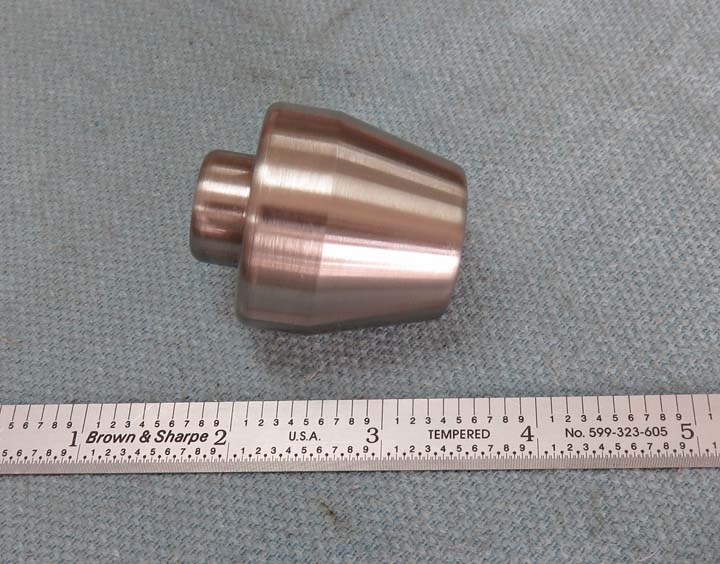
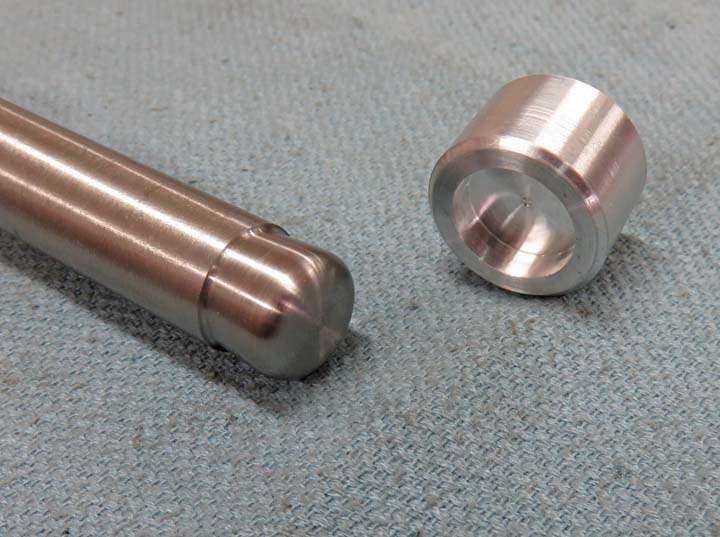
I made this center piece out of stainless steel and the smaller
area to the left will have a set screw. Later I'll add the handle to the
15 degree angle.
|
|
 |
|
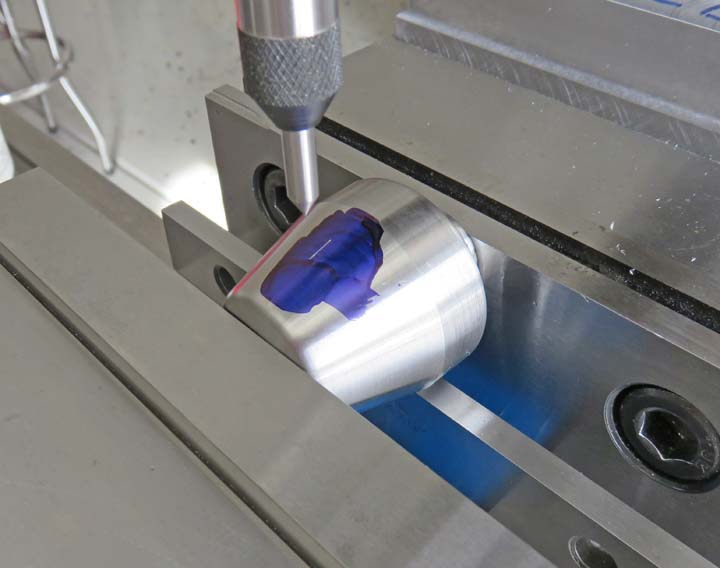
I'm getting ready to drill and tap for a 1/4-20 thread,
which will be for the set screw. While I have the piece in the vise, I'm
scribing a line for the handle. I wanted the set screw and handle to be
inline with each other. That way the set screw isn't as noticeable.
|
|
 |
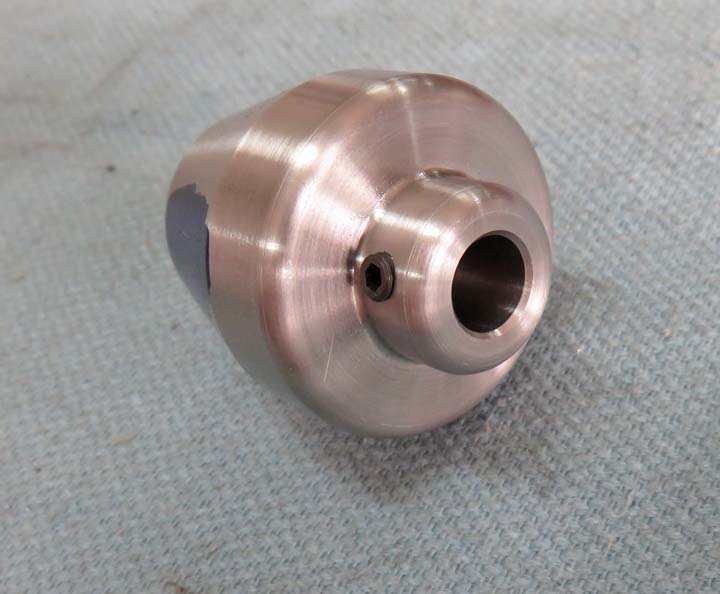
Here you can see the set screw and now it's time to make a handle.
|
|
 |
|
The handle will also be made out stainless steel and
this will be something new for me to make. Not that the previous piece
wasn't new, but that part is what I'd call straight forward lathe work. However, this
piece is different and will be more of a challenge.
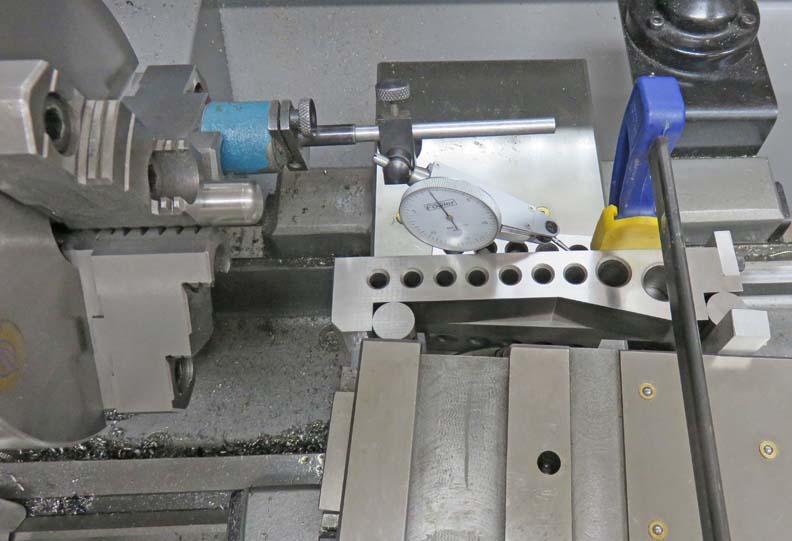
I removed the tool holder temporally while using my indicator during
this set up.
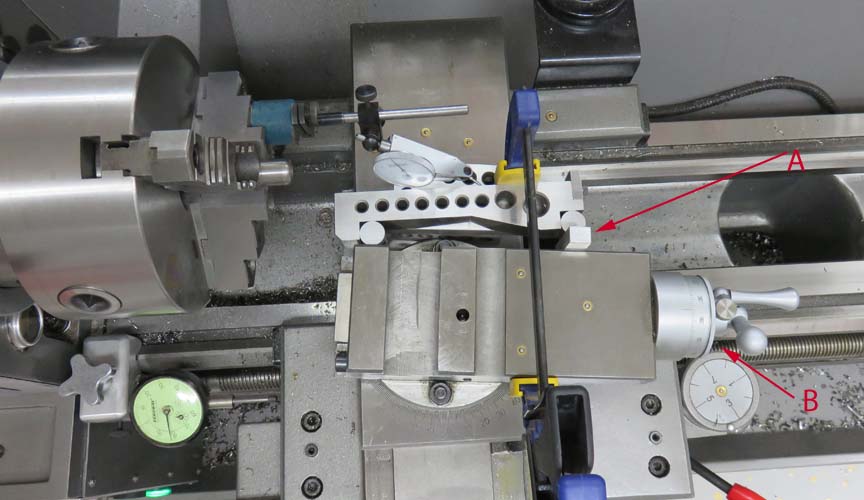
Here I'm using my sine bar to make sure my angle is
exactly what I want. I made a block that is on the right end of the sine
bar (arrow A) and is resting against the compound, which corresponds to
the angle that I need. To make sure it stays in place, I'm using a large
clamp with a soft jaw so it doesn't scratch anything. The angle that I'm
after is 2 degrees and 45 minutes (2 3/4 degrees).
No big deal with a sine bar. By loosening the two nuts on
either side of the compound, you can move it 360 degrees. Once you have
the angle that you want, you tighten down the nuts and then move the dial
on the compound to remove material (arrow B).
|
|
|
Here is how this works, you keep moving the compound a little at a
time until the indicator stays still while moving the carriage
longitudinally (left and right). Once you have the indicator stay at
zero that means you have the angle that you want. At this point you can lock down the compound and you're ready to cut some metal.
|
|
 |
|
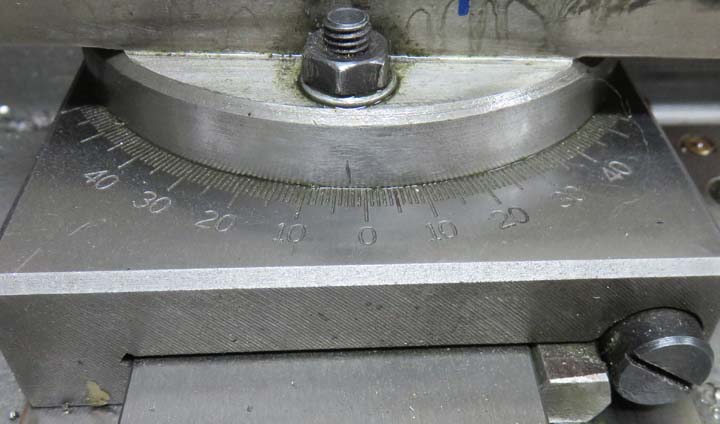
My lathe has a vernier scale for doing angles (like
most) but if you look close the reference line is not vertical. I know this isn't an
expensive machine but someone did a really bad job here. Plus, I would
no way be able to set this precise angle by using this scale.
|
|
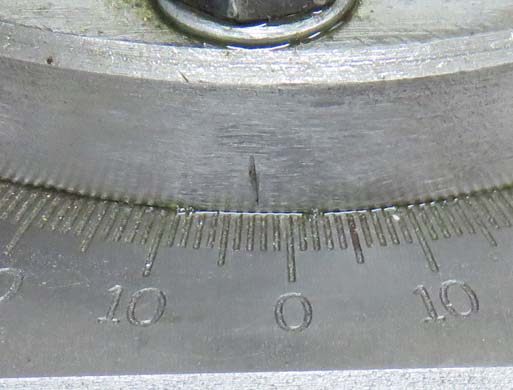
A close-up of the reference line. I don't know if I should use the
bottom edge or the top edge of that vertical line. Now for angles that
don't require something that close, this scale works fine.
|
|
|
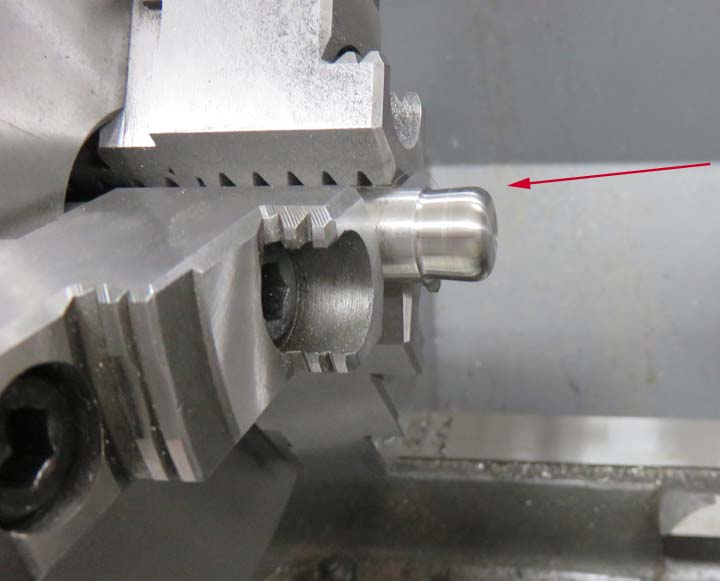
What you see below is just a partial cut along with a
radius on the end of my handle. The reason I did this is because my work
piece has already been machined to length. That means I don't have the
luxury of holding onto any extra material while machining, so I'm doing some
forward thinking here.
The length of that angle below is about 1/2" long, and
will serve as the start of my handle that will have my 2 degree and 45 minute
taper on it. I wasn't sure how to do this but this is what I came up
with for a single piece. If I were to make a bunch of these handles, I'd
do it differently.
|
|
 |
|
I drilled and tapped 1/4-20 threads in one end,
which will fasten to my center piece that I made earlier. I'll also use these
threads to help hold my work piece to some tooling that I made. On the
other end where my angle has been cut, this will be held with another
piece of tooling that will help stabilize my work piece while it's being cut.
|
|
 |
|
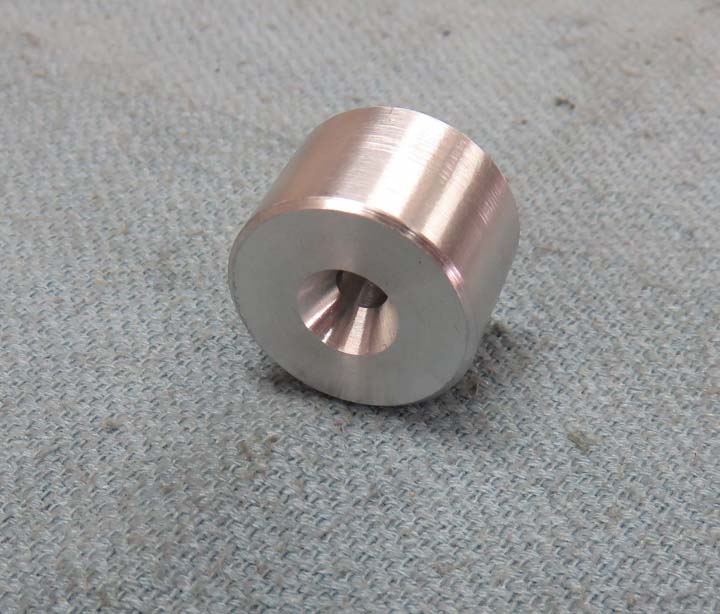
I made the inside diameter of the pocket slightly larger
than my work piece. The depth of the pocket is .200" deep and should be
enough to hold things from moving.
|
|
 |
The other side of my tooling I used a larger center drill, which will be
held with a live center to help stabilize my setup.
|
|
 |
|
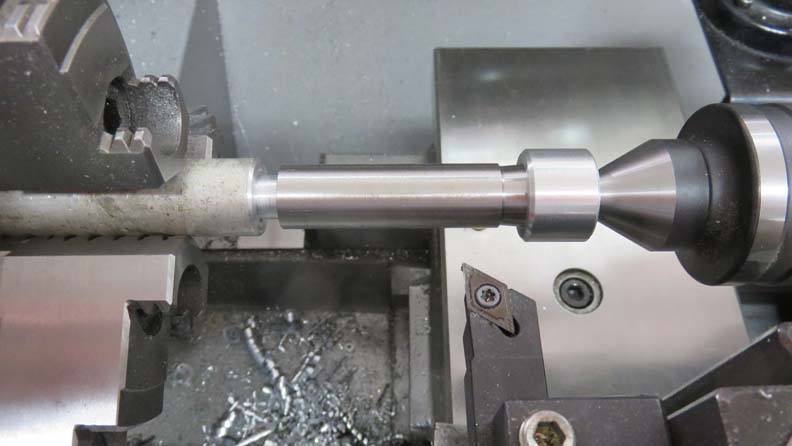
This should give you a better idea of what I'm doing.
Now I'm ready to use my compound to cut my angle. Side note: what I didn't show
you is the clearance I had to put on the right hand piece of tooling so
I could get my cutting tool in the right spot. All I did was slowly machine away some of the aluminum (next to
the angle) which only took about one minute.
|
|
 |
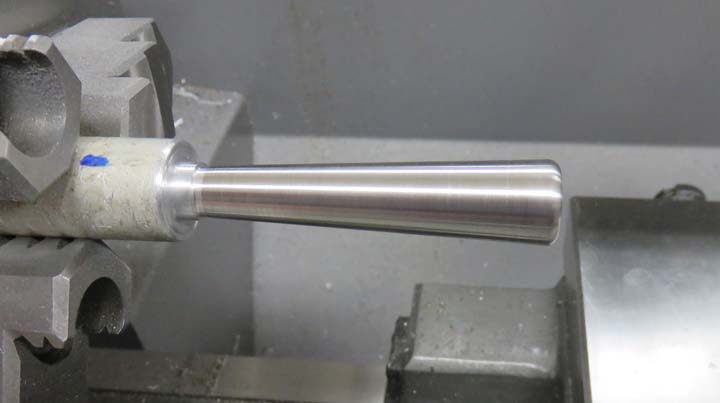
After taking a few cuts and a little sanding, this is what I ended up
with. If I were to try to machine this without any support in the rear,
my work piece would have been thrown out of the lathe.
|
|
 |
|
1
2
3
4
5
6
7
8
9
10
11
12
13
14
15
16
17
18
19
20
21
22
23
24 |