|
This project stems from a time when I was very
young. Let me explain what I’m talking about: when I was about nine years
old I started earning an allowance, just like most kids did at that age.
My allowance back in the mid 60’s didn’t pay much, maybe .10 to .15
cents a week. I know that doesn’t sound like much today, but back then
it was everything to me.
After a short time I had a few nickels, dimes, even
a quarter or two to my name, which made me very happy. And I would keep
that money in one of my dresser drawers for safe keeping. But as time
went by I wanted something other than my dresser to keep my cash in. So
I talked with my mom about this dilemma, one thing lead to another
and we went to a little store in downtown Banning called “Plaza Drugs”.
Yes they had a pharmacy, but they also had a little bit of everything (plastic models, some toys, etc). After looking around we found a
small coin bank, and it even had a key. Now this key was the equivalent
of what you might see a paper towel dispenser that a restaurant would
use today. In other
words, not very secure, but it was ‘way’ more than I expected at the
time. It also had a coin slot in the lid which was very cool. And it
resembled what you see below.
|
 |
|
That little bank was made from thin sheet metal,
not very big at 3” X 3.5” X 4” and the lock didn’t work that great
either.
However, I kept it for many years and in my mind…all my money was nice
and secure.
Now for some reason I’d been thinking about that
little bank lately and reminisced about it a few times during the summer
of 2018. Then it hit me, why don't I make something for my grandson,
Aidan, to keep his money in. Aidan is 10 years old, which must be the
reason I had it on my heart to make this project in the first place (because I was
close to his age
when I started to understand what money really was).
Now this won't be a bank because I've already
made him one of those. This will be a 'safe' to put his money
in or something else of value that he owns. Why a safe you ask? Why
not!!
|
|
Let's Get Started
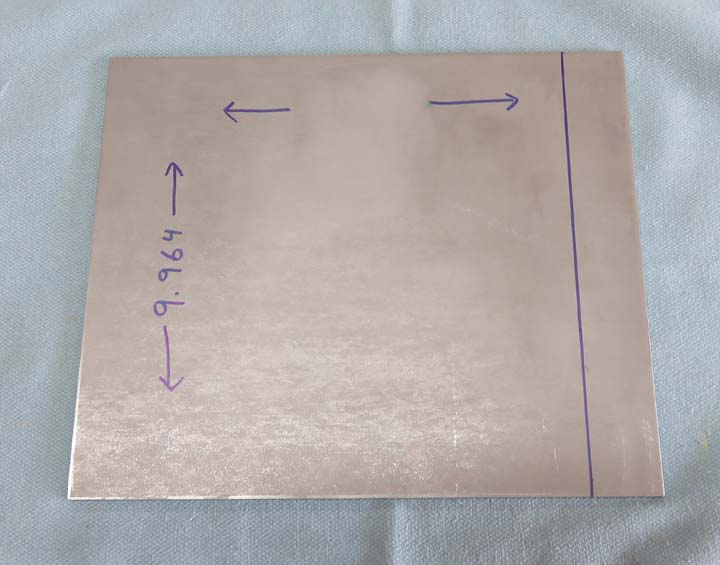
I made a cardboard mock-up of what I wanted to make
because that gives me a better idea of what's going on. The size is 12"
wide X 12" high X 10" deep. The pencil line on the front represents the
door, which will be 10" square. This should be the perfect size for him
because if I had something like this when I was younger, I'd be be a
happy guy.
I've also learned something else over the years, when
buying a new safe, purchase a larger one than you think you need. Being
a hunter, I have a few firearms and have always
kept them in some kind of a safe. I'm now on my third gun safe and my
current one is
pretty big, so I thought I'd make Aidan something a little bigger than
what I had back then.
|

|
|
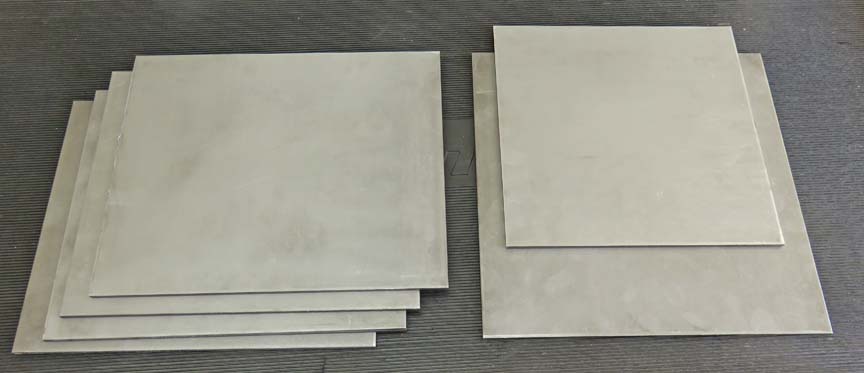
I bought some mild steel for this project and had the
steel company shear it so I didn't have to make a bunch of cuts. The
thickness of the steel is 3/16", which is overkill, but that's what I'll
be using. And you might be asking yourself, "how much is this going to
weigh?" Well, I figure around 50 pounds...give or take. I'll let you
know when it's finished.
|
|
 |
|
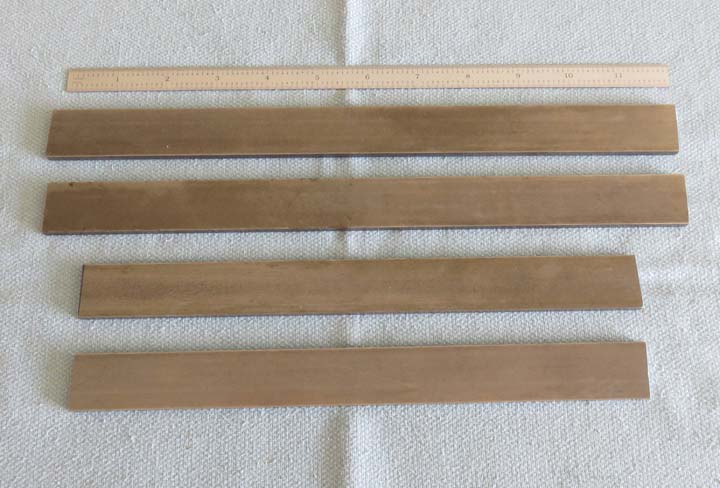
I also bought some 1/2" square steel and 1.0" X 3/16"
steel bar
stock that are both four feet long. The one inch wide material will be
used for the door frame and the 1/2" square material will go behind the
door frame, which I'll show you later.
|
|
 |
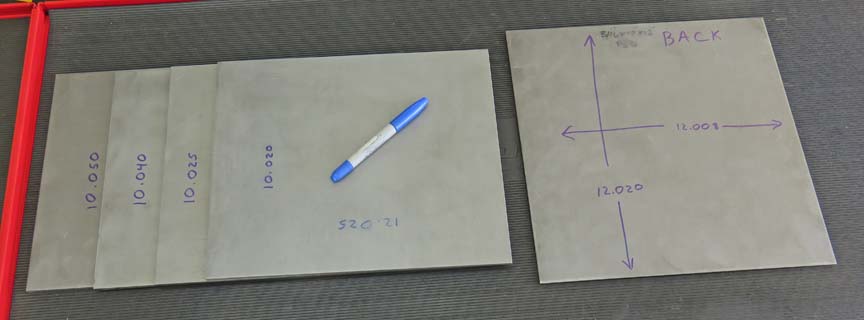
I measured each piece and put the dimensions on each one. The reason for
this is so I know which one is the largest or smallest when I machine
each piece.
|
|
 |
|
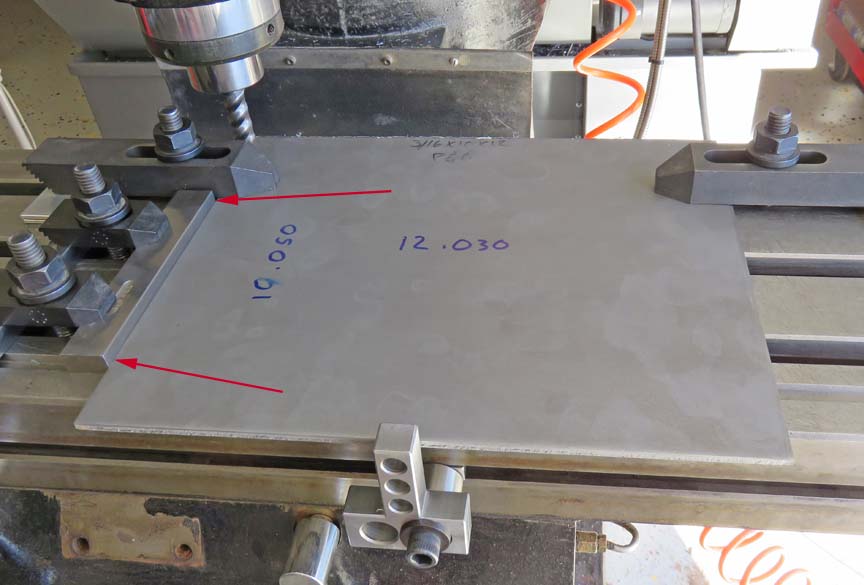
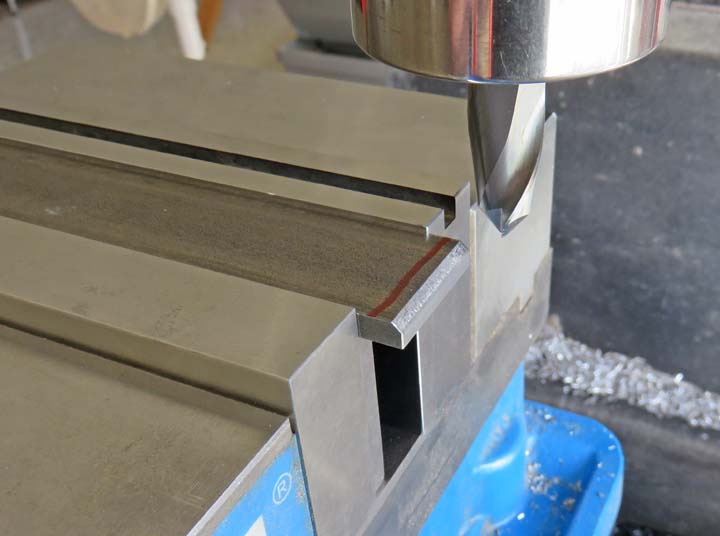
Time To Cut Some Steel I'm cutting one of the sides here. And to make sure I
keep my work piece square, I'm using a parallel that I indicated true
with the Y axis (arrows). When my work piece is against it and clamped
down, I know the adjacent edge will be square. I did this for all the
pieces.
|
|
 |
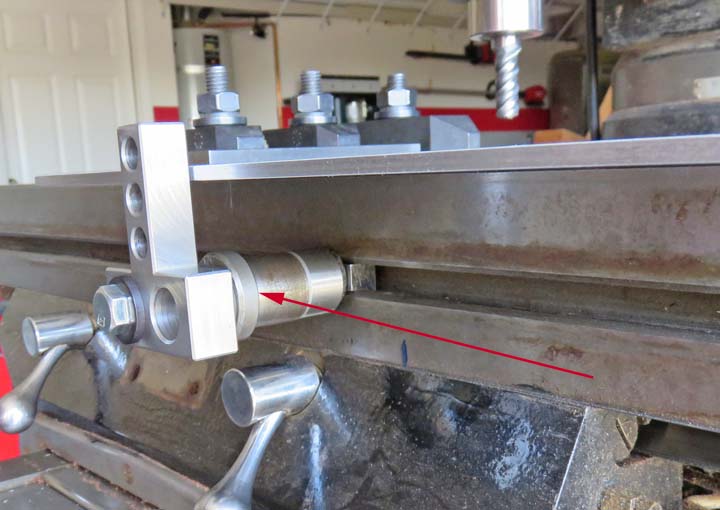
I'm using my new mill stop here but had to extend it away from the table
(arrow)
because my work piece is large. Depending on the size of each piece, I'd
change the distance of my work stop.
|
|
 |
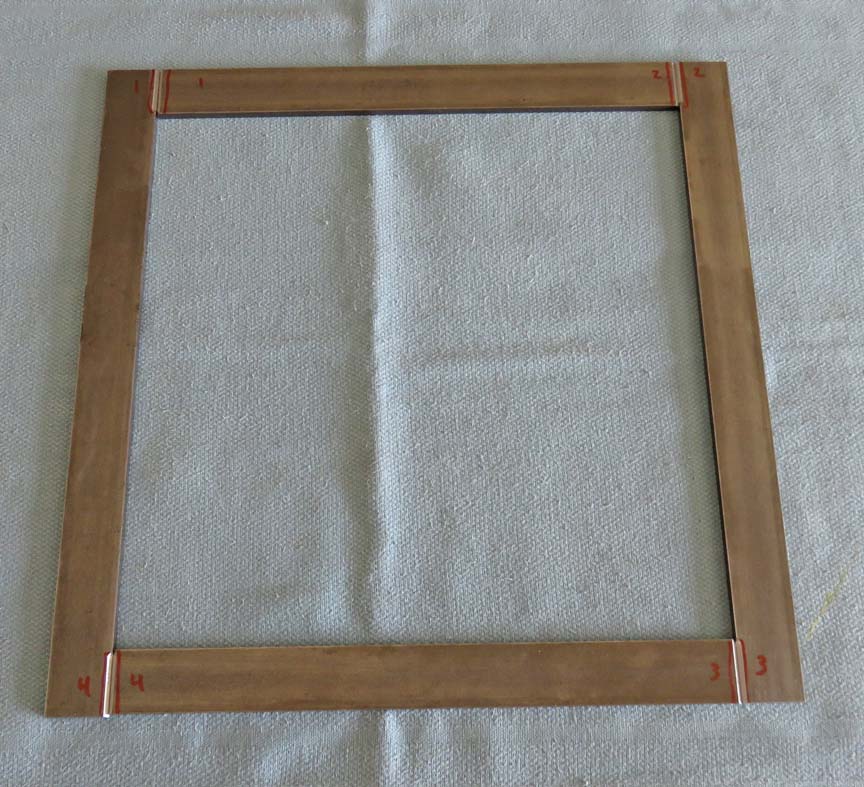
These are the pieces that I'm going to use for the door frame. I cut two
at 12" long and the other two are 10" long by one inch wide. These will be welded
together later.
|
|
 |
|
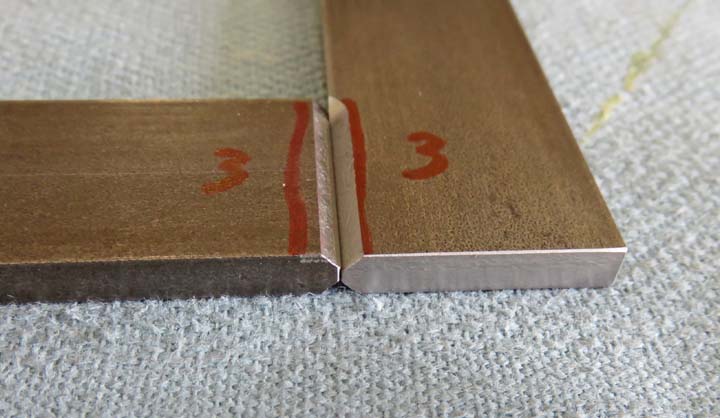
Here I'm cutting a 45 degree angle on each end before
welding. Here's a little info about welding: the material I'm removing
is called a 'weld prep'. Depending on the type of weld you're doing, this
weld preparation is needed to end up with a strong weld.
|
|
 |
This is what it looks like before any welding. Notice the weld prep on
the side pieces as well.
|
|
 |
|
Here is a close up of the weld preparations, which are
on both sides. Once you fill the area that has been cut away with filler
rod (from welding), I'll machine away any weld that is above my work
piece. This insures that the two pieces stay together and end up being
nice and strong, despite the weld being flush with the surface of my
work piece.
|
|
 |
|
While I was machining my door frame above, I looked over
at my cardboard mockup and started thinking about the shape of the safe.
I thought to myself, "anyone can make a basic box, how about if I do
something a little different"? Notice the arrows that don't have a
dimension between them any longer. I thought if I added a piece to each
corner, at an angle, say 45 degrees, about one inch long each, that
might look pretty cool.
What I'm going to do is cut a one inch piece off both of
the sides, top and bottom (four pieces in all) right on that vertical
line to make the safe look a little.....different....but hopefully a
little better. Or unique. Humor me and keep reading....
|
 |
|
1
2
3
4
5
6
7
8
9
10
11
12
13
14
15
16
17
18
19
20
21
22
23
24 |