|
More
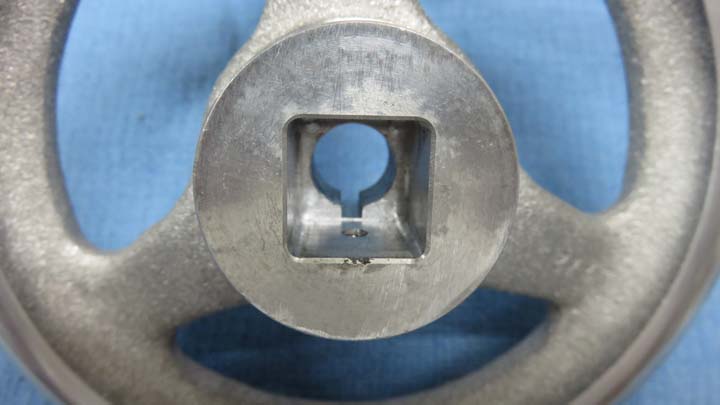
Component Parts Continued I went 3/4" inch deep
on the pocket, which is all I could go with the
type of end mill I was using. However, this should be more than enough
for this to work right. In case you were wondering about that funny
looking area on the chamfer, that's a casting flaw
that was in the aluminum before I machined it.
|
|
|
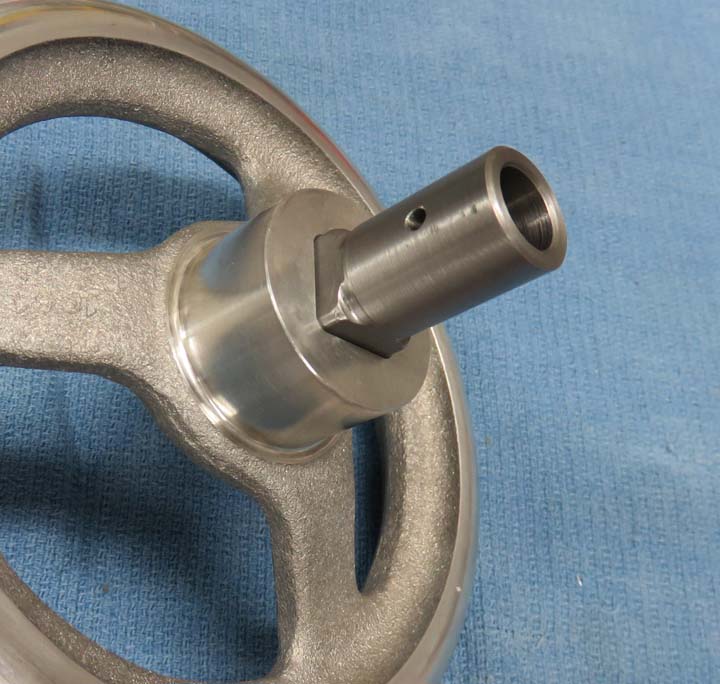
Here is what it looks like once it's placed inside the
pocket. When the adapter is permanently mounted to the shaft, a portion
of it will be sticking out once the safety doors are closed. Then the
guests will grab the hand wheel, place it over the square part of the
adapter and turn the gears. All this in the order to keep everyone safe.
|
|
|
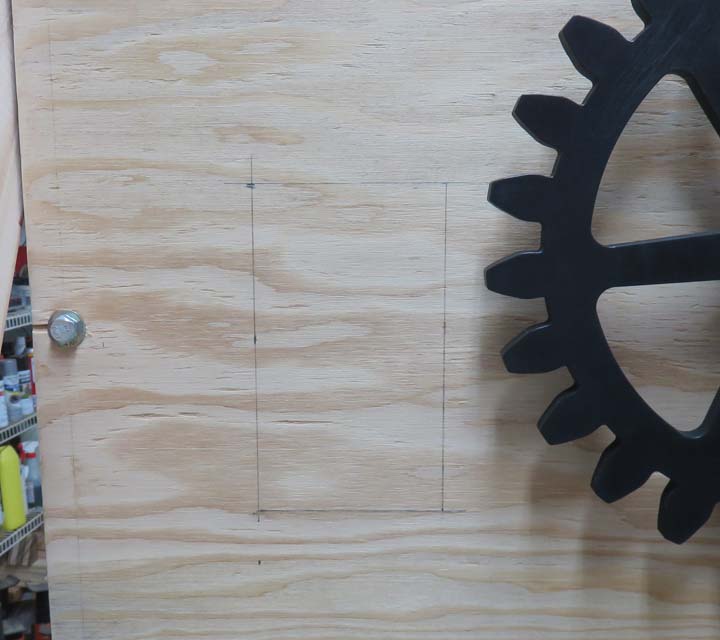
The item that will be dispensed is something I think
people will want to see while the gears are turning. I plan on making a
window out of some clear plastic so everyone can see the progress of the
item as it makes it way across the threads. This should build the
anticipation as the clock is ticking.
The pencil line represents the size of the window that
I'll be cutting out and should be just the right size and location for
most everyone to see. Laying out the location was easy to do from the
back so I know it's in the right spot.
|

|
I transferred the location to the front as it will be easier to cut from
this side. After removing the 12" gear, I used a jigsaw for the cut and
it worked pretty good.
|
|
|
I had some leftover plastic sheet from another project
that I thought would work great for this. In fact, one dimension was
already finished so all I had to do was make one cut. All you do is
'score' the top surface a few times and then using your hands, snap the
piece in two. I like using something with a straight edge while scoring
and breaking, like these two pieces of wood the plastic is sandwiched
between.
|

|
|
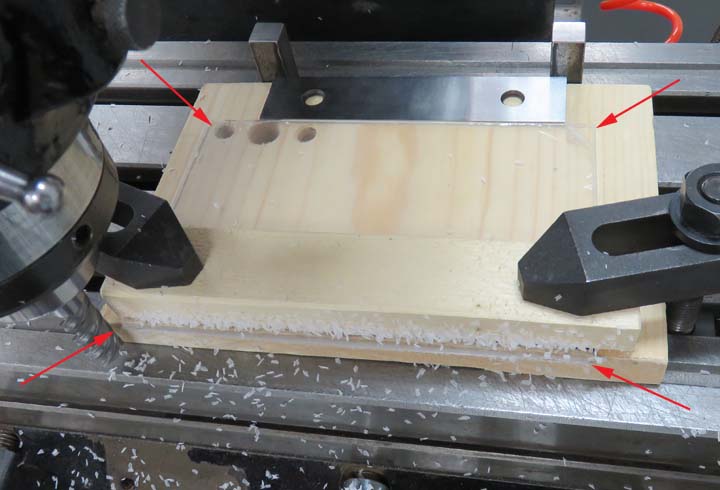
I wanted to machine the periphery to size (the arrows
show the corners) so I used my milling machine for this. Machining this
plastic is not as easy as it sounds, it tends to crack and melt onto
your cutter if you go to fast. Slowing down the RPM is key here and
taking your time.
|
|
|
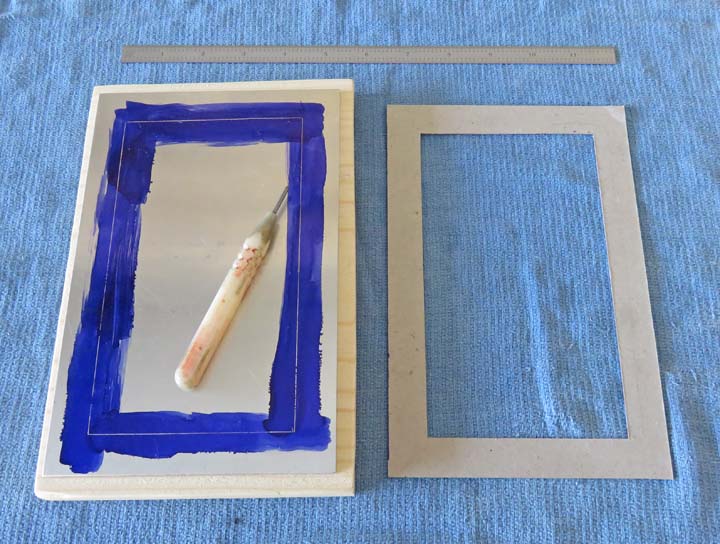
To hold the plastic in place I'll be making a trim piece
out of aluminum. The thickness of the trim piece is .090" and will look
like the cardboard cutout on the right when finished. After cutting out
the cardboard template, I used a scribe to transfer the rough location
from the template of where I need to cut.
|
|
|
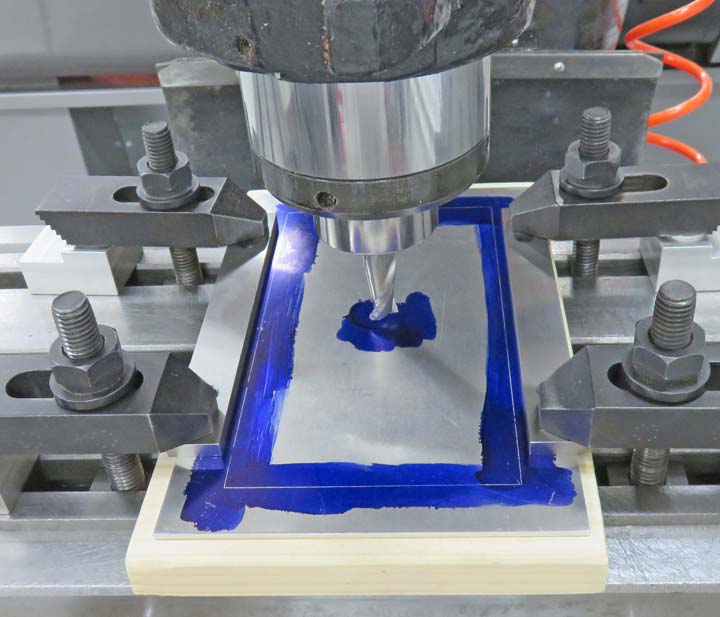
Cutting thin sheet is always a challenge with clamping
being the most important detail. After finding the center of my work
piece, I was ready to make some chips (aluminum chips that is).
|
|
|
I used a 3/4" end mill to cut with and stayed away from
my line by about 1/8". Notice the center of the aluminum sheet is still
resting on my wood tooling. Wood tooling works great for things like
this because it's easy to work with and is very cheap too.
|

|
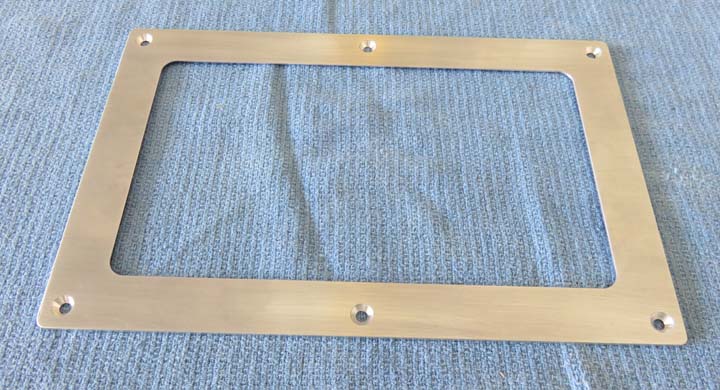
I also cut a recess into the trim piece for the plastic to sit. This way
the plastic is trapped and won't move once it's fastened down.
|

|
To fasten it down with I'll be using six flathead screws. This was an
easy piece to make and should look nice when mounted on the plywood.
|
 |
|
1
2
3
4
5
6
7
8
9
10
11
12
13
14
15
16
17
18
19
20
21
22
23 |