|
Miter Gear Box Continued
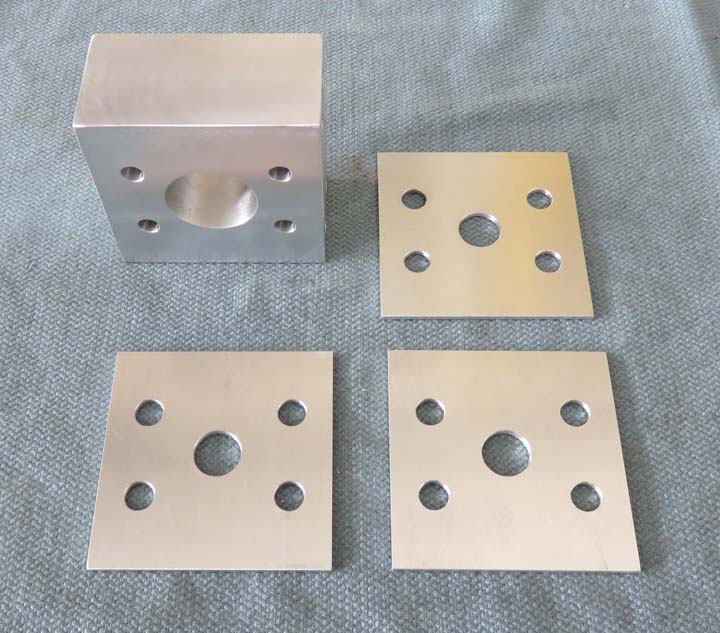
The miter gear box is going to need a trim plate that
will be on the front side of the plywood. I made three of them but I
only needed one, however I machined them all at the same time. This is
similar to the other trim plates except this one has four bolt holes.
|
|
|
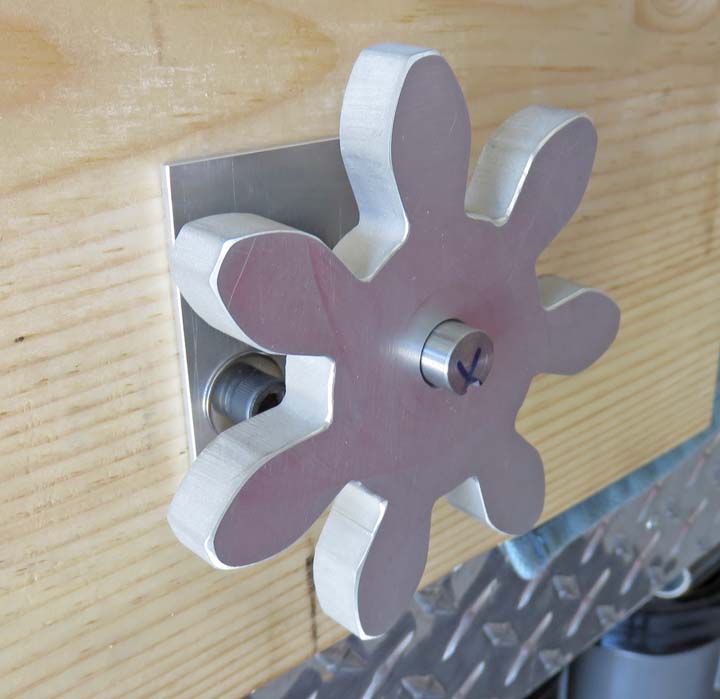
It's hard to tell here but this is the new trim plate.
What I'm doing is getting ready to cut the end of this miter gear shaft to length.
I made sure this sample gear was the right distance from the wood
surface and used a shaft collar behind the gear to keep it from moving.
This way I know how much I need to remove from the shaft (blue X).
|
|
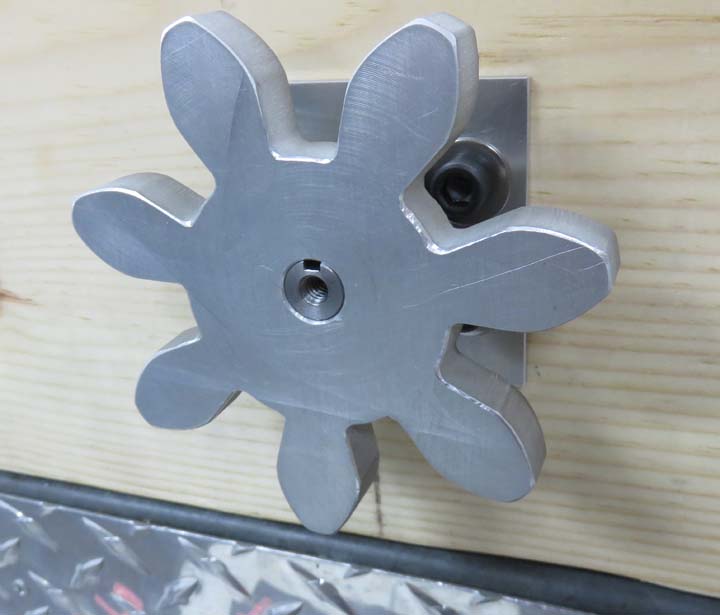
I machined the shaft to length and also tapped it with 1/4-20 threads.
This way I can use a socket head cap screw and washer to hold the gear on with.
|
|
|
Cutting Threads
6-2017
Earlier I mentioned something about dispensing an item,
well this is
the real reason I'm making this miter gear box in the first place. What Matt and Angela
want to do is have this wall of gears be more than just a puzzle, they
want it to give you something after the gears make a certain amount of
revolutions. And to make that happen I'm going to be adding some threads
to the plain shaft that I left long on the gear box. After I determine
how long this plain shaft should be I'll cut it to length.
Now I didn't know what pitch I needed or wanted here (the number of threads
per inch or TPI) so I started experimenting. I tried two different thread
pitches, a six
and an eight pitch, and the latter is what you see below. The reason for
the threads is to have a steel ring ride along them as it turns. And
the ring will be holding something special the whole time. This is the
reason for the threads because this special item will eventually fall off
the end and be dispensed through a chute to the people going through the
room. In other words, it's a very elaborate way of getting your
next clue.
|
|
|
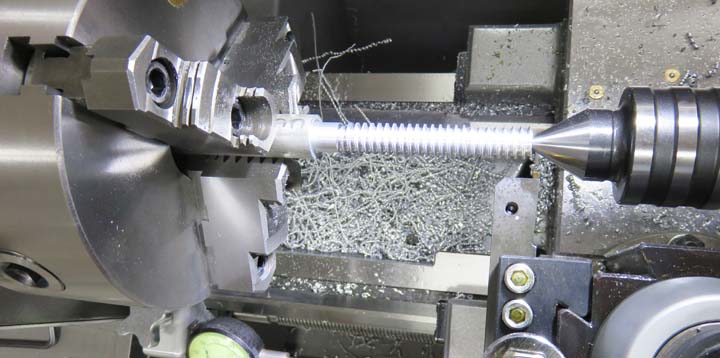
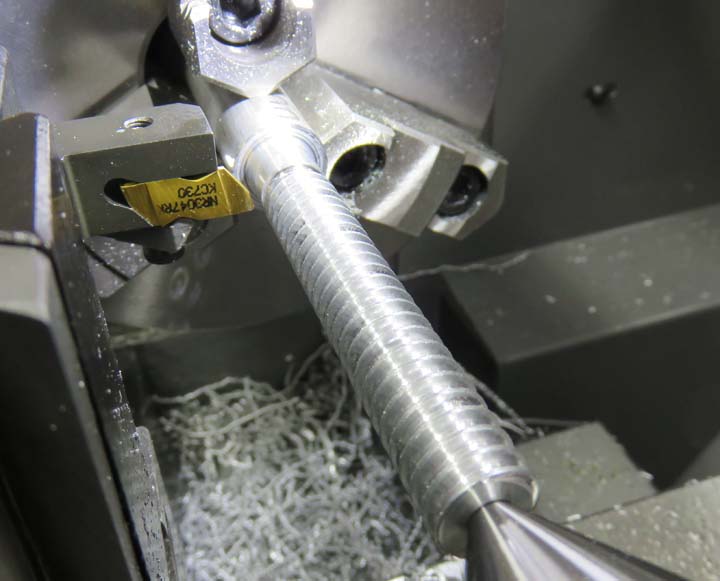
These threads are 3 1/2" long but I'm not sure just how
long I really need them. I do know however that if this needs to be
shorter that it's much easier to cut
it than make a new one.
Machining Tip: Notice the threading tool is
upside-down. By having it this way and running your machine in reverse,
you can machine your threads going 'away' from the chuck. This works great
if your threads need to be against a shoulder because when you do
it this way, there's no risk of running into said shoulder as the tool
is moving away from it the whole time. Just a little trick I've learned
over the years.
The only drawback to this method is that you end up with
a
groove at the starting point when you're all finished. This groove would
normally not be a problem but the ring I'll be using (to help
dispense something) would never move across the threads if it were
placed in it. And this might happen if someone were to reset the game
wrong before the next group of people showed up. However I have a solution
for this which I'll show you soon.
|
|
|
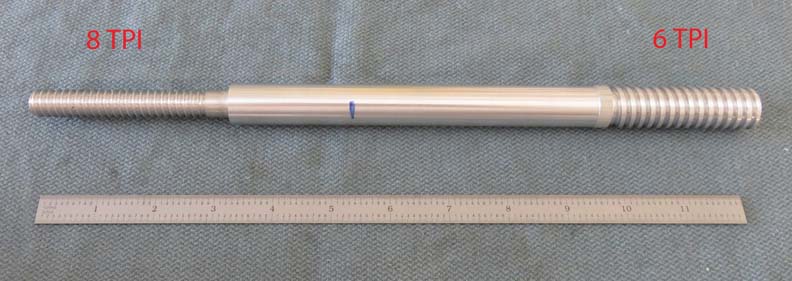
Here are the two different threads that I machined for
testing, a six and
eight pitch. I liked the eight pitch better and thought it would work
well for this application. Here's why: this one will need to turn eight
times to have the ring travel one inch. So the more turns the shaft
makes, the more everyone in the room will be cheering on the person turning
the shaft while the game is in play. Oh, did I mention that all of
these gears will be turned by hand? Matt and Angela wanted some
excitement while this wall of gears was in motion so I thought making
it longer would add to this.
The diameter for the eight TPI is .499 (call it 1/2")
and the six TPI is about 3/4", which I did first. Once I was finished
with the 6 pitch, I knew I had room for more threads per inch. What I
mean is, if you look at the six TPI on the right, you can see there are
some small flats between the threads. After seeing this I knew I could
put more threads per inch in a given space, which is what I did on the
other end of this test shaft.
|
|
|
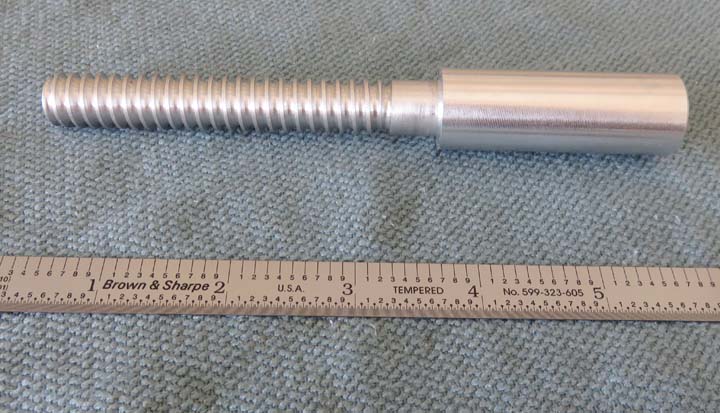
After confirming that I'd be using eight threads per
inch, I cut it off at the blue line that you see in the above picture.
The larger section to the right of the threads is just under 3/4"
diameter and I plan on boring this end to fit my 1/2" shaft.
|
|
|
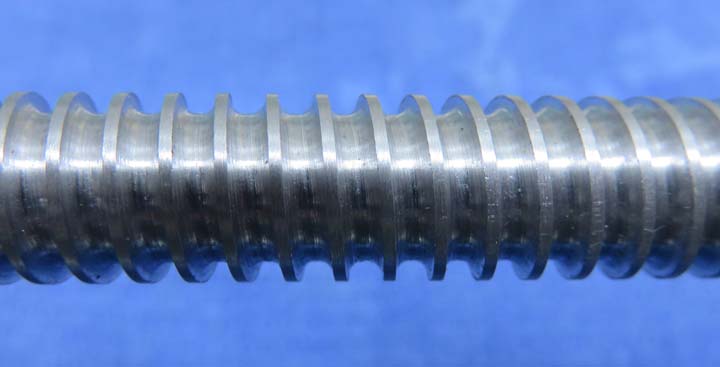
Here is a close-up of the threads. Normally threads have
a 60 degree angle and are V shaped but I wanted a radius because of the ring that will be used
here. This way the ring will ride on these threads easier and shouldn't
have a problem while the shaft is spinning. In other words, having a
radius will capture the round shape of the ring better.
|
|
|
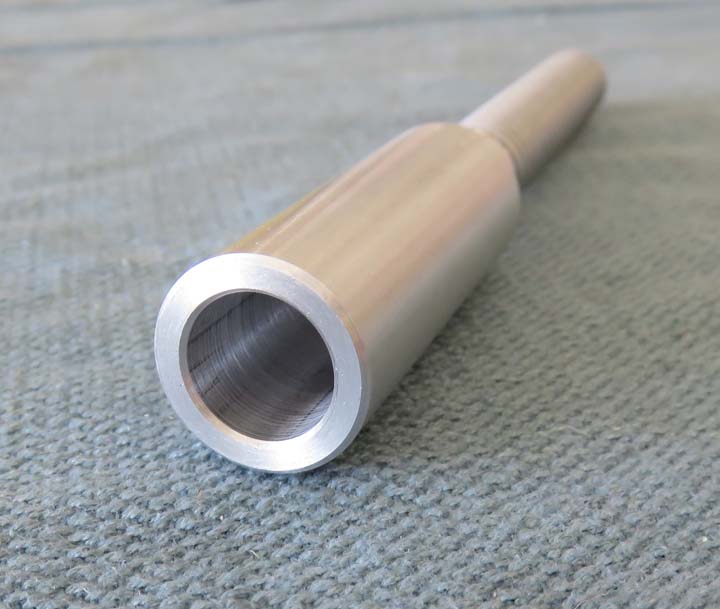
Machining Here is the end with the 1/2" diameter hole. I drilled
it undersize first, bored it within .015" (so the hole would run true to
the outside) and then reamed it to .501" diameter X 1 3/4" deep. This
way it will slip over the 1/2" shaft without any problems.
|
|
|
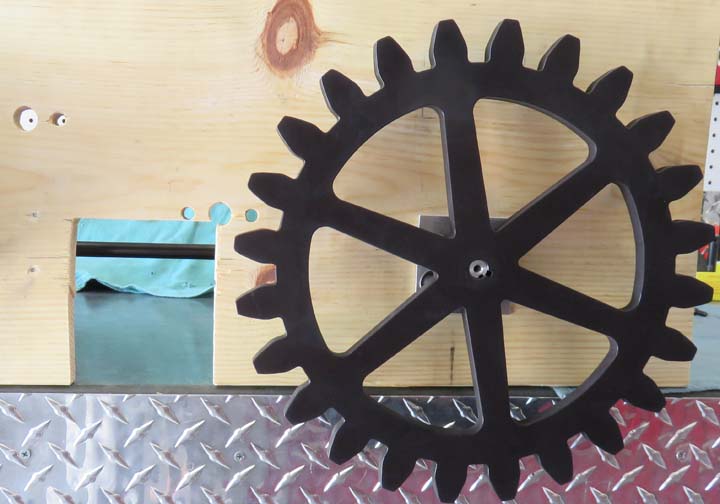
Here is a sneak peak of the largest gear back from the
plating shop, which is what I'll be using on this shaft with the miter
gears. If you look through the cutout in the wood you'll see the 1/2"
plain shaft. I left this shaft extra long while building the gear box
and planned on cutting it to length later. Well that time has come so
I'm trying to figure out exactly where I'm going to cut it.
The cutout in the wood represents a window that I'll be
putting in the four by eight piece of plywood to let everyone see the
progress of the item being dispensed. I wanted this window to be next to
the gear, not behind it so it's clearly visible and not obstructed.
|
|
|
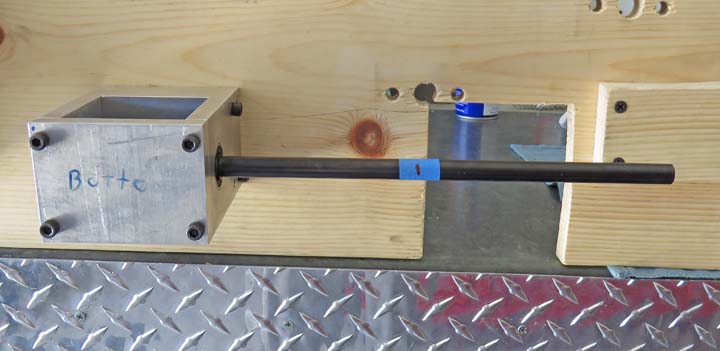
Here is the backside and I've marked the shaft where I
plan on cutting it. Once the threaded part slides over this shaft the
threads will be visible through the window. Now it's time to take apart
the gear box one more time and cut the shaft to length.
|
 |
|
1
2
3
4
5
6
7
8
9
10
11
12
13
14
15
16
17
18
19
20
21
22
23 |