|
Mounting The Hardware Continued
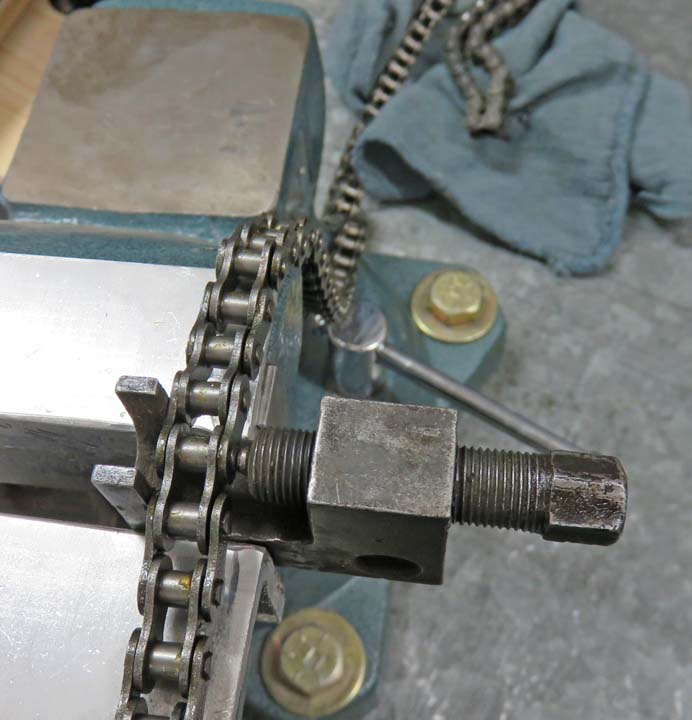
I measured the length of the chain and now I'm ready to
break it. This chain breaker is a tool leftover from my motorcycle days
that came in handy for this project. However, my motorcycle chain was
much larger than the one I'm using here, but it still works.
|
|
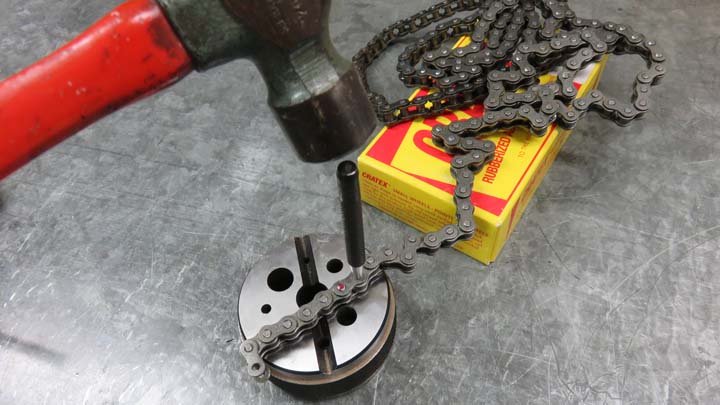
Once the pin moved a small amount (with my
chain breaker), I drove it out with
a punch. The red dot next to the punch is my target link and this is
where my master link will go.
|
|
|
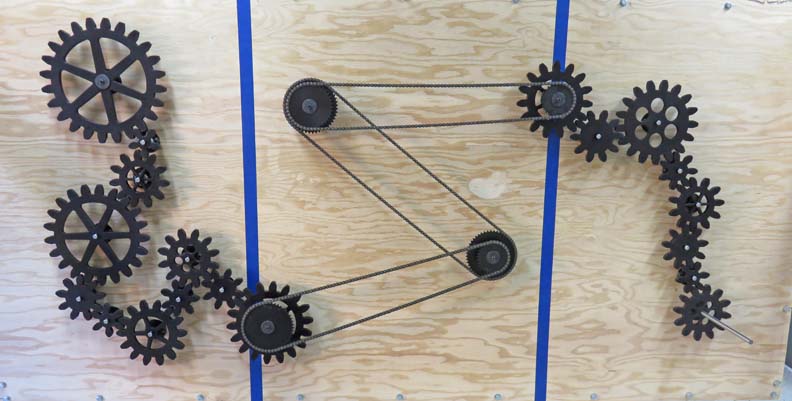
Here are all the chains and gears mounted and assembled.
Spinning it by hand is slow but It works really well, however it's
noisy. Once all those gears are spinning they tend to 'ring'. Now I
wondered if this would be too loud but after I showed Matt and Angela
they both really liked it. Now it's time to work on a handle to properly turn
all these gears and chains with.
|
|
|
More
Component Parts
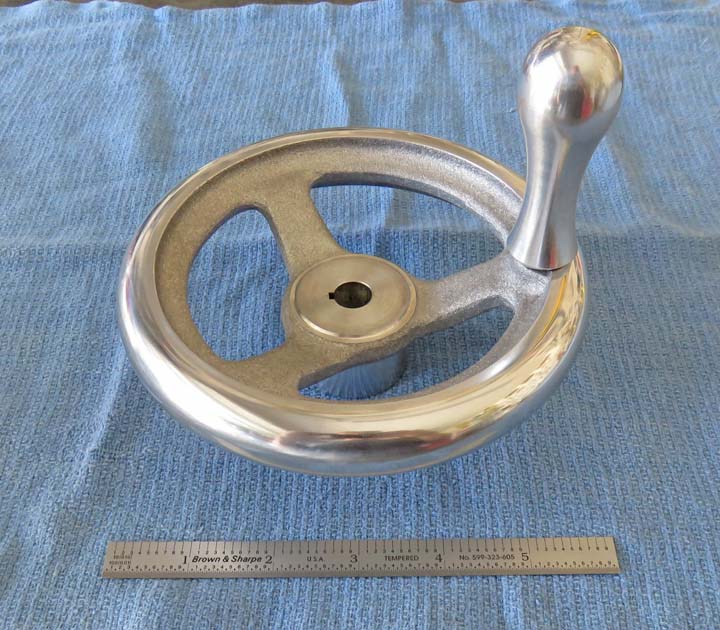
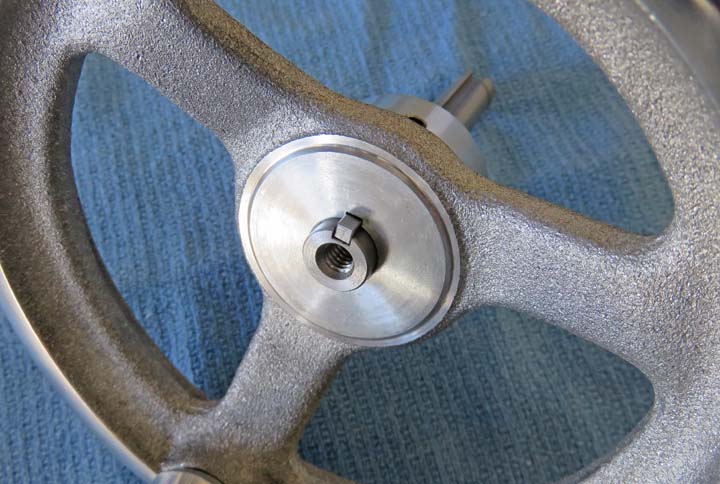
I bought this aluminum hand wheel to turn the gears
with. The handle that's sticking up spins independently of the hand
wheel, which should make it easy to
work with. It has a 1/2" diameter thru hole along with a 1/8" wide
keyway.
|
|
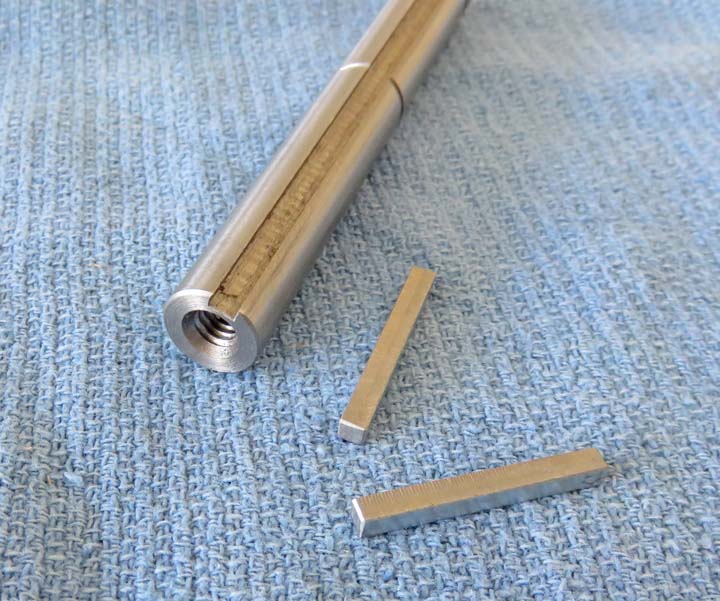
I made a 1/8" X 1/8" key out of some larger key stock so I could try out
the handle.
|
|
This is a leftover test shaft so I could fit my keys to it.
|
|
|
The key worked fine to do some testing with. However,
that keyway wouldn't do much good because I won't be able to mount the
hand wheel to the shaft like this. The reason for this is because of the
safety doors that will be in place (I still need to make them). The
safety door will have a hole in it so the shaft can pass through as it's
being closed which means the hand wheel can't be mounted. So just how am
I going to use the hand wheel?
|
|
|
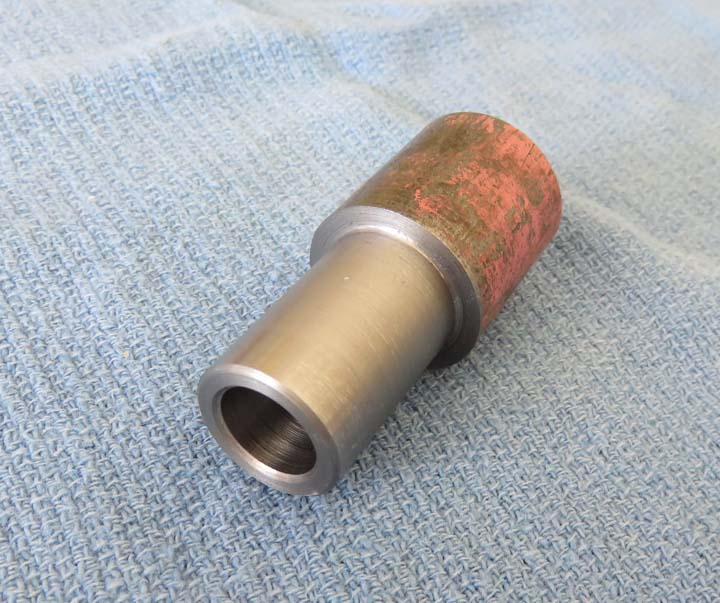
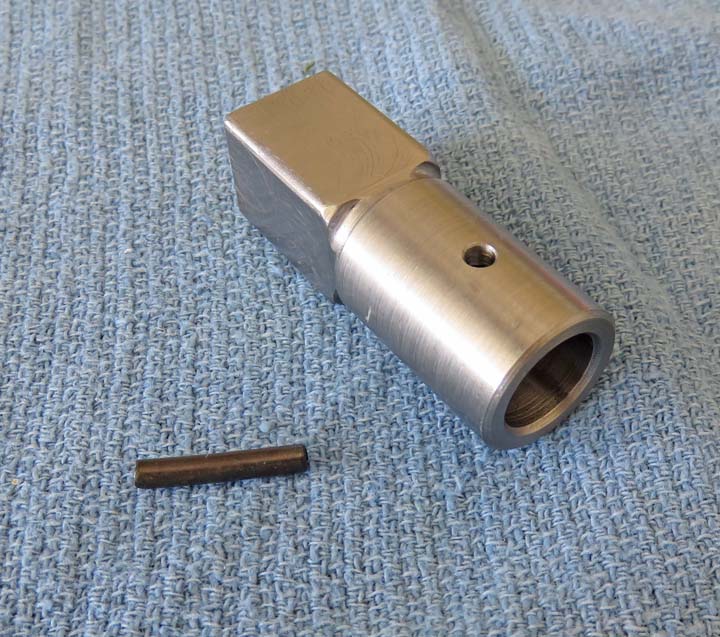
I'm going to make an adapter that will be permanently mounted
to the shaft. Once it's mounted, I'll be able to slid the hand wheel onto
it and then turn the gears. The piece you see below is only about half
finished. The part that has been turned is 3/4" diameter and the hole is
1/2" diameter, the same size as the shaft.
|
|
|
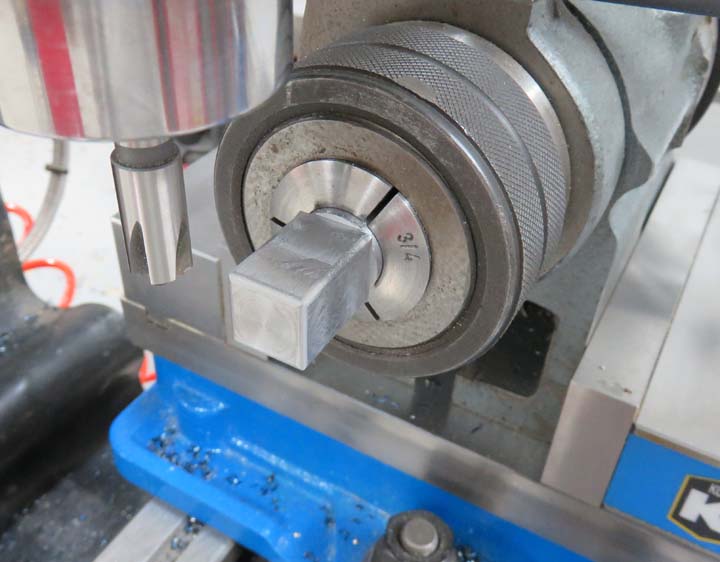
By chucking on the 3/4" diameter I'm making a square on
the other end. This square will be milled into the hand wheel and that's
how I intend to drive all the gears with. Also notice I've rounded all
the corners so no one gets cut and this makes it easier to insert into
the square hole on the hand wheel.
|
|
I'll be using a 1/8" 'roll pin' to fasten the adapter to the shaft. This
roll pin will make it easy to assembly and remove if need be.
|
|
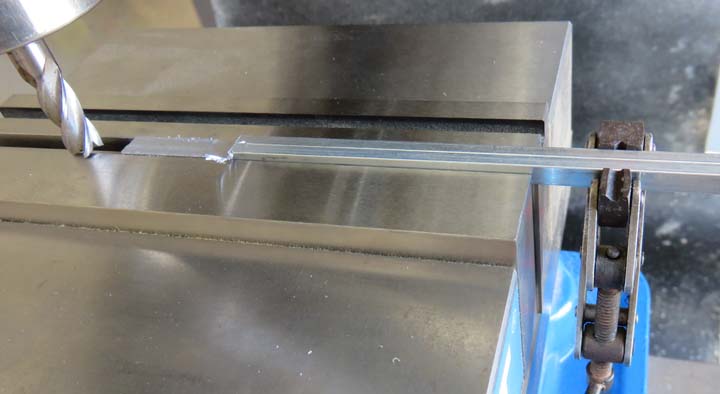
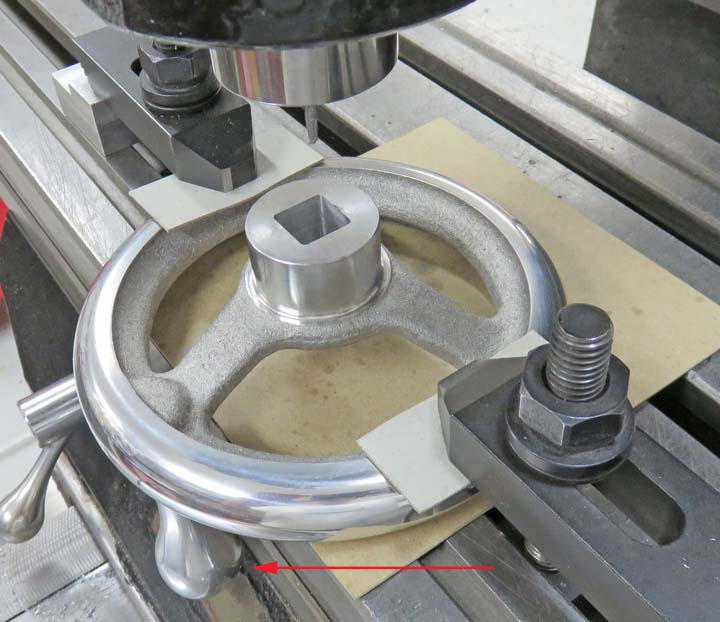
Here I'm using a 1/8" end mill to make the square pocket with. Notice
I've placed the handle of the hand wheel over the edge of the table so I
can clamp it (arrow).
|
 |
|
1
2
3
4
5
6
7
8
9
10
11
12
13
14
15
16
17
18
19
20
21
22
23 |