|
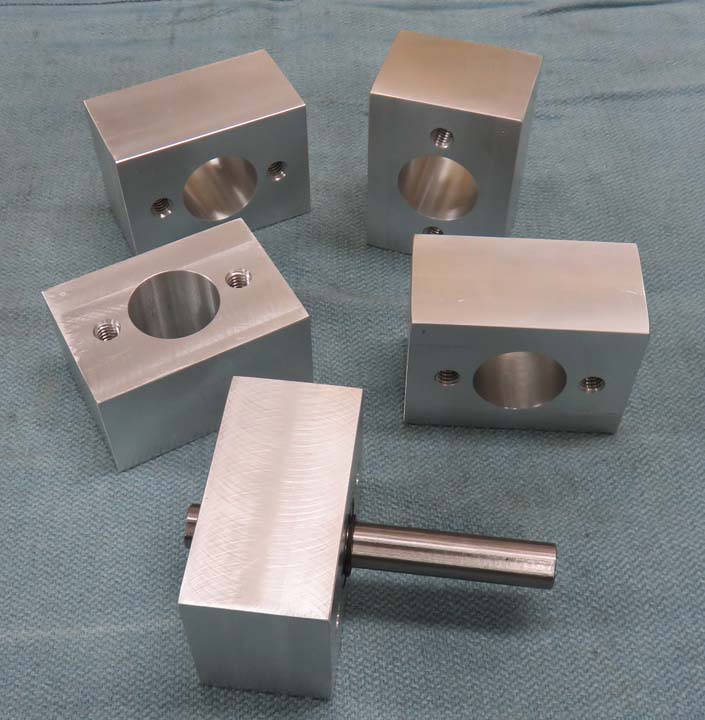
Chains And Sprockets Continued These blocks will be used with the shafts that have
keyways and now it's time to install the bearings. If you
remember, I made these at the same time I made the bearing blocks for the
miter gear box. And I made an extra just in case.
|
|
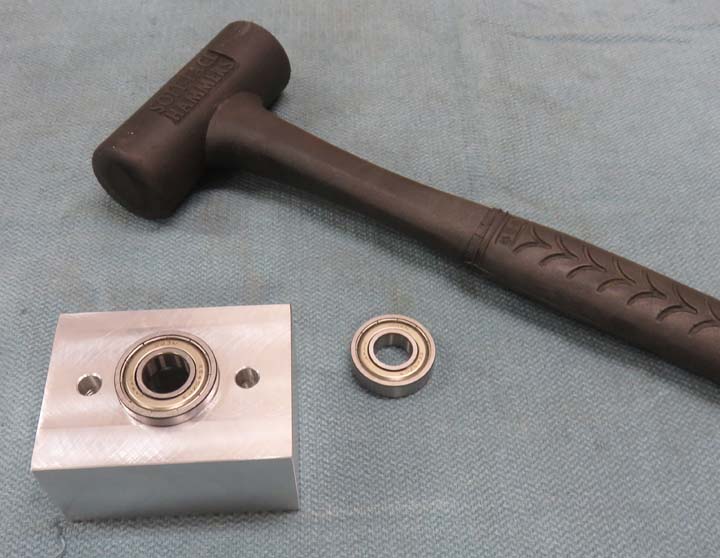
This is the same procedure that I went
through with the gear box earlier; small amount of oil on the bearings and block, start it
with a soft faced hammer and then press it home with my bench vise.
|
|
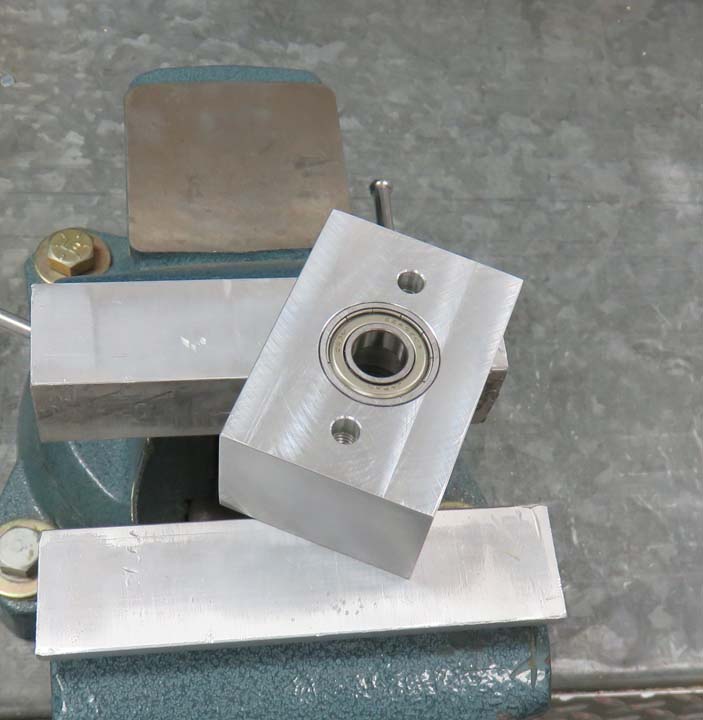
And there you go, we've got some bearings installed and ready for action.
|
|
|
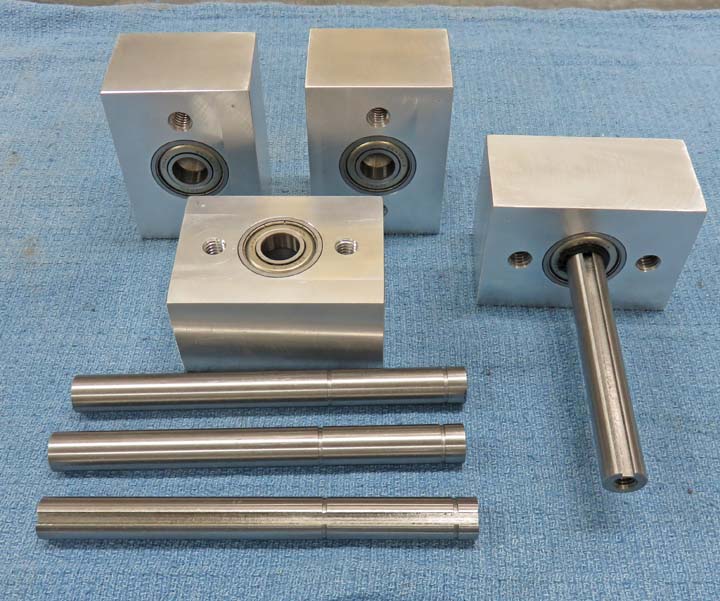
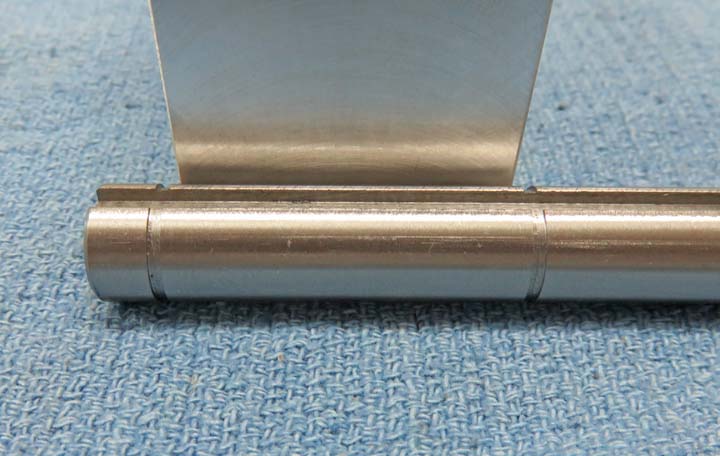
Here are the shafts that will be used with these blocks.
I had to find out the length I needed and then cut them all to size,
along with drilling and tapping 1/4-20 threads in one end. I also cut
two grooves in each shaft for some retainer clips, which will keep the shafts
locked into place.
|
|
|
Here is a close up of the grooves and you can see they
are placed the same distance apart as the block is wide. I added a
couple of thousandths to the groove distance so I wouldn't have any
trouble installing the retainer clips. This plan worked out great and
they all went together easily.
|
|
|
Sprocket Adapters
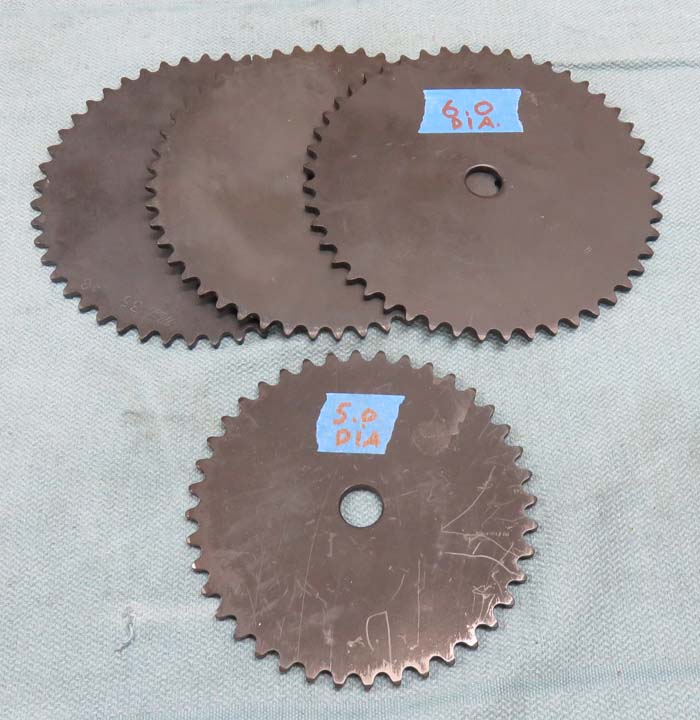
Here are the sprockets that I was talking about earlier
that have the larger holes in them. When I was researching these online
and found out they had this weird hole size (.594"), I knew I had to
figure out a way to work with them. I came up with a few different ideas
of what I could do and finally settled on one that I think should work.
One thought was making an adapter out of steel and
welding it to the sprocket but I decided to scrap that one. The main
reason for not going with the welding idea was because it was permanent. And I didn't want that. Another idea was to use some
kind of clamping arrangement, like two pieces bolted together but again I didn't like that method either.
|
|
|
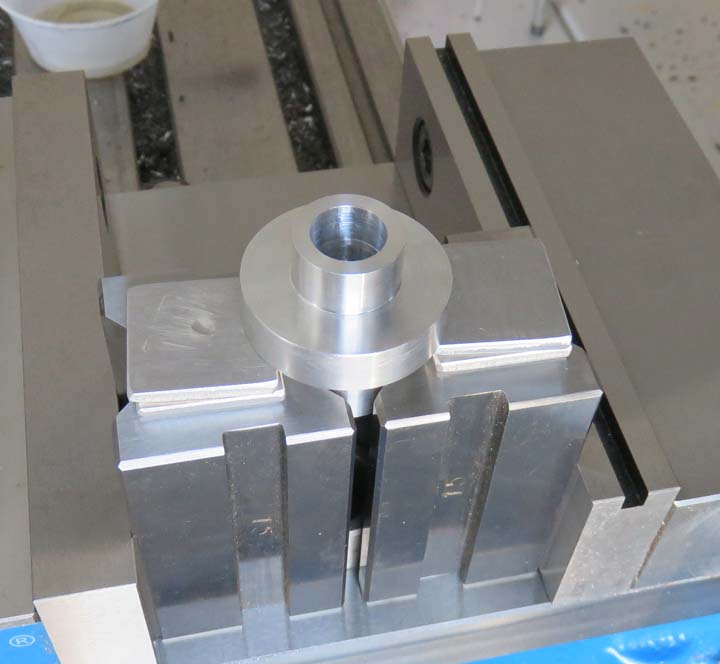
What I settled on was making an adapter out of aluminum
and it will include a spacer built into it as well. This adapter will
have two 3/16" dowel pins that will drive the sprocket along with a
keyway that will be placed at one end. I made three different types of
adapters because I have three different sprocket/gear or sprocket/sprocket
scenarios.
I'm using some V blocks to hold my adapter so I can
drill and ream the dowel holes. I'm clamping on a 1.000" diameter here
and if you look close you can see another piece towards the bottom
(between the blocks). The reason I have two one inch pieces is because
otherwise the V blocks want to close-in at the bottom during clamping as
the part is above the top of the vise jaws. Having a second piece of the same
diameter equals out the clamp force and works well.
|
|
|
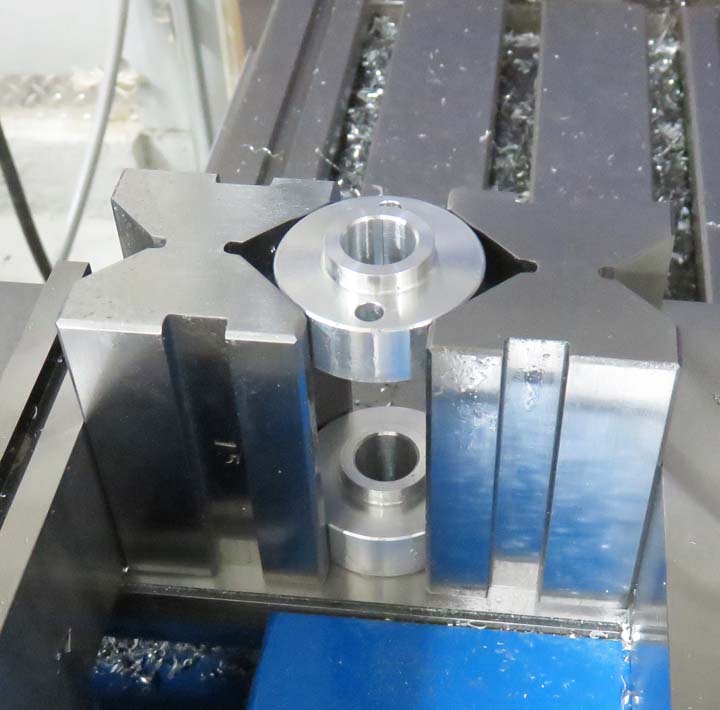
Here is a another type of adapter with this one being
used with the sprocket/sprocket setup. You can also see the exact same part
below but without the dowel holes....yet. As I drilled and reamed one, I
used the other one as my clamping buddy.
|
|
|
Here is what I came up with; starting with the top ones,
you can see the dowel holes along with the keyway. The end with the
keyway is 1.000" diameter and also acts as a spacer. This built-in
spacer is to separate the gear and sprocket one inch apart. The opposite end is
where the sprocket will be placed (top left) and the one that is next to
it (upside-down) will have a gear.
The two pieces below them are identical and will be
placed back-to-back when used for the sprocket/sprocket. These four will all
use keys of different lengths (below).
And the one to the right is just a spacer which was very
easy to make. I'll explain in more detail as we go.
|

|
|
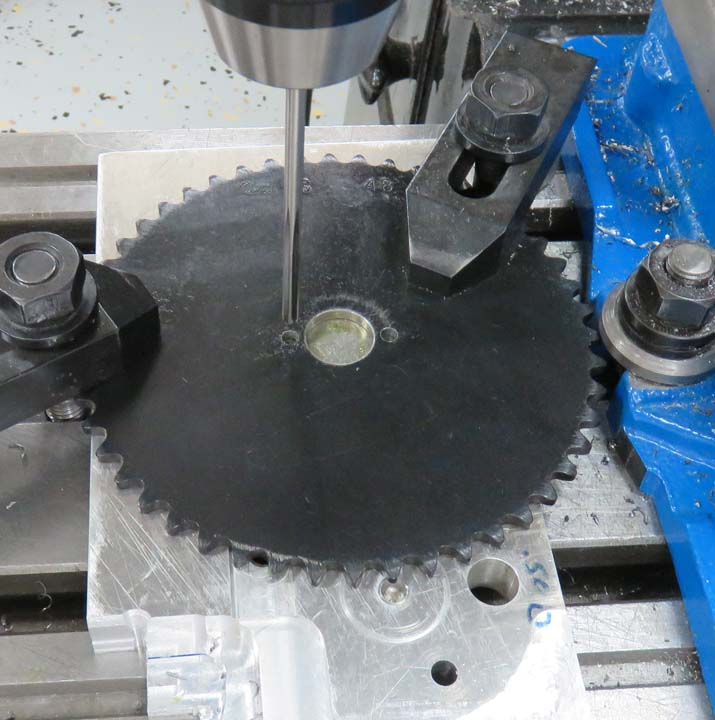
What I did was open the hole in all of the larger
sprockets to 3/4" (.750) diameter first, which is what all the adapters
have. Here I'm drilling and reaming the 3/16" dowel holes in each one
that will fit the adapters.
|
 |
|
1
2
3
4
5
6
7
8
9
10
11
12
13
14
15
16
17
18
19
20
21
22
23 |