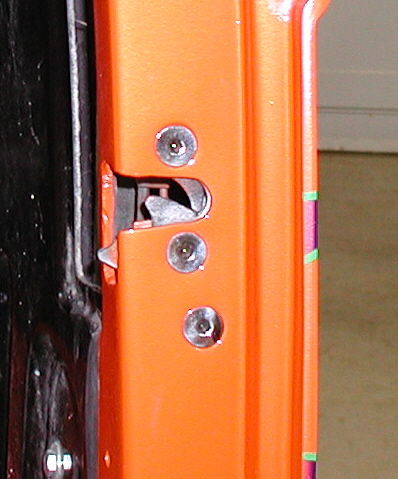
| To make things look a little better, I
replaced the black flat head cap screws with some polished stainless ones. I
polished these like I did the other button head cap screws that I've been
using on the rest of the car. Just a little detail that only took a few
minutes.
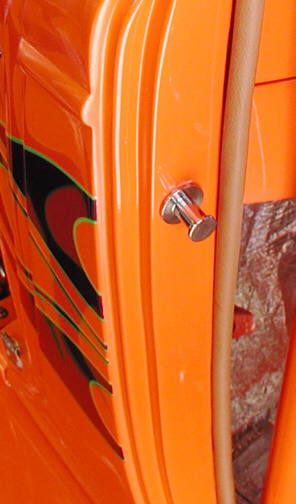
You can also see the graphics that are on
the edge of the door which wrap around to the inside. By doing this, you
can't see where the graphics end when your looking at the car from the
outside when he door is closed. It just gives it a finished look when
you do this. Speaking of a finished look, pay no attention to the
inside of the door because it still needs a door panel installed.
|
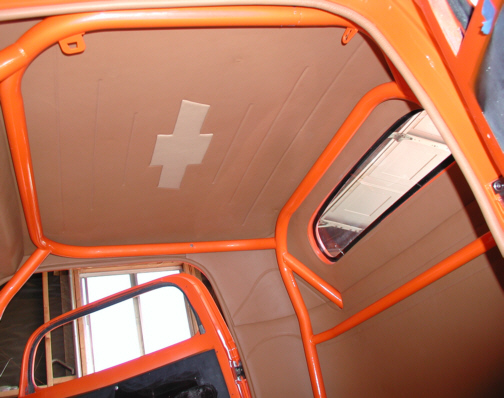
| I'm getting the interior in slowly and
one of the things that I haven't been looking forward to was installing
the headliner and the roll cage. As you can see, they're both in but what a
pain they were. The headliner went in and out five or six times before I
had it right. The reason for that is because it has about 16 clips that have to
go into holes that you can't see. I put tape on both sides of the
headliner (which was placed right next to a
clip on each side) and then placed an ink mark inline with each clip. I did the same
thing on the body so I would have a reference to line things up with
this time. My
wife helped me with it which was much easier this time with two people (I should
have had her help me with it the first time). While trying to get all
the clips in place, one of them towards the center just wasn't going to
go peacefully so while I had it removed (one of five or six times), I
cut it off flush with the bottom surface of the headliner. I tried to
cut it with some wire cutters but I had a hard time so I used my Dremel
with a cutoff wheel. I really
don't know why there are so many clips on it because once you have it
in place, it doesn't want to come back out. The reason it doesn't want
to come back out is because the headliner is a little bigger then the
opening that it goes into so when you have it in the right place, it
ends up being slightly curved (concaved). The curve wants to lock it in position
and it's really hard to remove once it's in.
There are four panels that help keep the headliner
in place which are the two small side panels, rear window top piece and the
front panel that goes around the wiper motor area. All of those panels
go in "after" the headliner is in and they all have the same
kind of clips to hold them. I think I could have used a lot less clips,
like four or six clips total on the headliner to hold it in because the
other four panels below it would have kept it in place. I'll remember
that if there is ever a next time!
Then came the
cage. The main hoop was first, then the roof hoop and last was the bars
that come off that down to the floor next to your feet. Once they were
all in, I was trying to figure out how come I couldn't install the down
bars that go into the trunk. It hit me at that moment that the main hoop
needed to be loose and lifted up so the down bars would join together.
Now to make that happen, I had to remove the whole cage and start with the down bars
first and THEN work
my way forward. I had forgotten all about that part of the puzzle when I
started bolting things together and with everything painted, I had to be
really careful. The roof hoop has one foot long pieces that come off it
and they end up very close to the dash when your installing it. I
wrapped the ends with rags and then used tape to keep the rags in place
for insurance. That worked good because one end touched the dash once
while I was installing it but there's no scratches to report. Now if I
can remember how everything else should be bolted on in the right order,
that would be just fine with me. One step forward and two steps back has
been the deal lately.
|