|
Working With Wood Continued
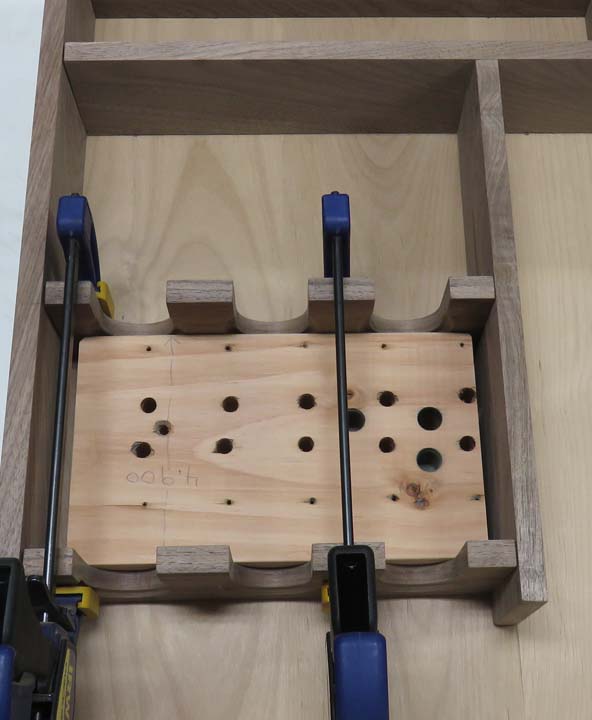
The next bottle shelf has a different location so again I made another
spacer out of some scrap wood.
|
|
 |
|
Once I had all the other smaller shelves screwed in place, it was
time to install the longer ones. However, this one had a problem.
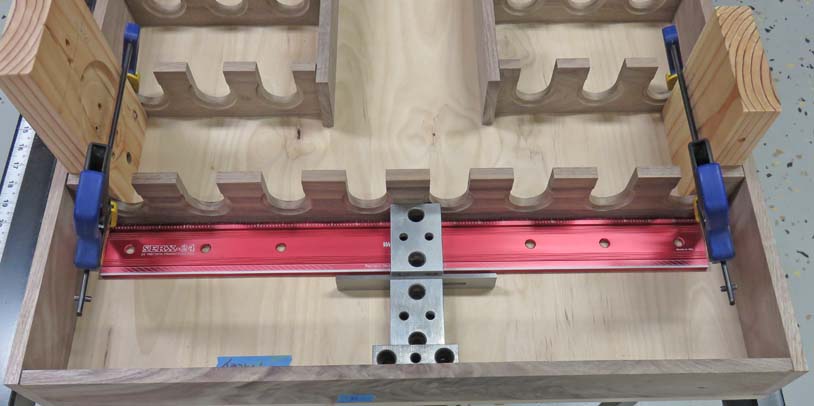
Here is what I came up with
to put this shelf in the correct position because it had a slight bow to
it. I clamped my spacer blocks on each end giving me the right distance
at the ends, but the middle didn't want to corporate. So I used my 1 X 2 X 3
blocks and a parallel (as shims) along with a straight edge (red piece) to make sure
my shelf was where it needed to be. Then I used my pencil and laid out
some lines like I did before. Whatever it takes ya know!
|
|
 |
|
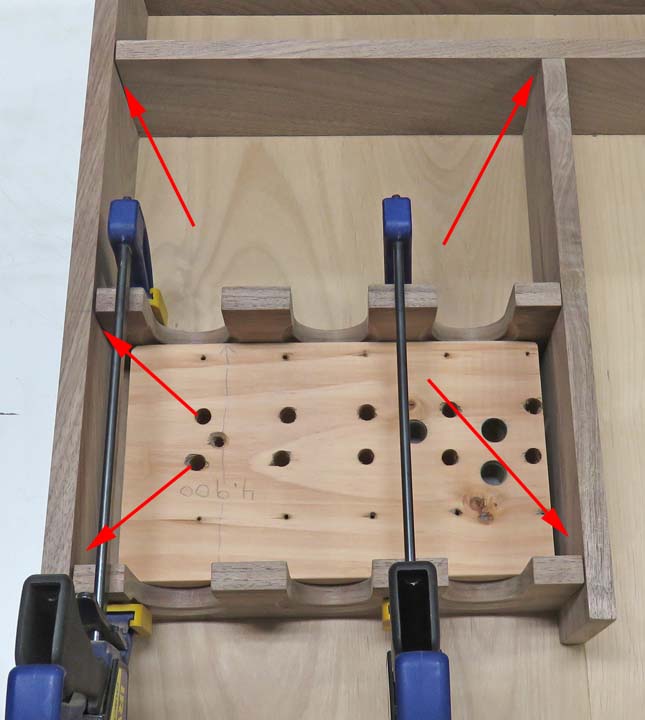
As we all know, wood is dynamic. And as the days have been going by, the gaps at all the joints
are getting larger (arrows), which means I'll need to address this. What
I plan on doing is adding dowels to all of these places. In fact, I'm
going to add two dowels at each joint, which is going to take some time because there
are a lot of joints to deal with. Later, once I put glue on all the
dowels and then clamp them up, those gaps will be gone and everything should all look good again.
|
|
|
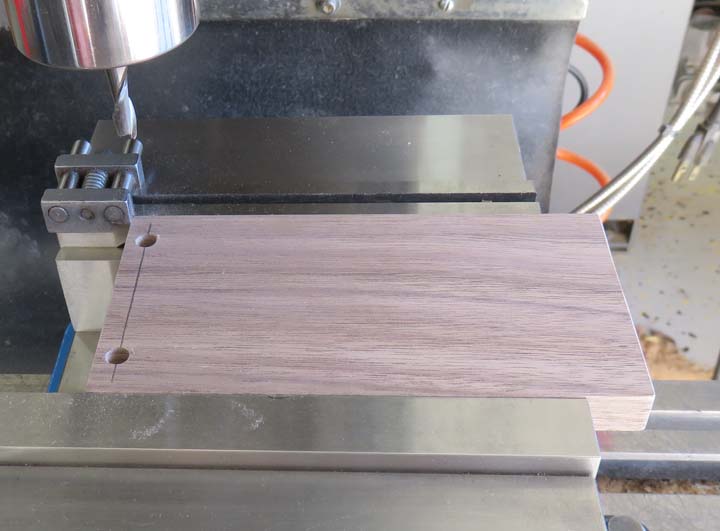
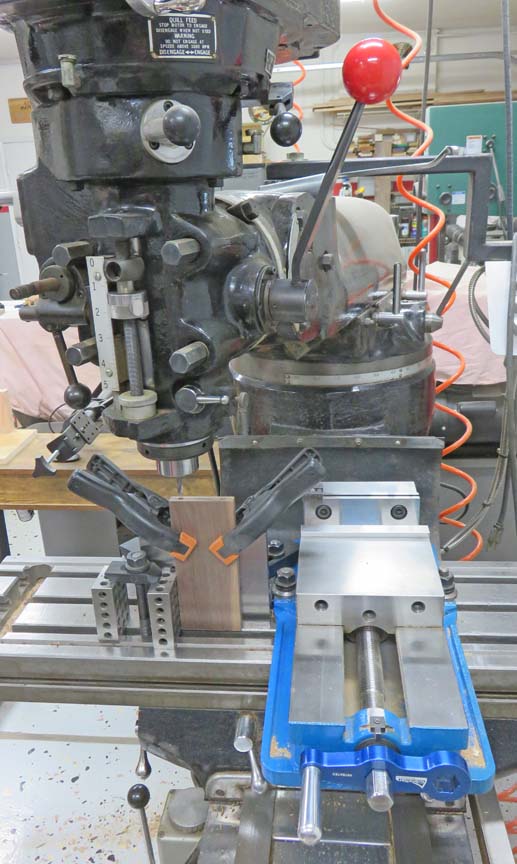
Machining Dowel Pin Holes I'm starting on the cubby hole pieces first to get an
idea of what this is going to take. I decided to use one single tool for
this, a 1/4" endmill. This takes the place
of a drill and a reamer to put the holes in. This method will go much faster and work the
same.
|
|
 |
|
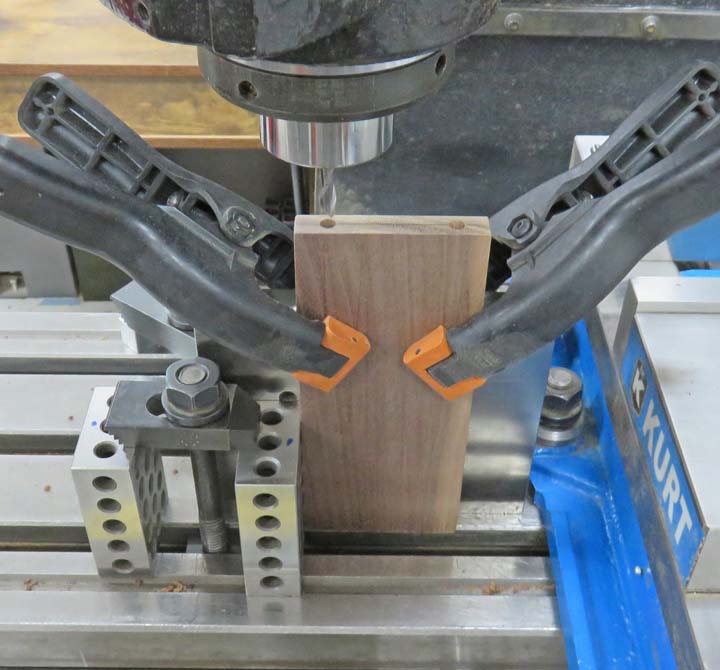
The mating part to the one above needs the holes on the
end grain, which means I'll need a different setup. To put the holes in
the ends of the boards, I had to swing my column over
and then extend the ram out to reach my work piece. This is no big deal
and I was able to leave my vise bolted to the table while I worked.
|
|
 |
|
I used an angle plate behind my work piece to support it and
then used hand clamps to keep things in place while working on them. The 1 X 2
X 3 blocks were used as a work stop. This worked out well so now I have
a good idea of what I'll need to do for all of the other dowel holes.
|
|
 |
|
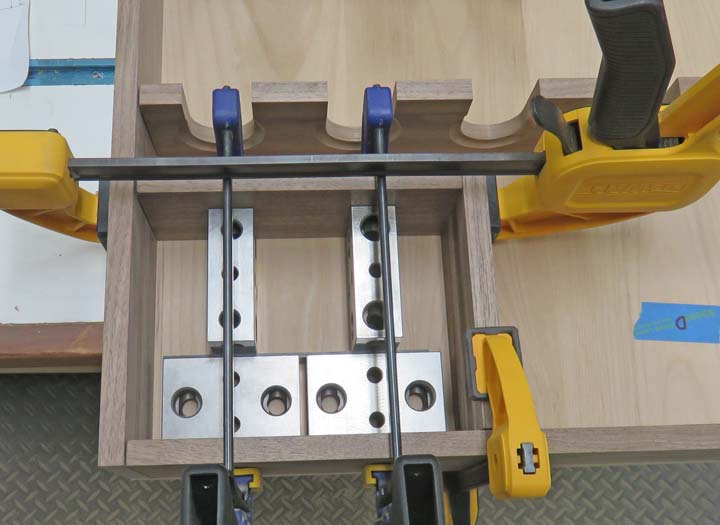
Working With Wood Continued Here I'm using my metal working blocks once again to
align my work pieces. Who knew these would come in so handy for woodworking?
Once everything was in the right place, I used my pencil and made my
marks on the longer outside pieces that were at a right angle to the
mating pieces.
|
|
 |
|
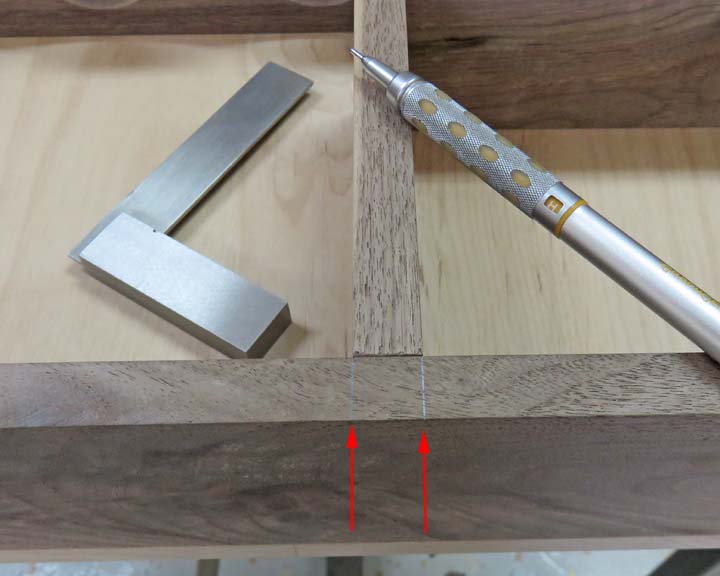
Here's a better look at what I'm talking about above.
The arrows are pointing to my pencil marks that represent each side of
my board. Once I take the long side piece off (the one with the pencil
marks), this will give me my location for the dowel holes.
|
|
 |
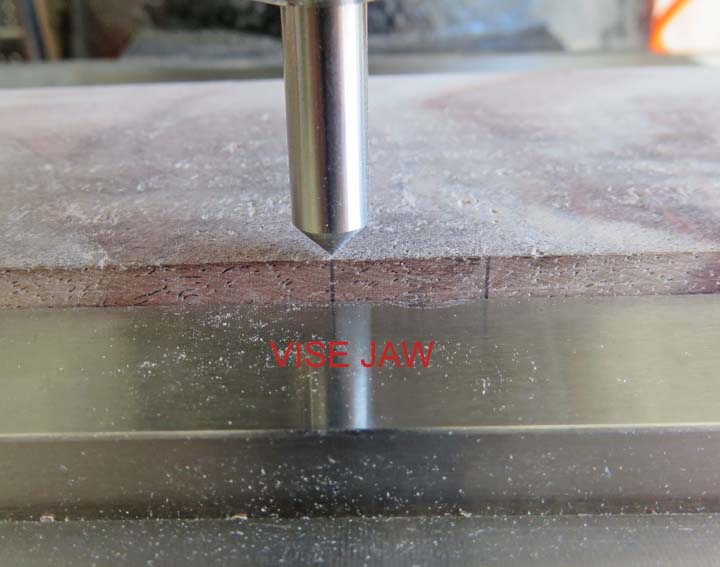
Next
I used a center point and picked up one of the two lines in my milling
machine. Then I moved
over half my board thickness (.250" or 1/4") and this is where my X axis
centerline will be.
|
|
 |
|
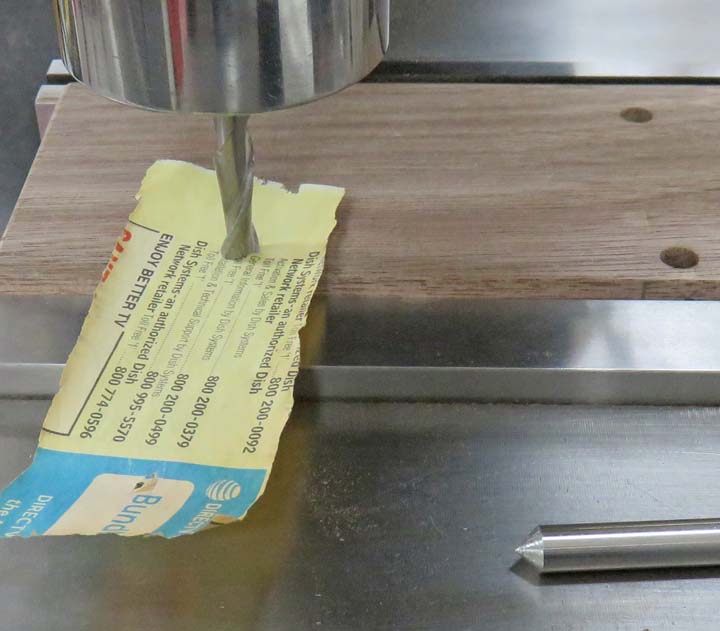
I switched to my 1/4" endmill, and used a piece of
paper to just touch the cutter to my work piece which will be my Z zero.
Then I removed the
paper, moved my cutter up out of the way and made my depth .275"
(slight more than 1/4"). The reason for this odd
number is because I'll be cutting all my wood dowels to .500" or 1/2"
long and this will give me a small amount of clearance for glue in each
hole.
|
|
 |
|
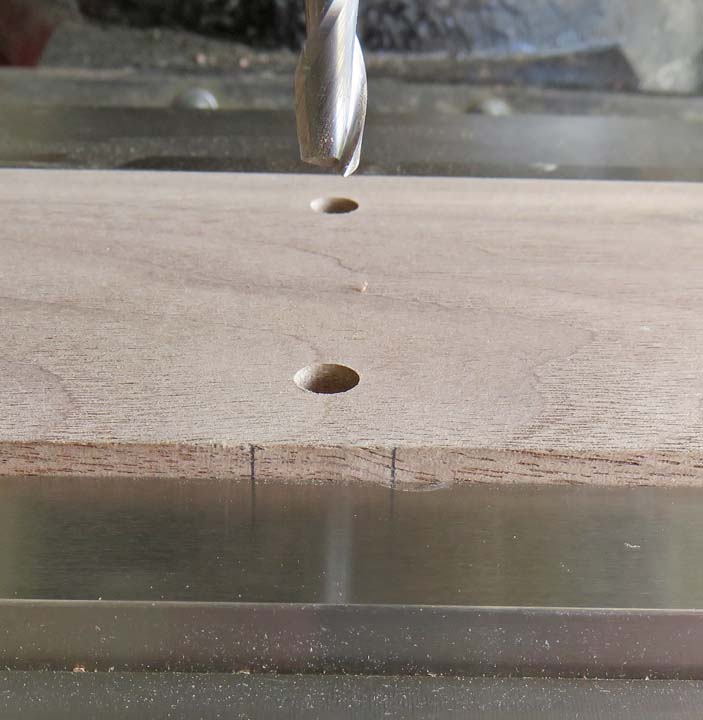
And last I cut both of my holes to the locations that I
needed. This process works, but it takes a fair amount of time because
of all of these steps.
|
|
 |
|
1
2
3
4
5
6
7
8
9
10
11
12
13
14
15
16
17
18
19 |