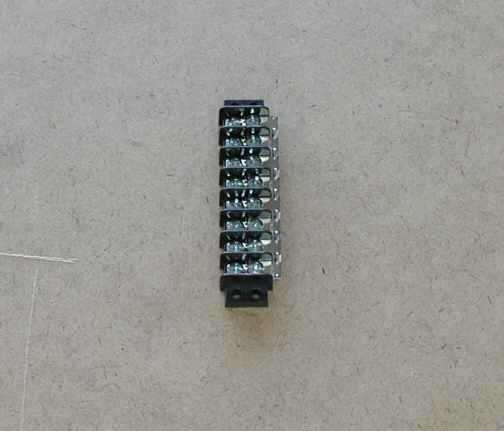
| Gett'n grounded.
With the car being fiberglass, I won't be able to
just hook a wire any old place like a steel bodied car, so that means
I'll have to do some extra work. What I came up with to make sure things
were grounded well was a central area that most of the ground wires
could connect. A terminal strip will be used and placed to the right of the MSD controller.
The piece to the right will be used in place of jumper wires.
|
|

|
|
Here you can see it installed and
screwed down. This makes it much easier than cutting, stripping and then
hooking it to each lug.
|
|
|
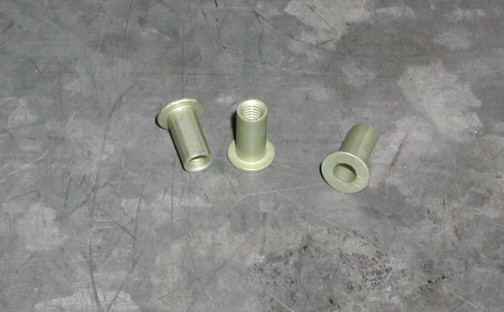
These are Riv-nuts and are made out of
aluminum. They are based on the same principal as a pop-rivet (by the
way they are installed). They have threads inside of them but not all
the way through. The reason for this is because of the way they get
installed. If you look at the one with the shoulder facing you, it
doesn't have threads at the end but you can see the others do which is
on the opposite end. When you install them, part of the small diameter
gets squeezed that's next to the shoulder. They come in a variety of
thread sizes and the one I'm using today is 10-32. I also have some in
6-32 and 8-32.
|
|
|
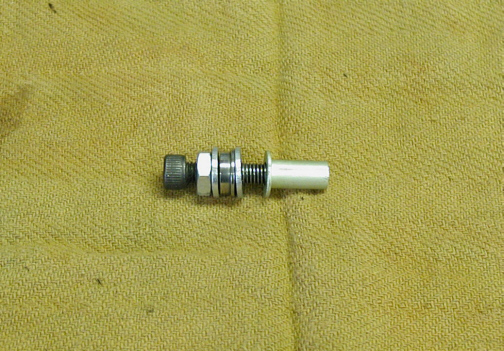
This is a home made Riv-nut installation
tool I made. First we have a 10-32 Socket Head Cap Screw (Allen head
screw), nut, washer, bearing, washer and then the Riv-nut. The first
thing you do is drill a hole the size of the body and in this case, that
would be .250" or 1/4". After the hole is drilled, you insert
the Riv-nut along with the installation tool. I threaded the screw in
till it just came out the back and called that far enough. Next you run
the nut down till the washer, bearing, washer touches the Riv-nut. Now
all you do is use an hex-key (Allen wrench) to hold the screw and turn
the nut with a wrench. You only have to turn the nut two or three turns
and that's it. Let's see what it looks like after it's installed.
|
|
|
|
1
2
3 4
5 6
7 8
9 10
11 12 13
14 15
16 17
18 19
20 21
22 23
24 25
26 27
28 |
|
29 30
31 32
33 34
35 36
37
38 39
40 41 |