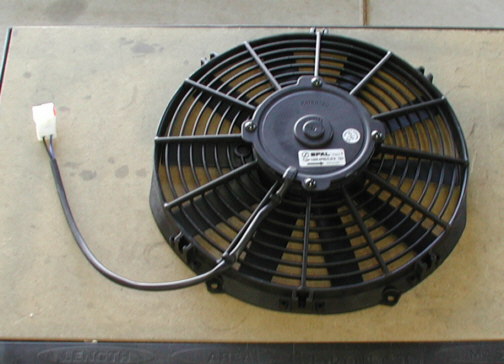
My plan for a fan was for me to use
two smaller 10" pullers like the one that you see below. The problem was that I could only fit one of the two in there because of
the limited clearance between the nose of the water pump and radiator.
Being that I bought the largest radiator that Griffin had was a good and
bad thing. The good was that is should keep the engine nice and cool,
but the bad was that it didn't give me much space to work with because
of how thick it was. The way I understand electric cooling fans is using a puller is better than using a pusher. Here's the difference
between the two. A puller fan is mounted on the engine side of the
radiator and "pulls" the air through the fins. A pusher fan gets
mounted on the other side of the radiator and like the name implies, it
"pushes" the air through it. You would think that it wouldn't
make a difference how you moved the air as long as you "moved
air". The difference is "how" the air is passed through
the radiator. If the air has to go past a fan that is a pusher type,
then some of the air is being diverted away because of the configuration
of the fans housing, causing turbulence. The air gets swirled around instead of just going
through in a nice straight line so this is why a "puller" is
preferred over a "pusher" type of fan.
|
|
|
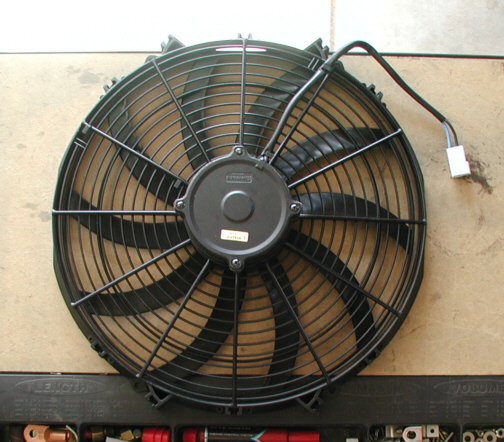
This is a 16" pusher fan made by
Maradyne
and if
you look at how much bench space it takes up compared to the one above,
you'll see that it's much larger. This fan is reversible which can be
used for a pusher or puller by removing a clip that holds the fan blade
on and flipping over the blade. Then all you have to do is reverse the
wires and your good to go. Notice the blade configuration between
the two as well. The larger one has curved blades and the other has
straight ones. Curved blades are quieter than straight ones but move
less air so it depends on your setup as to what you might need. You
can get a fan in just about any size, blade configuration, pusher or
puller that you can think of. This one pushes 2000 CFM (Cubic Feet per
Minute) of air which is very good.
|
|
|
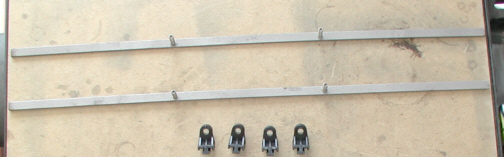
I also bought a mounting kit that can
be used in either a vertical or horizontal position. I plan on mounting
it horizontally which means I'll have to cut them off on each end and
then drill some holes. These
mounting straps come with 1/4-20 studs welded on them along with four
plastic clips that I won't be using. Now I have to fasten these straps
to the front of the radiator which means I have to drill some holes in
the channel that runs from the top to the bottom of each side of the
radiator. If you remember awhile back when I was mounting my
overflow
container, I had a mess on my hands by drilling a small hole into
one of the tubes causing water to leak out so let's hope lightning
doesn't strike twice.
|
|
|
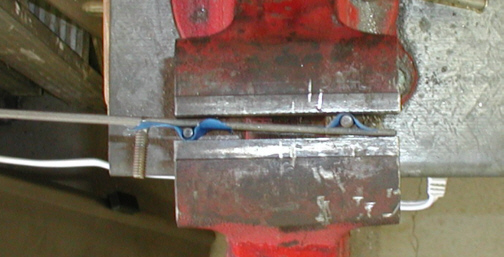
After cutting the straps to length, I
noticed how close the fan was gong to be to the grill so I needed a
little extra clearance. What I did was make a slight bend in the
mounting straps on each end by using two pins on either side of the strap and then squeezing
the vise together. This produced a nice off-set bend which gave me an
extra 1/4" of clearance. The tape was used to keep the pins from
falling while I was placing the straps in the vise.
|
|
|
|
1 2
3 4
5 6
7 8
9 10
11 12
13 14
15 16
17 18
19 20
21
22
23 24
25 26
27 28 |
|
29
30 31
32 33
34 35 |