|
Building A Box Continued After I was finished rough sanding each panel, I was
ready to cut them all to size. Here I'm removing a bad spot on the end
of this panel. And if you look close you can see pencil mark to remind
me to do this. What I did was just skim the opposite side and then cut
this side to length.
|
|
 |
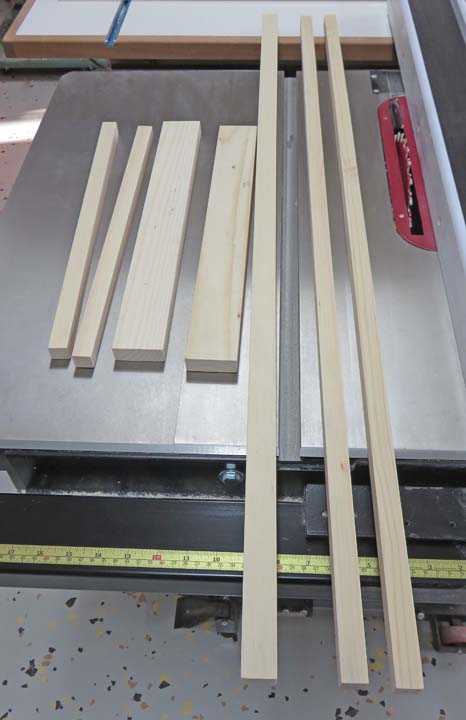
What you see here are four shelf cleats
and three seat supports. These will be screwed on with # 6 X 1 1/4 long
screws.
|
|
 |
|
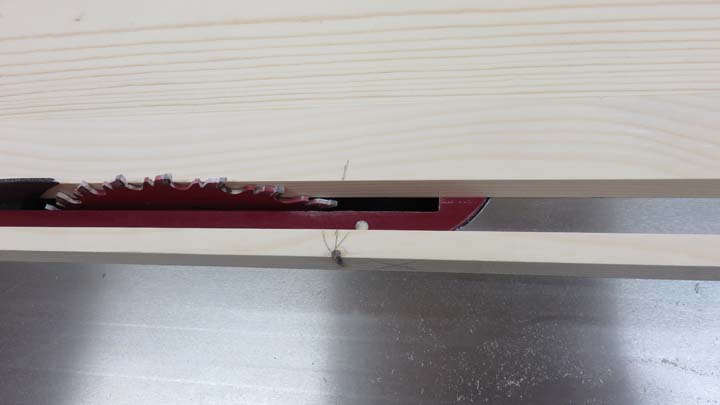
After I ripped all the panels to the width I needed, I
was ready to cut them all to length. To keep the ends square to the
sides, I used my crosscut sled. However, notice I don't have much room
leftover (near the blade) with this large panel. And it's hanging off my
table saw by almost 12" so I had to be careful while cutting.
What I did was hold the panel so it didn't fall with my
right hand, turned on the saw with my left hand, and then held the panel
with my left hand while I ran it through my saw. This worked but I was
maxed out for any extra room.
|
|
 |
|
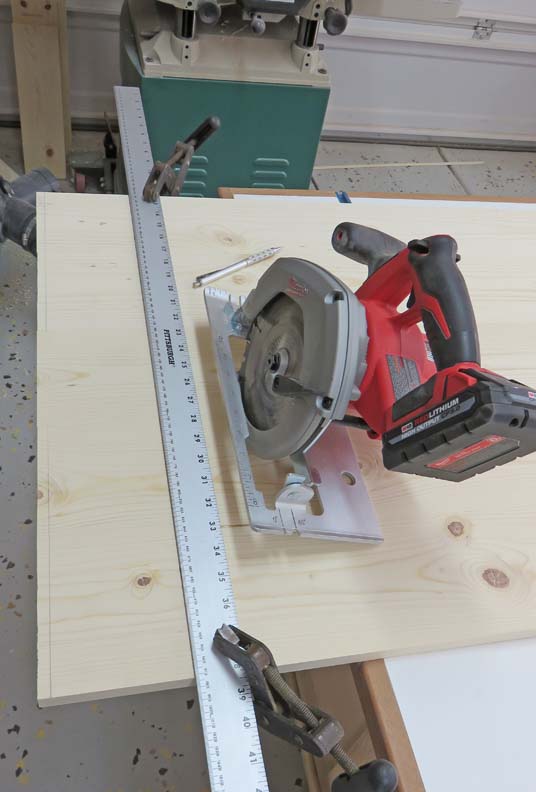
The back panel was too large to use my crosscut sled so
I had to cut this one with my circular saw. I used my square on each
side, made a small mark and then joined both marks with a straight edge.
Then I moved my straight edge over, clamped it to my panel and used it
as a guide to make my cut. This worked great and everything came out
square.
|
|
 |
|
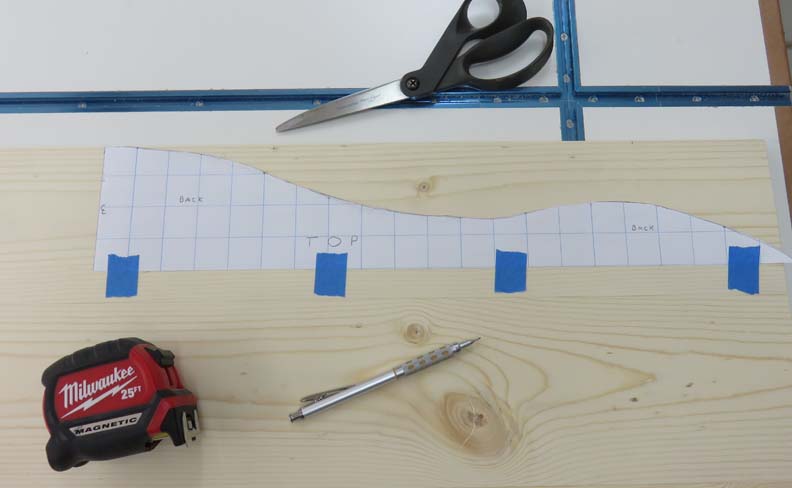
Getting Fancy What I did was make a pattern out of graph paper for the top
section of the back panel. I taped it down and traced along it with my
pencil. Then you just
flip the pattern to do the other side, keeping the one edge at center
line. This panel
will also have a sculpted edge along the bottom as well, but will be a
different shape and use a different pattern. Now this took
some planning before I glued anything together because I didn't want to cut through
any knots.
|
|
 |
|
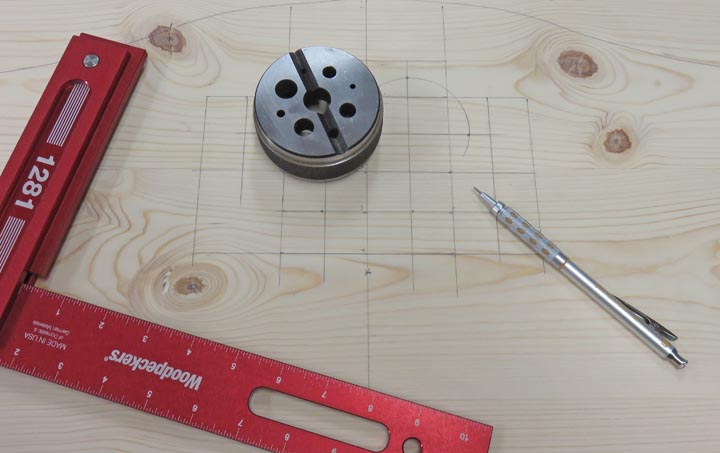
One other thing I want to do on the back panel is make a
heart cutout. What I've done is laid out a grid pattern with one inch
squares, plotted some points and then traced around them. Here I'm using
a 'bench block' for the heart radius.
One other thing: the square that you see below is made
by a company called 'Woodpeckers'.
This square is made out of solid aluminum on a CNC milling machine and then
they attach a handle. That makes it a precision square and it works
really good. I've had it for about a year now but haven't talked about
until now. Woodpeckers makes some really nice stuff and if you're
looking for quality tools made right here in the U.S.A. look no farther.
|
|
 |
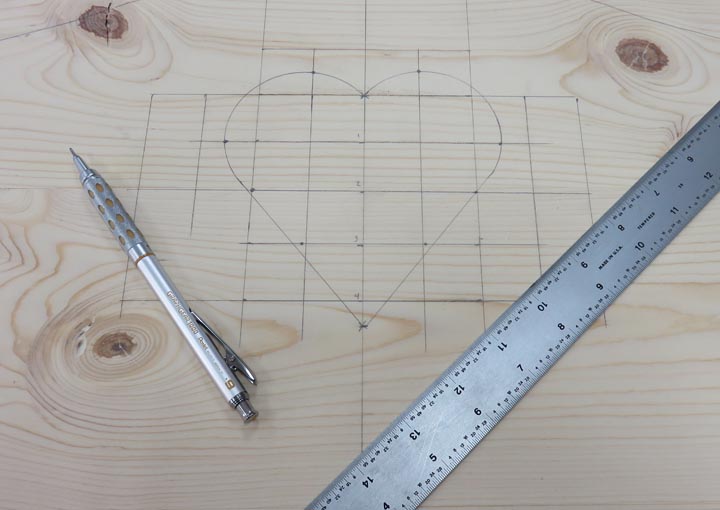
I then used a straight edge to connect the tangent point of the radius
to the bottom of the heart. This worked out great and it was easy.
|
|
 |
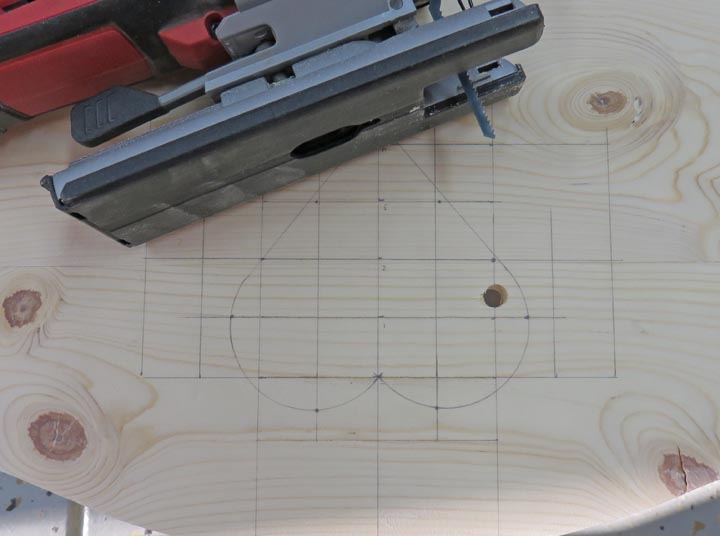
I drilled a clearance hole for my jig saw, clamped it to my mobile work
bench and cut out the heart.
|
|
 |
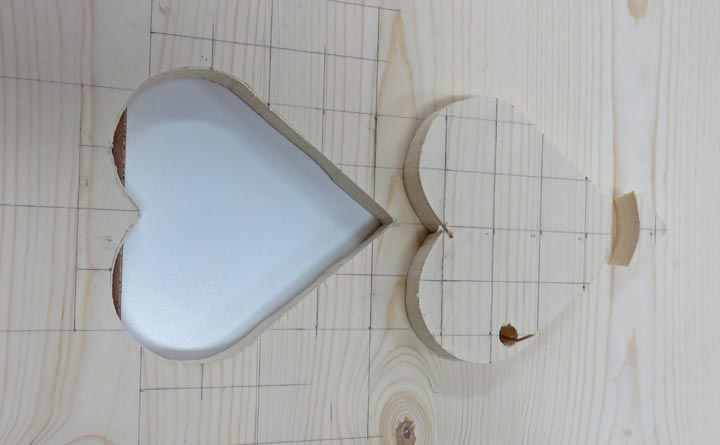
If you look close you can see I made two cuts to remove the entire piece. I
then used a small sanding block with 80 grit paper to deal with the
straight sections.
|
|
 |
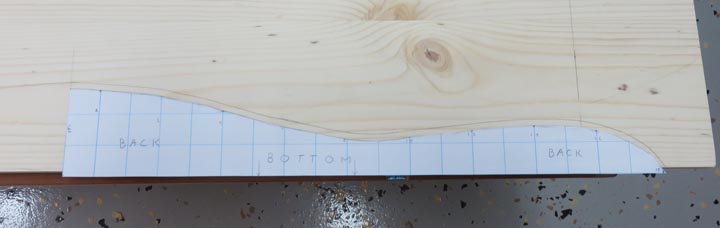
Here is the pattern for the bottom of the back panel. And the same thing
happens here, trace the pattern, flip it and then do the other side.
|
|
 |
|
1
2
3
4
5
6
7 |