|
Nose Continued
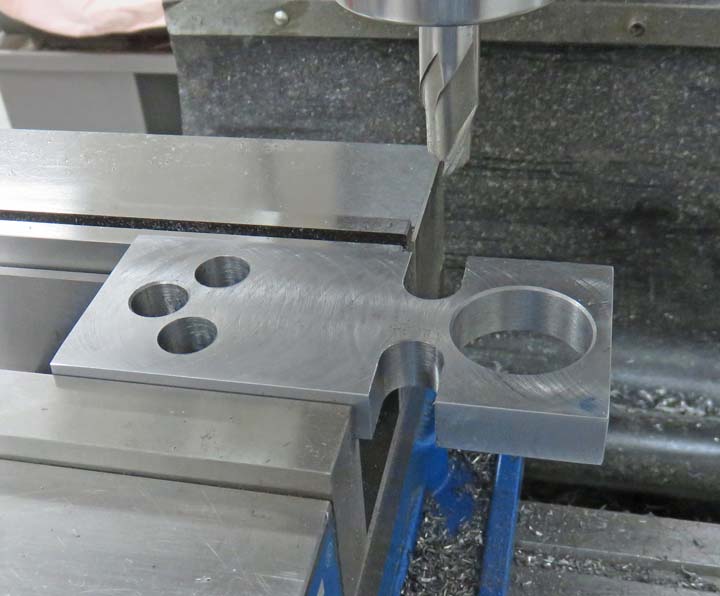
There will be a short straight section close to the large hole, which
is
what I'm putting in here. I picked up the location of smaller hole first and then made these two
cuts.
|
|
 |
|
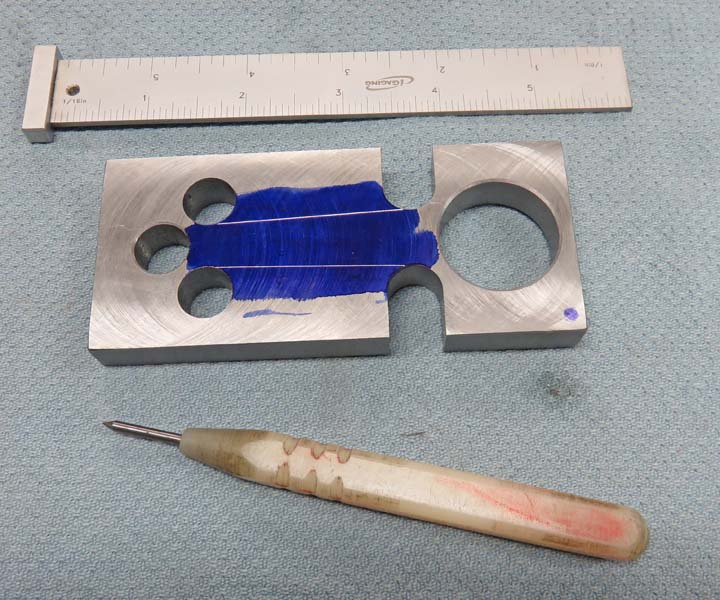
Now it's time to rough out some material. And to make
sure I don't cut in the wrong spot, I'm using some layout dye and then
scribing a line from one hole to the next. Now these holes are not
inline with each other. The reason is because this section will
end up with a taper, just like a real connecting rod is designed. Once
the material is removed, they will blend at both tangent points (the
holes I drilled earlier).
|
|
 |
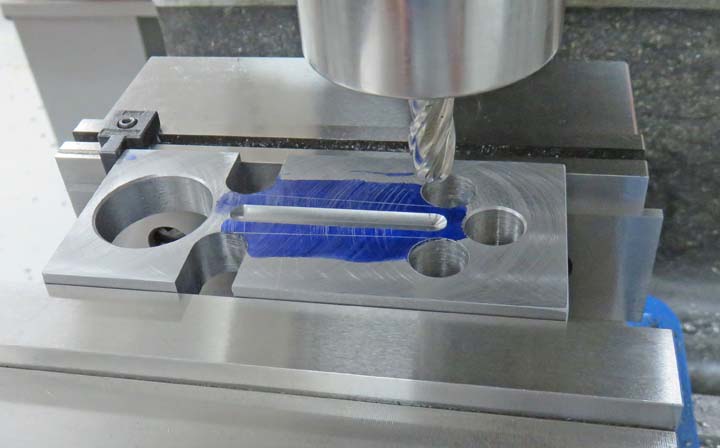
I'm using a 3/8" diameter ball end mill to produce a small relief down
the center of the connecting rod. This will give it the look of a real
one. And I did this on both sides.
|
|
 |
|
Time to put some holes in for my rod bolts to pass through.
These holes are .250" diameter (1/4) which will
fit the same size bolts without any slop. I could have made them larger
but there's really no need.
|
|
 |
|
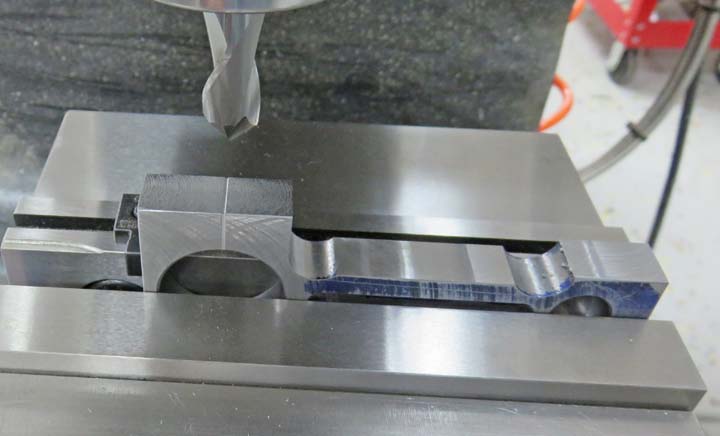
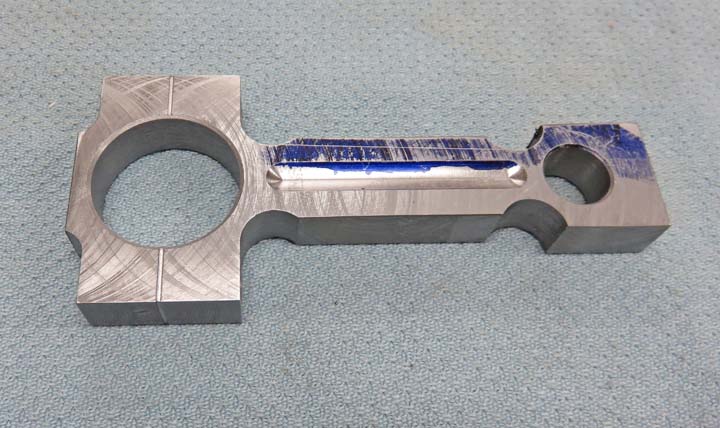
Here you can see the material roughed out along the
taper. If you look close you can still see the scribed line I made
earlier. I'll be finishing this area next.
What I'm doing below is putting a small line across the
big end of the rod to simulate it being two pieces. There was no
need to actually make a two piece connecting rod because it doesn't have
any real function, other than looking like a 'real one'. This line is only
.005" deep and was made with a 45 degree carbide end mill.
|
|
 |
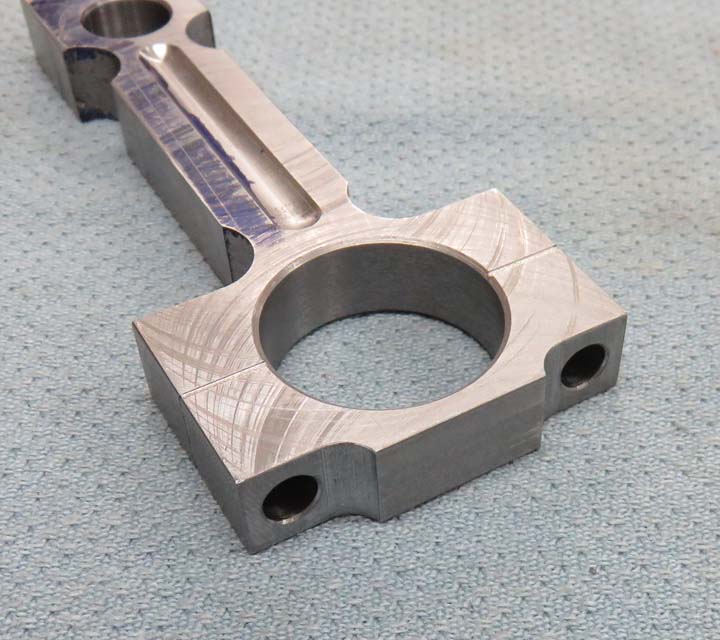
If you were to see it in person, and were never told you that it was
only one piece, it would be hard to tell from a distance.
|
|
 |
I also put a small bolt relief on at the end too. So far I'm liking it.
Now it's time to cut the taper and blend in those two tangent points I
talked about earlier.
|
|
 |
|
To make it easier on myself, I made the angle or taper
at two degrees. That's the nice thing about designing something
yourself, you can do what you want.
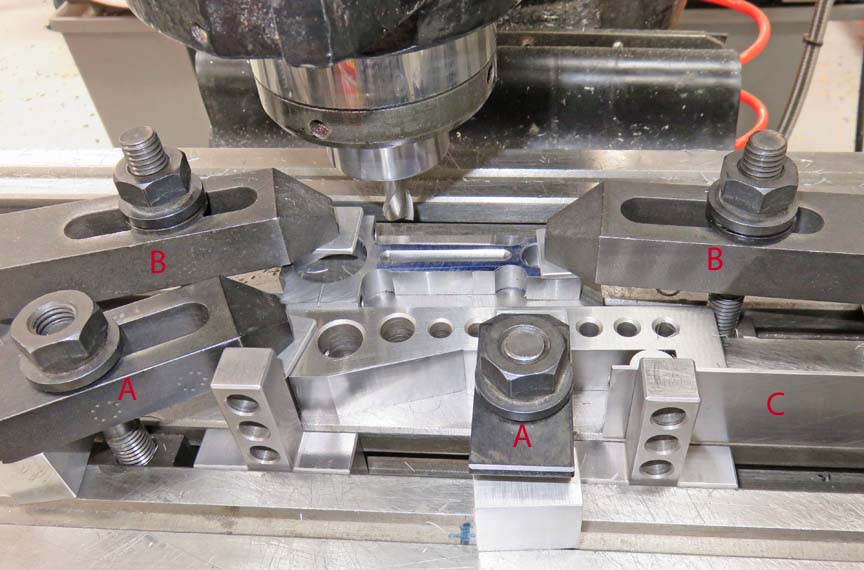
Now there are a few things going on here so let me
explain one thing at a time. I'm using my 5" sign bar to produce my
angle of two degrees and it's being clamped down with two clamps (A).
The two larger clamps (B) are holding down my work piece. And to make
sure I don't damage my work piece, I've placed some aluminum shims
between the clamps and connecting rod.
To attain the angle that I needed
of two degrees, I would need to use something.174" thick, and I just
happen to have a parallel that exact size (C). This is what you see
between the sign bar and my mill stop. All this for my two degree angle
.
Once everything was clamped down, I used my 1/2" end
mill again and carefully removed the remaining material. The hard part
about this kind of setup is making sure to not go farther than my
tangent point, or blend point. If I did go farther, you would see it as
a dig-in spot where the cutter removed material were it wasn't suppose
to. Taking your time is key here.
|
|
 |
|
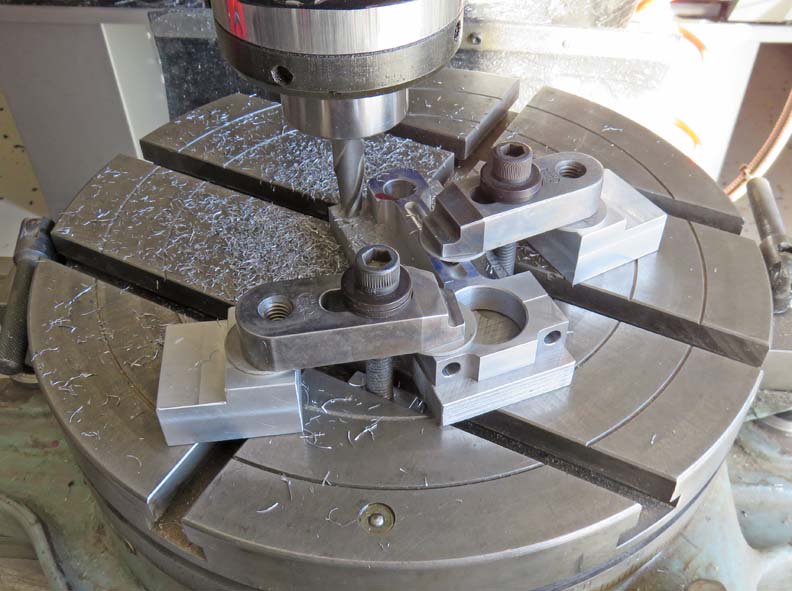
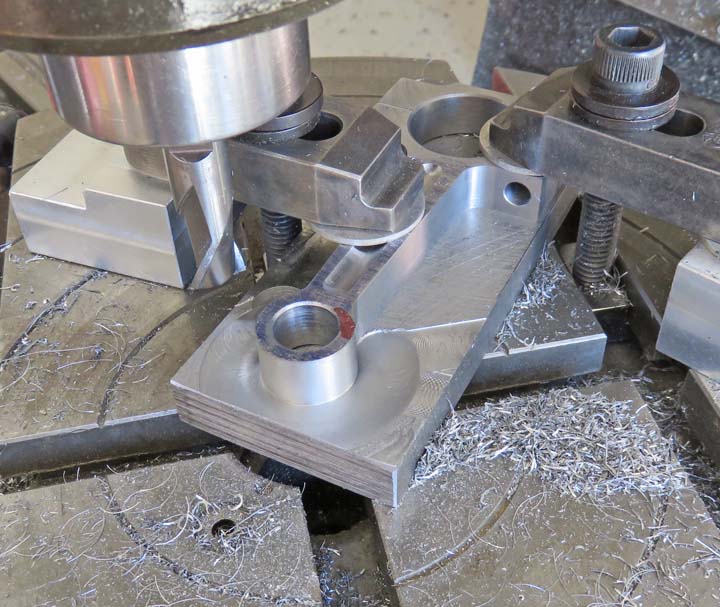
Now it's time to work on the smaller end and that will
require the use of my rotary table. Now I could have used my belt sander
and worked the rounded shape to a scribed line. However, that process wouldn't look as
good as the one I'm doing here. On the other hand, the belt sander is
very quick and this one is not.
It's been about four years since I've use this rotary
table and come to find out it wouldn't even turn. I had to use WD-40 along
with some light oil injected into specific areas to get it to move at
all. This wasn't good news because I will have to turn the handle on it many
many times. Once I had it loosened up somewhat, I placed my work piece
on it, indicated it in and then clamped it down.
As I was turning the handle, I quickly found out that I
still had rough areas within it, making it hard to
turn. Now this handle doesn't spin which compounds the problem, so I put
on some cotton gloves (the ones I like to weld with) which made life
much easier for me. Side note: this is the first time I've ever worn
gloves working on a machine because they can be hazardous. On the other
hand, I wasn't near the moving spindle or cutter either.
|
|
 |
|
The trick to doing this is to not rotate the table to
far or I'll end up digging in to the beam of the connecting rod. It's
the same thing as before, work slow and don't mess it up. I'm glad I
took the time to machine the end like this because it's perfectly round
and square to the sides. There's no way I'd have it look this good from my belt sander.
|
|
 |
|
1
2
3
4
5
6 |