33 Coupe Before Paint 3
3/13/05
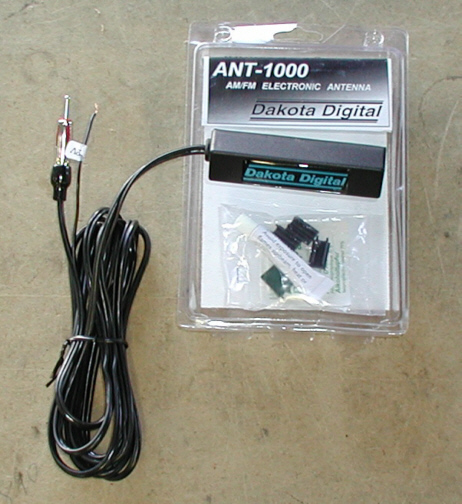
One of the things that I didn't want
showing was an antenna on the outside of the car for the radio, but how
do you do that? I've seen some nice retracting ones that come out of the
body but you always have a spot that you can see where they enter-exit
at and I wanted a nice clean look on the outside of the car. This is
where this electronic antenna from
Dakota
Digital comes in because you mount it inside the car. If you have a
steel body car, you're to keep this unit away from the body by 1"
to 1 1/2" but if you have a car made out of fiberglass, you can
mount it anywhere. Now this is an electronic antenna which means you
have to run power to it, and to install this was simple. All you do is
plug the one end into your radio's antenna, the other wire goes to 12
volts and that's it. The antenna measures 3/4" X 3/4" X
4" and also comes with some slick mounting hardware as well. The
wire is very long which means you could mount the antenna in the
headliner if you wanted. After hooking it up, I put the unit behind my
kick panel and then tried it out. Now I had my doubts about how good
this would work when I first read about it but after trying it, I
couldn't believe how good it worked. In the area that I live, we're surrounded
by mountains and not much comes in but a few desert stations but with
this Dakota Digital antenna, I received a ton of stations. I highly recommend
this unit to anyone that needs or wants a clean install and end up
having a very functional AM/FM antenna.
|
|
|
| 3/23/05
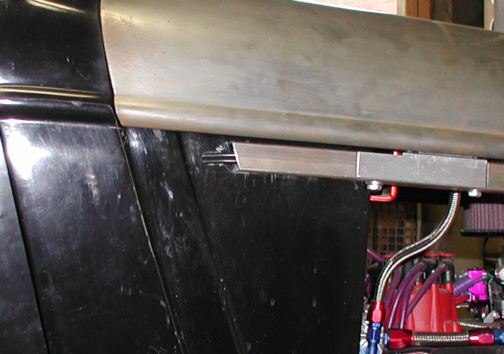
One of the things that I wasn't happy with was the
hood release cables showing once I was done with the hood hinges. The
instructions and video that came with the hinges all referred to a 1932
but not anything later so I had to wing-it for some of that install. I
ended up having the cables take a different route on it's way to the
inside of the car once I had everything in place because of the way I
fastened the rails to the body. After cutting the rails to what the
manufacture recommended, they ended up a little short as you can see so
I wanted to cover this area so it wouldn't look so unfinished.
|
|
|
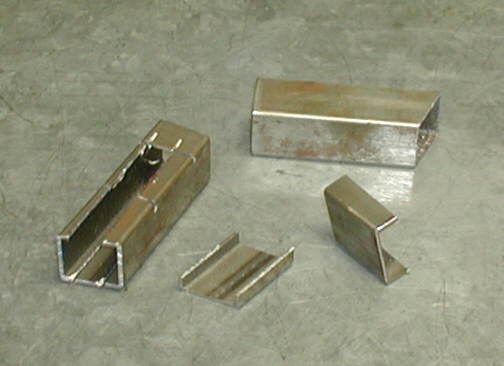
To cover the cables, I planned to use
some of the excess material that I cut off the rails when I first
installed them. I'm going to cut and weld some of these pieces to extend
the rails about 1 1/2".
|
|
|
What you see here is one of the pieces
that is ready to be welded on the end of the rail. To make this, I cut
one of the square pieces at an angle and then welded on an end piece.
After sanding the ends flush with the sides, I used a file to match the existing
radius that runs along the edges and I also put a small radius on the
end too.
|
|

|
|
1 2
3 4
5 6
7 8
9 10
11 12
13 14 |
|