|
Working With Steel Continued
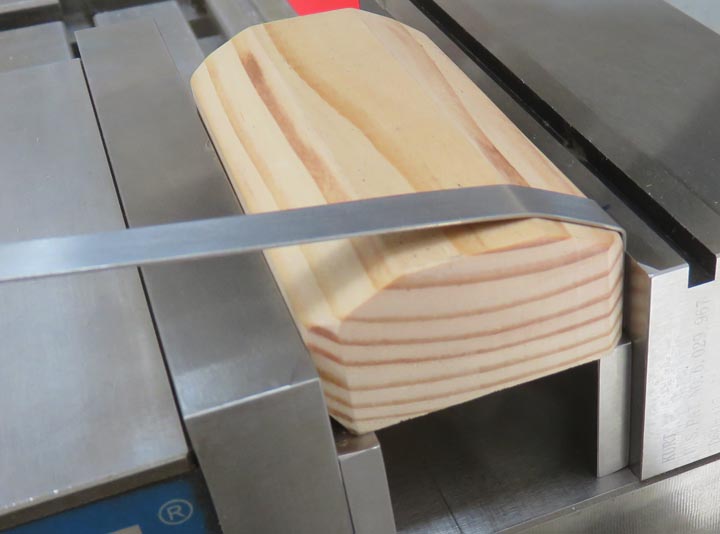
Here is a close-up of what I'm doing. Now this steel piece is oversize in
length so I'll need to cut it to length later.
|
|
 |
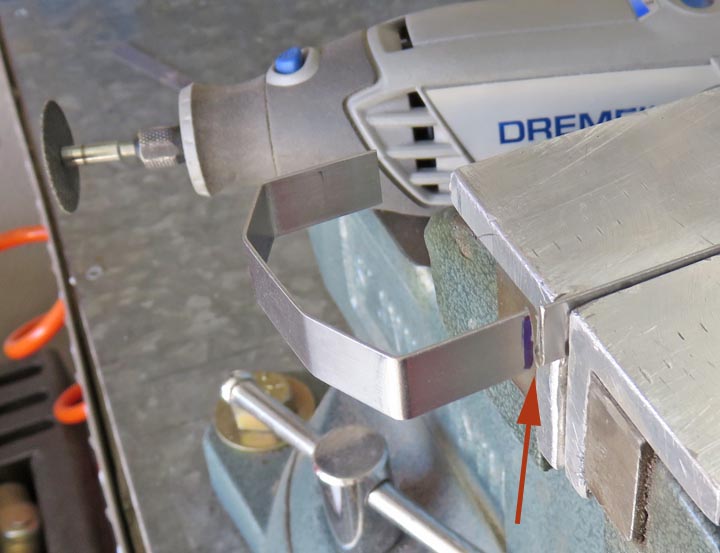
Once I was happy with the form, I cut it
off with my Dremel using a cutoff wheel (arrow).
|
|
 |
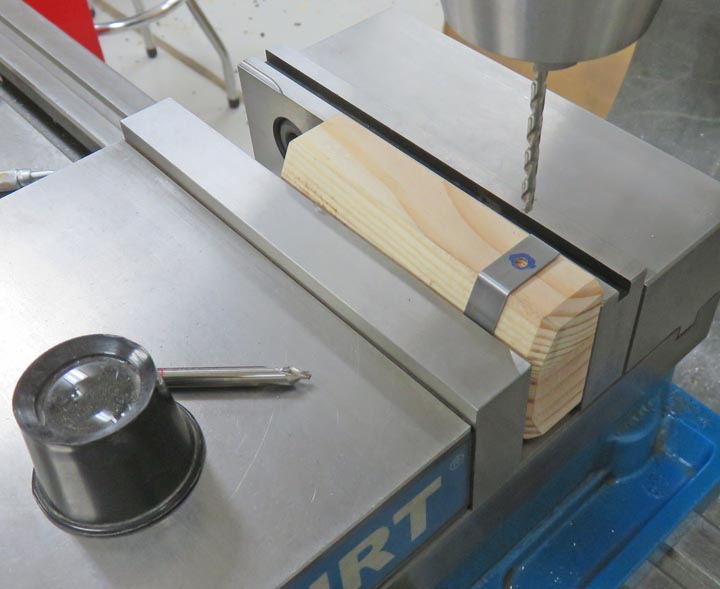
Here I'm drilling a clearance hole in the sheet metal for some #4
screws. In case you're wondering, I'm using a test piece of wood here.
|
|
 |
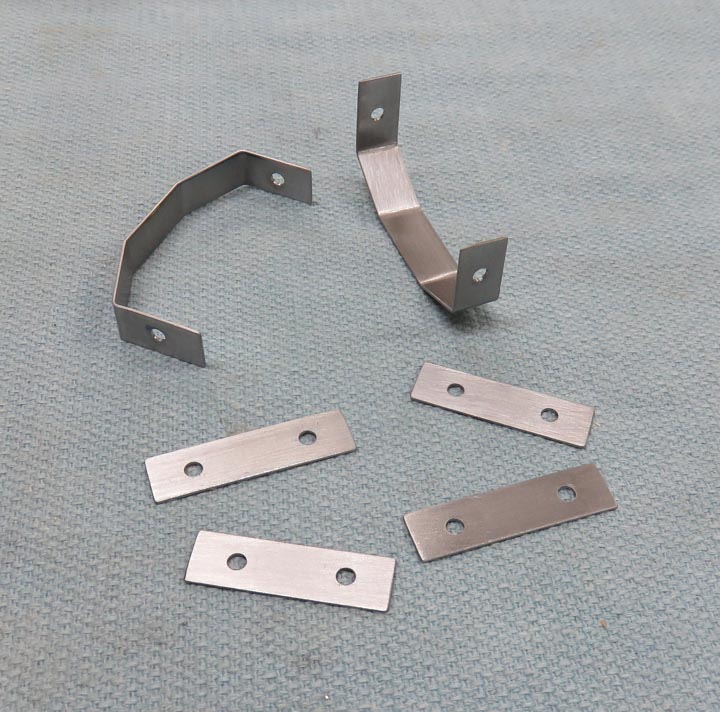
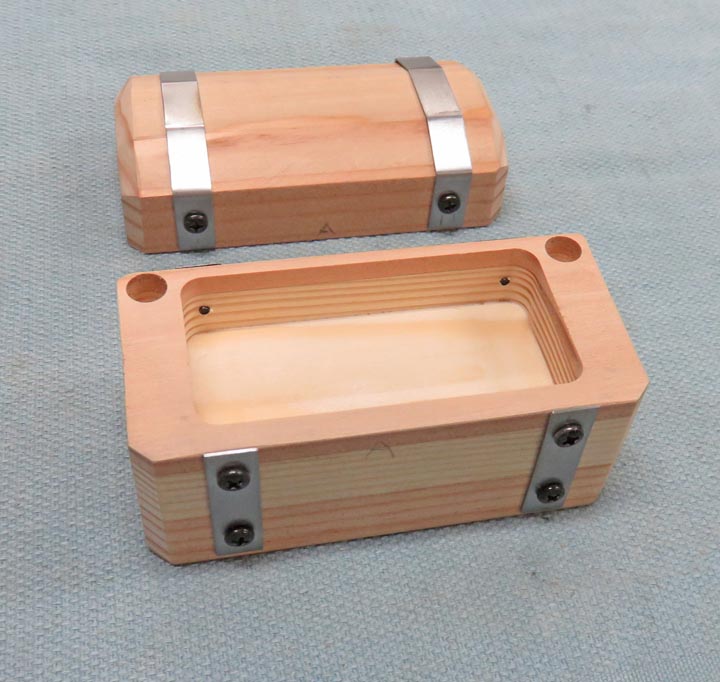
Here is what I have now, the two bent pieces will go on the lid and the
other pieces will be fastened to the box.
|
|
 |
I used my mill vise to hold my sheet metal pieces in place while I
drilled my pilot holes.
|
|
 |
|
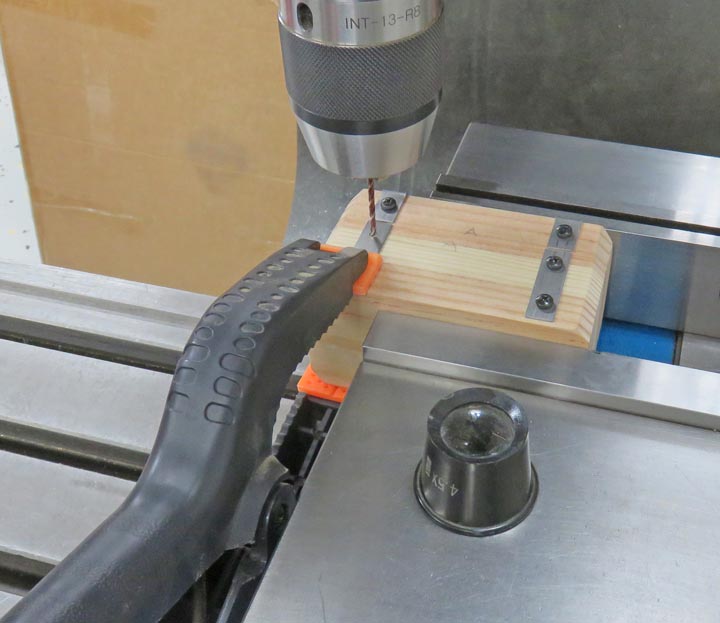
I quickly remembered why I don't like using small drills
all by themselves. Without the use of a center-drill, these small drills like
to wander, or follow the grain of the wood, moving them out of location.
But when using a short center-drill first, your small drill will be exactly where you
wanted it when you're finished.
|
|
 |
So far the metal pieces are looking pretty good. Now it's time to work
on the latch for the front.
|
|
 |
I bought this latch system in two different colors, black and bronze. I
liked the black ones because it will match my metal pieces better.
What am I talking about? You'll have to wait a little longer.
|
|
 |
|
The latch fits on here just right. And I received two
latches in the package, one that opens to the right and one that opens to the left. .I
don't know what I'm going to do with the remaining latch, maybe it will
go on a future project.
|
|
 |
|
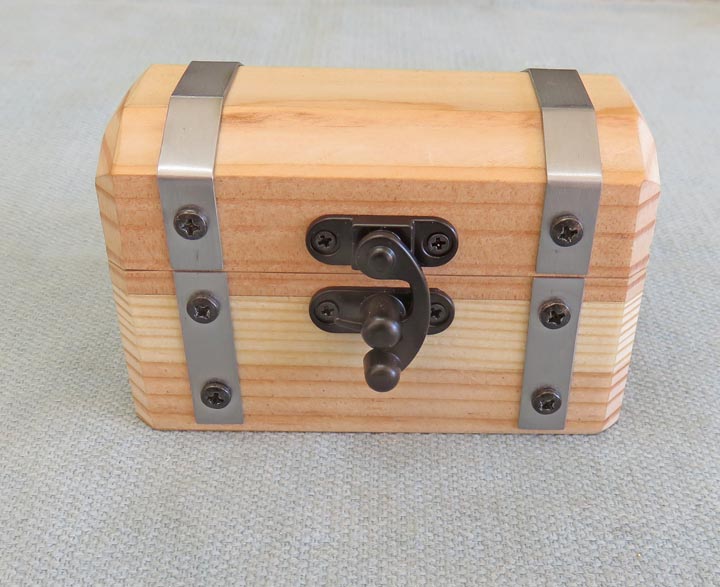
Here is what the latch looks like closed. I'm very happy
with the quality of these latches because they aren't super thin and the
mechanism works very good. Now that the outside is almost finished, it
time to work on the inside.
|
|
 |
|
1
2
3
4
5
6
7
8
9 |