|
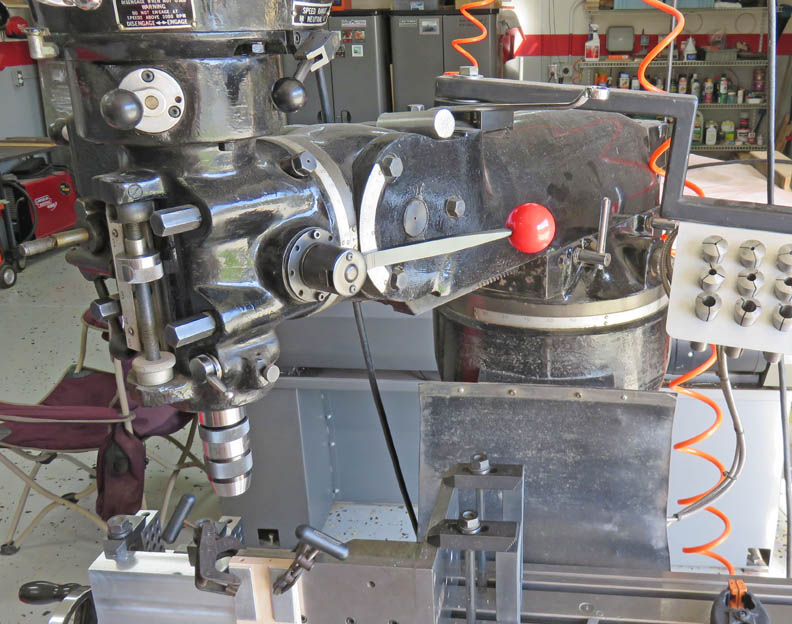
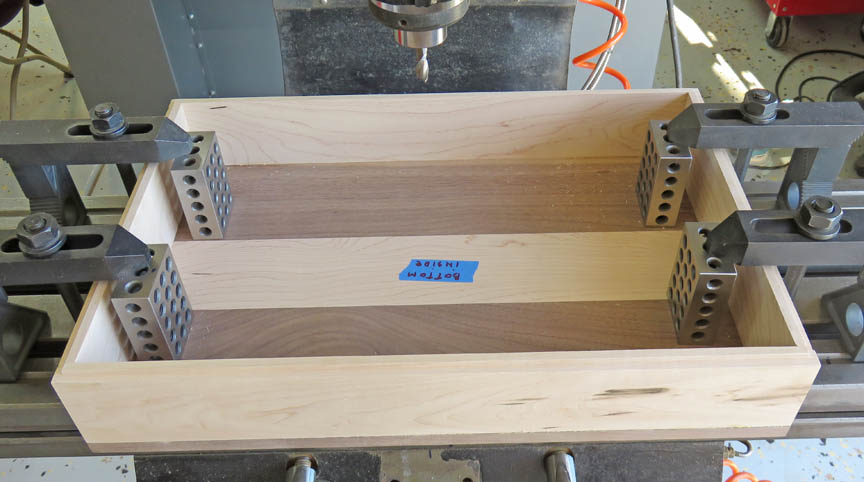
Machining Continued
I had to turn the head about 20 degrees and the ram is almost maxed out
here. Whatever it takes ya know...
|
|
 |
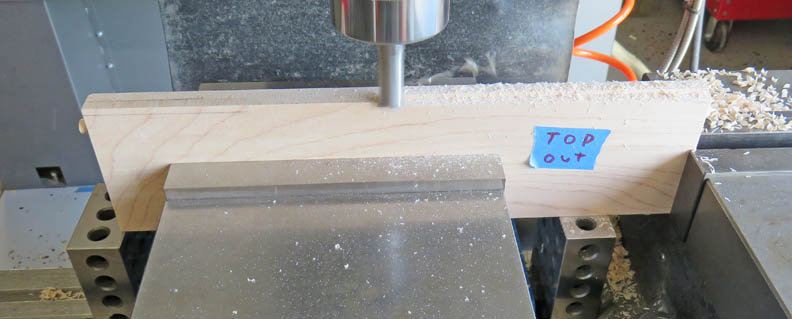
I'm cutting a step for the lid to sit on.
My board is 1/2" thick and the step is going to be half that thickness
by 3/16" deep.
|
|
 |
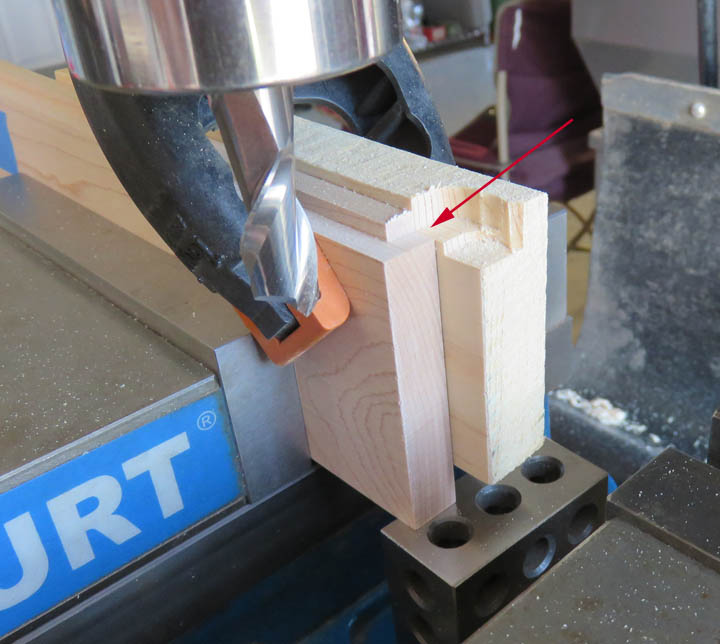
There are a couple of spots that needed cutting at each end which I'm
doing here. And I'm using a scrap piece behind my work piece so it
doesn't chip as the cutter exits.
|
|
 |
|
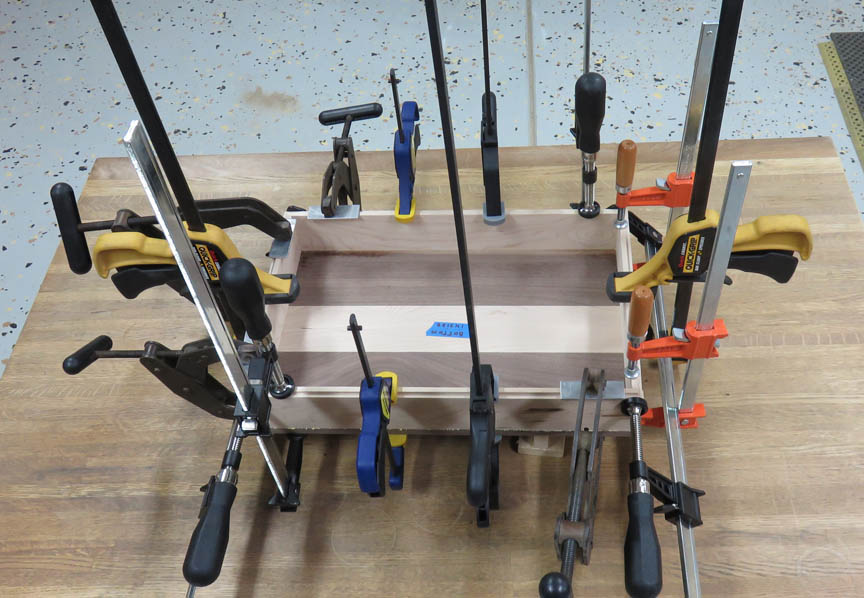
Gluing
A couple of days later it was time to glue it together. That's the good
news....
|
|
 |
|
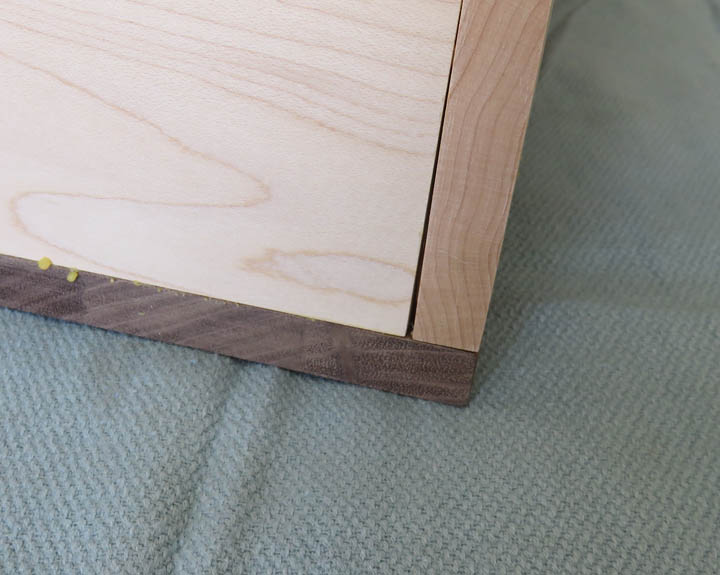
Problems
See that gap, well...that shouldn't be there. I started
thinking about how this happened but for the life of me I couldn't
figure it out. Then a little while later it hit me why.
The day or two before I did any gluing I did a dry fit.
Everything fit great and I was really happy at that point. After looking
at all the surfaces of my work pieces, I decided to do a little sanding
to remove some planer marks that ended up on all my boards. Come to
find out one, of the three knives on my planer chipped and caused some
uneven surfaces on every piece. Now I knew it would be really tough to
sand away these problems once the box was glued together so I used my
electric orbital sander on these pieces. And like before I used a pencil to
mark each piece and sanded away all the lines. This worked great but
little did I know at the time that I had removed too much in a few
places. As you can see, the thickness of the side piece is smaller at
the bottom than the top. I wasn't happy once I saw this during the glue
up process...when it was too late.
|
|
 |
I needed to do something so I made a wedge to help fill the gap.
|
|
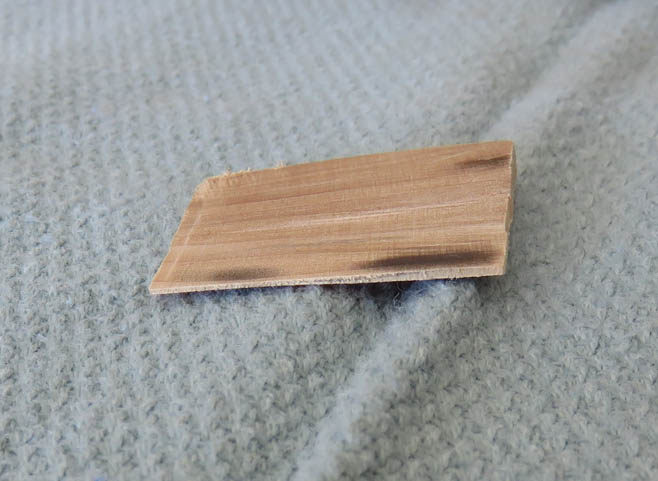 |
I glued it in and waited till the next day to work on it. Note how
thin the wedge is, you can almost see through it.
|
|
 |
Here I'm doing some final touch-up with an end mill to the step that the
lid will set on. The reason for this is because someone removed too much
material while they were sanding earlier :-[
|
|
 |
|
Final Touches
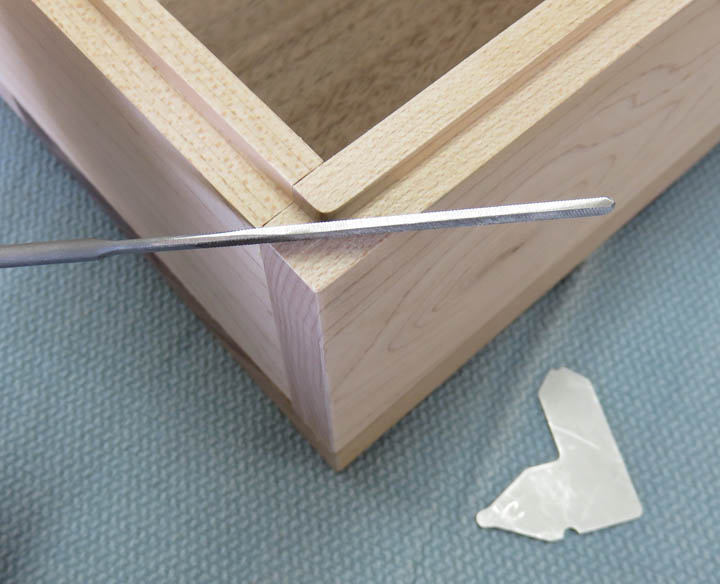
I'm rounding the sharp corners in four places so the lid will fit. The
size of the radius is 1/16 and I used a fill to produce them.
|
|
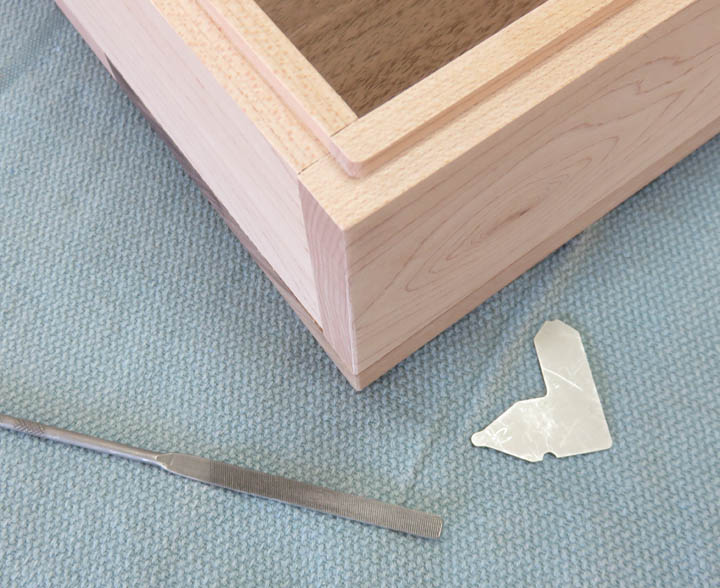 |
It might be hard to see here but I removed the teeth from one edge of the file
(with my
grinder). This is so I can lay the file flat against the surface to
produce my radius and not remove any wood from the bottom surface.
|
|
 |
|
1
2
3
4
5
6
7 |