|
Main Rotor Nut Clock Continued
Here is what it looks like with it installed in the pocket.
|
|
 |
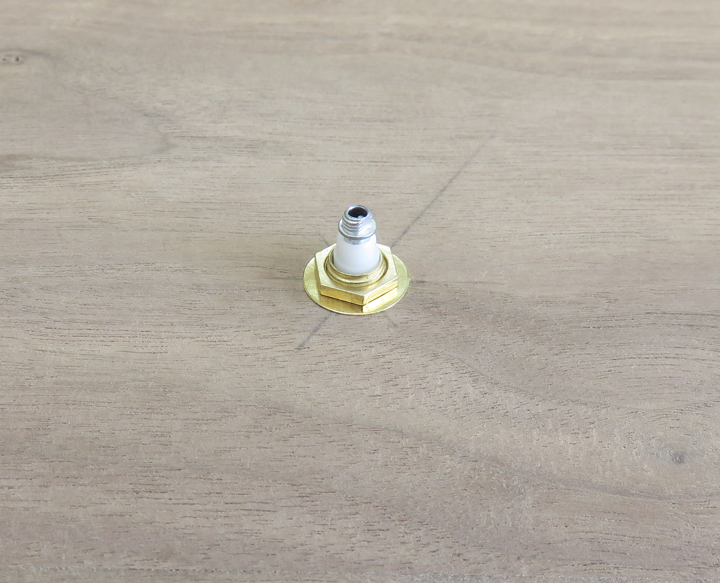
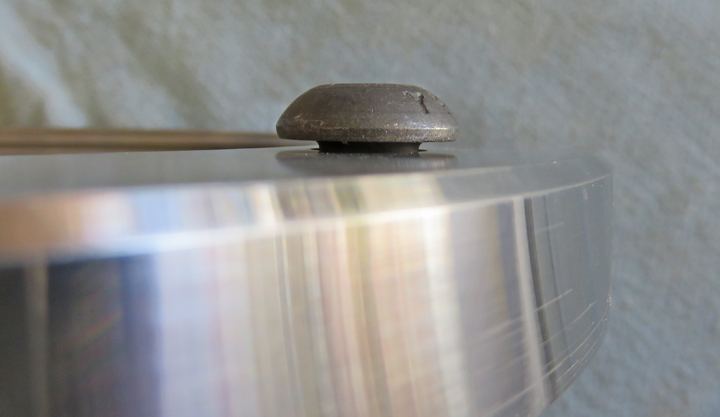
This is all that sticks out of the
surface, which is perfect. The pencil lines are the middle of the
hexagon.
|
|
 |
|
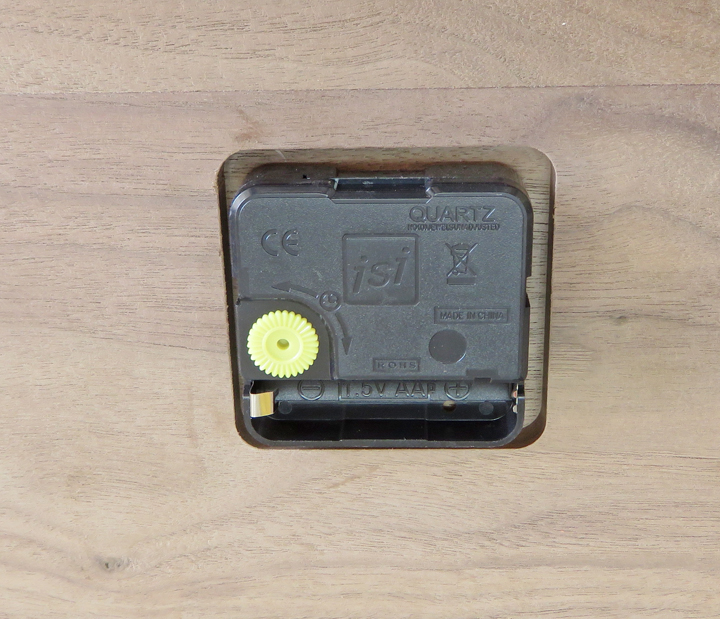
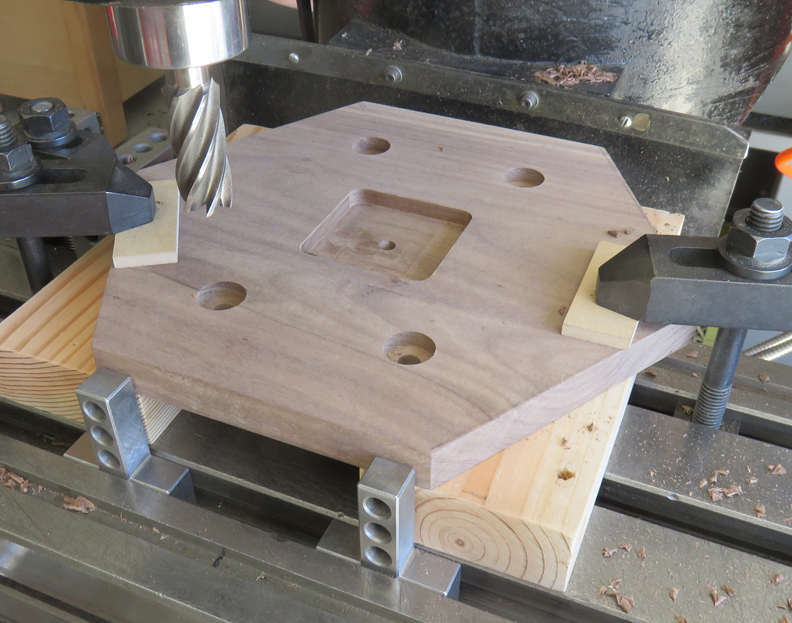
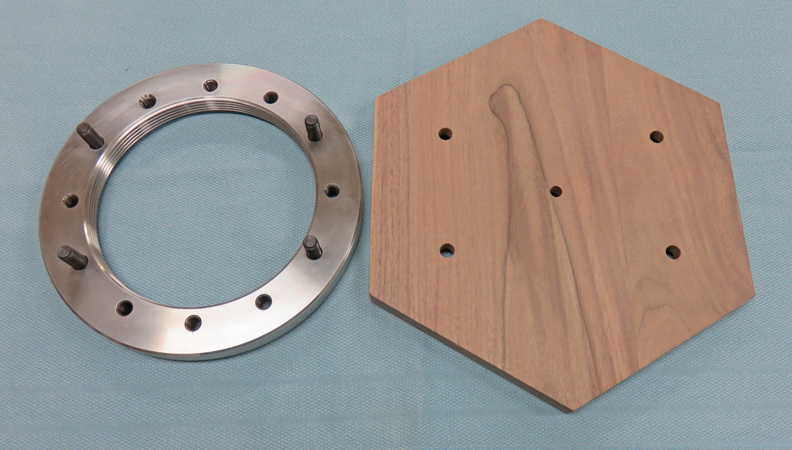
Now that the clock movement fits, it's time to mount the
main rotor nut to the wood. What I'm going to do is use four of the 12
holes for mounting. And those four bolts will be 1 1/2" long, but the
rest of them will only be 1/2" long. What you see below is a counterbore
for some 3/8" nuts and washers that will attach to those four longer
bolts.
|
|
 |
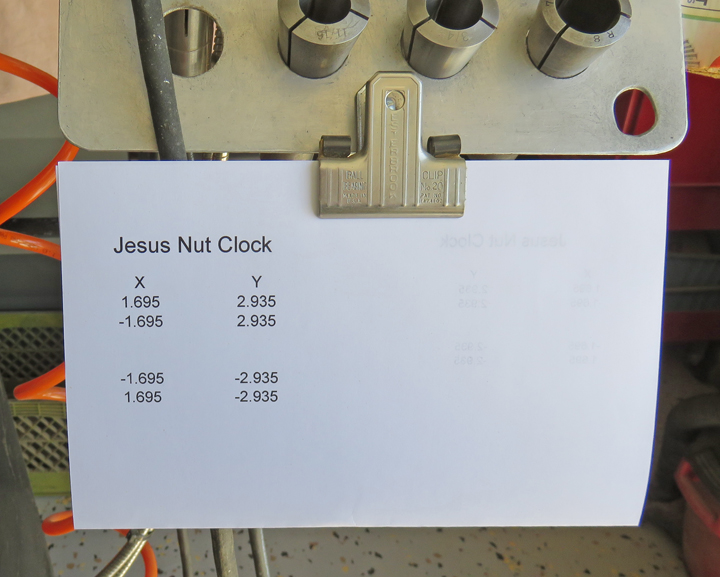
This is my cheat sheet for the hole locations. Once my center is found, I
just dial to these coordinates and drill my holes.
|
|
 |
|
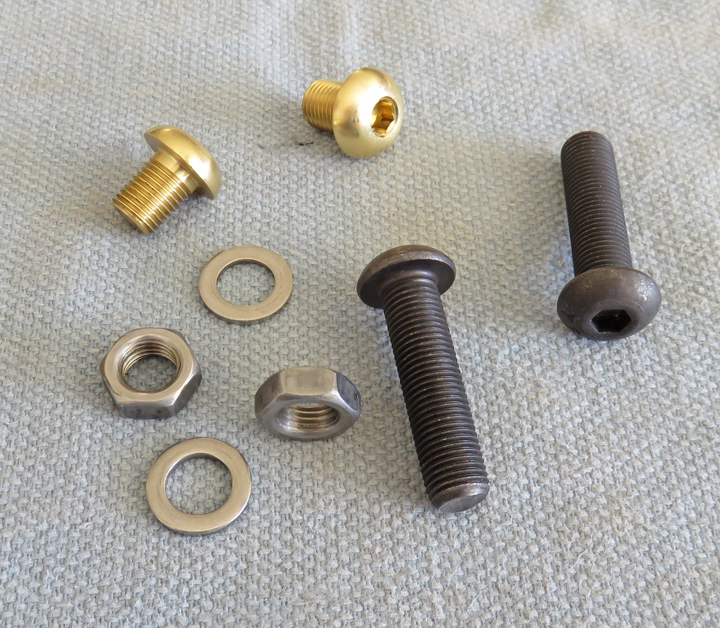
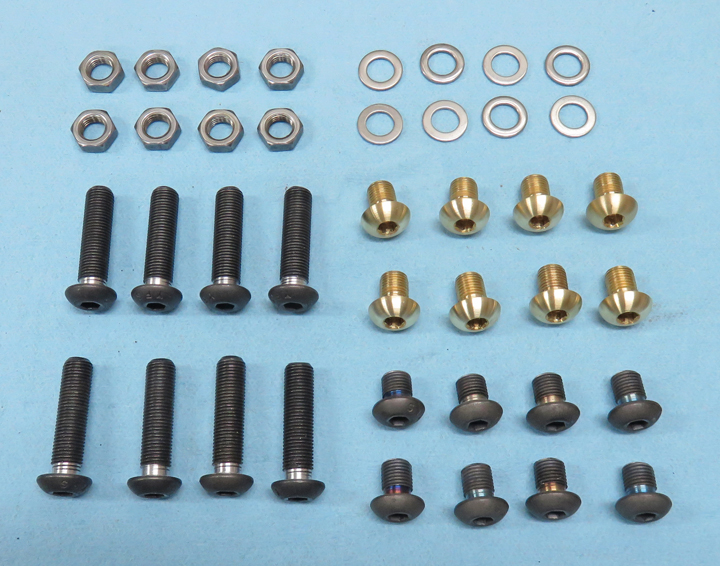
Here is some of the hardware that I'll be using. I
bought eight button head cap screws made out of brass that were 1/2"
long (four for each clock) and two packs of 10 socket head cap screws X
1 1/2 that were black oxide coated for the remainder. I also
bought some thin 3/8-24 nuts to match my longer bolts. I'll only be
using eight 1 1/2" long bolts (four for each clock), which will be used
for mounting the main rotor nut to the woods surface. However, I'll
still need 16 of the black bolts that are short (like the brass ones) for the
remainder, but I'll cut those to length.
|
|
 |
Here is what the bolt looks like once I tightened it down. Well this
won't do because it needs to sit flush to the surface, so I'll to do some machining to the bolts.
|
|
 |
|
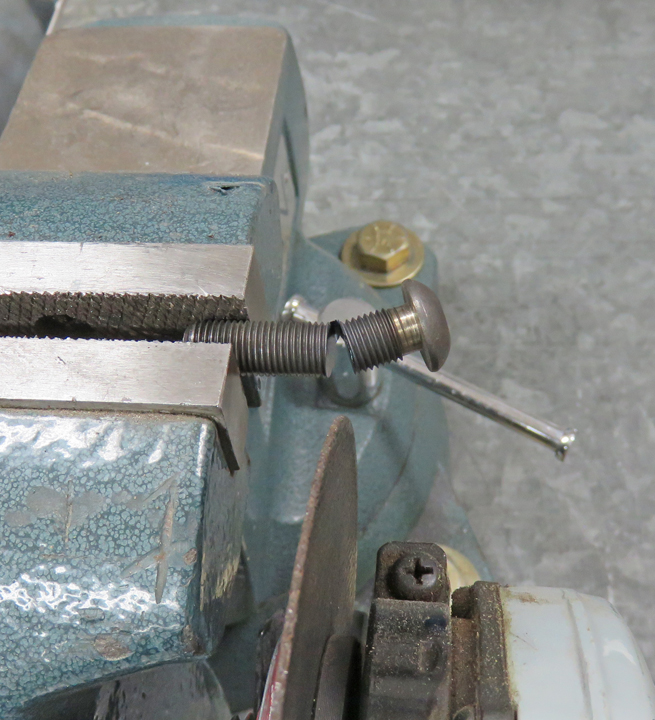
I made a bolt turning fixture out of an old brake
booster pushrod that went to my 33 Ford. This piece of steel (orange)
has shallow threads on one end for the 1/2" long bolts, and a much
deeper thread on the other end for the longer bolts.
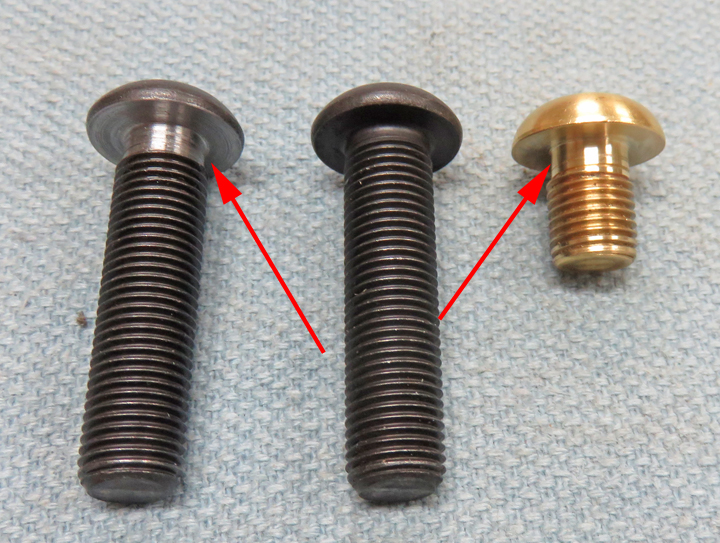
I'm using a parting tool to machine a thread relief in
each bolt so the head will sit flush with the surface of the rotor nut.
|
|
 |
The arrows are pointing to the machined areas, which didn't take that
long to do. Now each bolt goes all the way down and sits against the
surface.
|
|
 |
After the machine work was done, I cut each bolt with a cut-off wheel
and deburred them all with my belt sander.
|
|
 |
Here are all the fasteners that I'll be using. And while I was machining
the brass bolts, I gave each one a quick sanding with some 180 grit
paper.
|
|
 |
Here you can see the four longer bolts threaded into the rotor nut. These will
pass through the wood piece and will be held in place with a washer and
those thin nuts.
|
 |
|
1
2
3
4
5 |