|
This will be my second attempt at making a bandsaw box,
with the
first one going to my
daughter Angela for Christmas last year. This type of box requires a
bunch of sanding because there are many steps along the way. Now this
box will be going in our kitchen and will be primarily for my wife to
keep packets of tea in.
Working With Wood
I'll be using four species of wood for this project. In
fact, these will be almost the same as the
two fruit bowls that I
made in January of 2022. The reason is so they'll match each other in
our house. The species of wood are maple, alder, mahogany and black
walnut. The only difference for this project is I'm using mahogany in
place of cherry that I used on the fruit bowl. Why? Because I couldn't
find any cherry at
Reel Lumber the day I was
buying my wood.
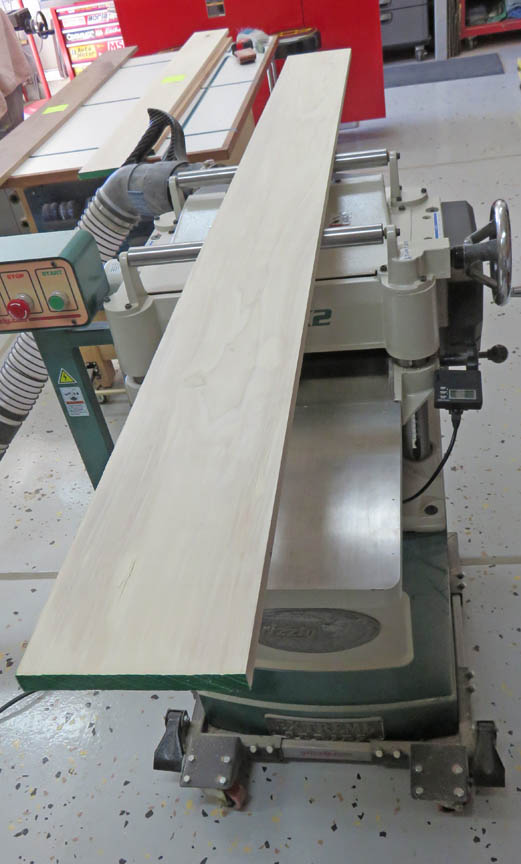
The first thing I did was use my planer on all the long
pieces. This works out pretty good because I normally have leftover
material and I label each piece letting me know it's been planned for
future items I might make.
Now the height of this box will be 14 1/2" tall by 5
3/4" wide, and will have three drawers in it. The overall height was
determined by the tea packet size which is, 3" tall X 2 1/2" wide. I had
to make sure I had enough material after cutting out each drawer which
dictated my box height.
|
|
 |
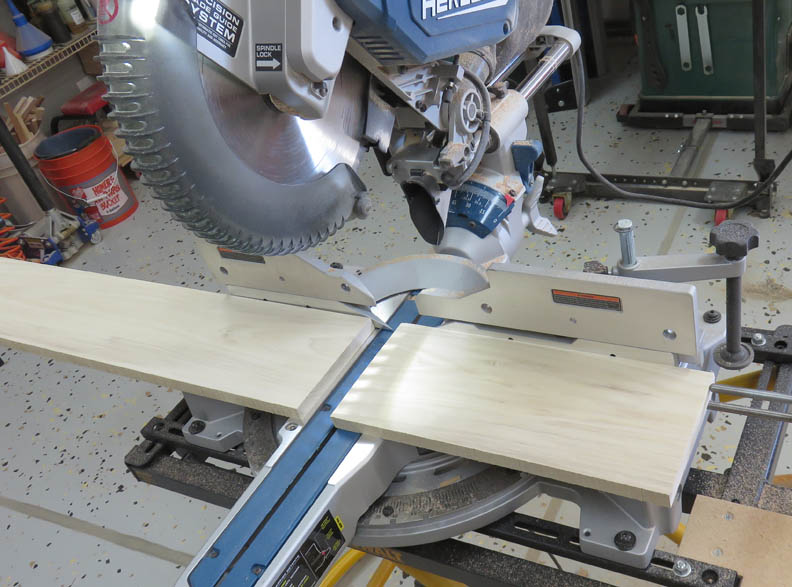
Here I'm cutting each piece to 15 1/2
long, giving me a little extra material for my glue-up.
|
|
 |
|
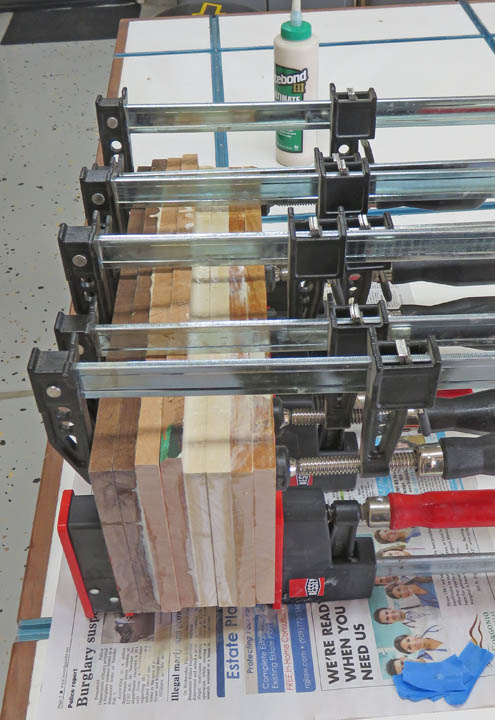
Here are all my pieces rough sanded and ready to be
glued together. However, this gluing process is going to consist of two
parts: first I'll only glue each piece of the same species together;
e.g. both black walnut pieces together, both maple pieces, etc.
|
|
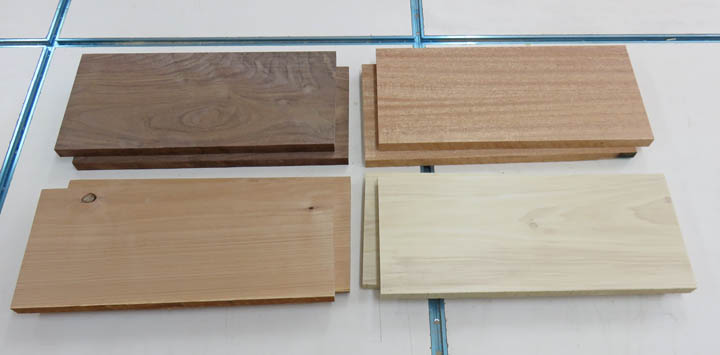 |
I know it looks like everything is glued as one big block but it's not.
|
|
 |
Next I wanted all my glued pieces to measure 1 1/8" thick to make up a
finished box depth of 4 1/2". I ran all my pieces back through my planer
until I had the size I needed.
|
|
 |
Here you can see the chain of pieces coming out of my planer. The reason
they are butted against each other is to reduce the amount of snipe on
each piece.
|
|
 |
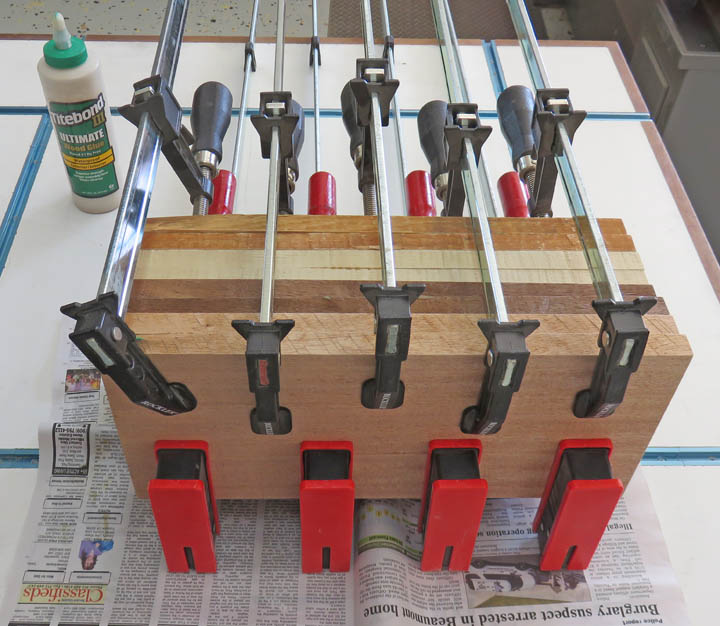
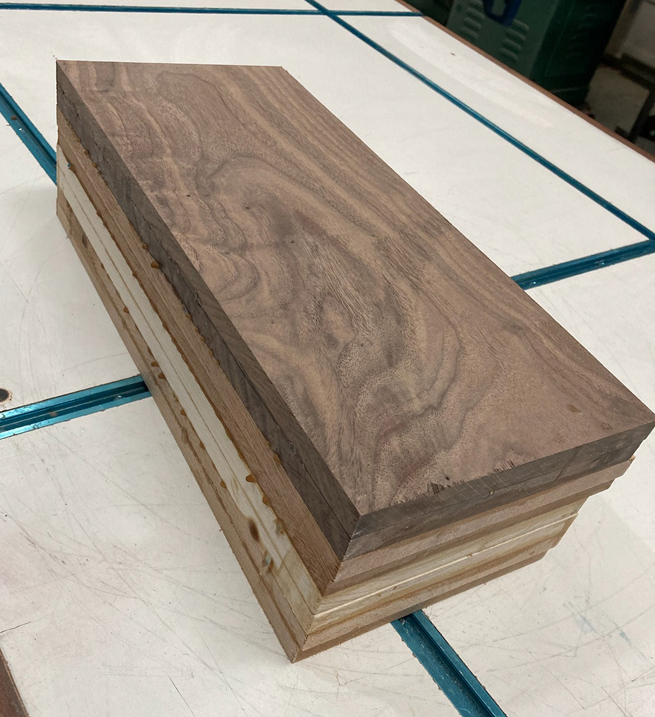
Here is step two of my glue-up. Now all the pieces are joined together
as one large block.
|
|
 |
The next day here is what I had. Now it's time to start cutting on my
bandsaw.
|
|
 |
|
Change of Plans
Before I ever printed anything out, I used a tape
measure and showed my wife just how tall the finished box would be. She
thought that would be fine so I started working.
Now originally I drew this project on my CAD system to
give me all my sizes. Once I knew what I needed size wise, I proceeded
up to this point. Then a few days later I printed out the picture that
you see to the right. However, after my wife looked at how tall it was
going to be, she didn't like it because now it was too tall. So it was
back to the drawing board to remove one of the drawers, which reduced the
overall height from 14 1/2" to roughly 11.0" now. At this point she was
happy so it's time to move ahead and get busy again.
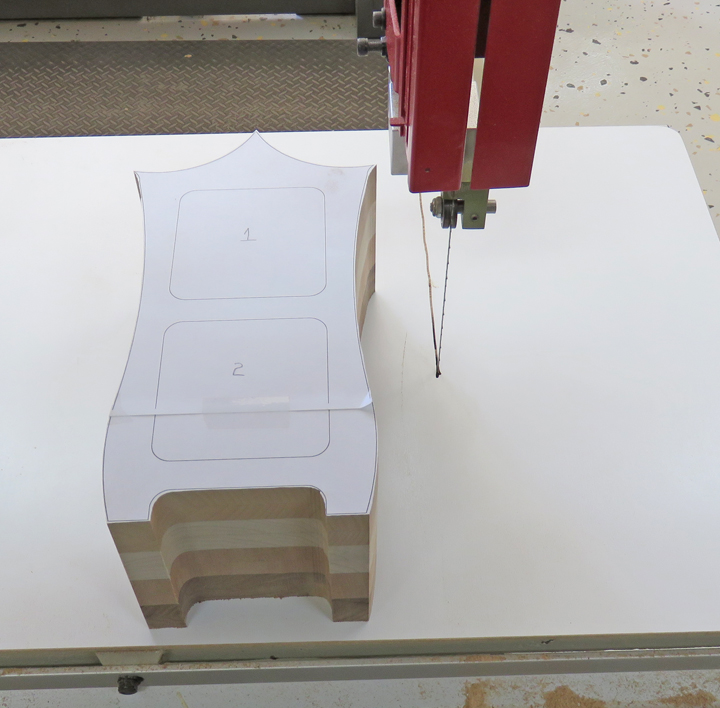
I'm using some 3M spray adhesive to attach my pattern to
my block of wood. All you need is a light coat of adhesive on the wood
surface, then place your paper template where you want it and apply some
hand pressure. A minute later you're good to go.
Notice the paper template is two pieces below. This was
necessary because printer paper is 11" long and I needed a small amount
extra at both ends. No big deal, just hold the paper up to the light,
align your lines up and tape it together before gluing it to the wood.
Also, notice I'll have some extra material now that my project is
smaller. Oh well....
|
|
 |
|
Working With Wood Again
I cut out the periphery which went pretty good for a few
of reasons. First, I'm using a different blade than last time, with this
one being a 4 tooth per inch blade compared to the other that was 14 TPI,
but both are 3/16" wide. Second, I'm using a smoother working surface so my work
piece slides easier compared to the cast iron table. Third, I'm using a
'blade stabilizer' in place of the normal blade guide rollers that came
with the saw. To learn more about these last two upgrades and
others you can check them out here,
called Bandsaw Upgrades.
|
|
 |
|
1
2
3
4
5 |