|
Cutting The Slots
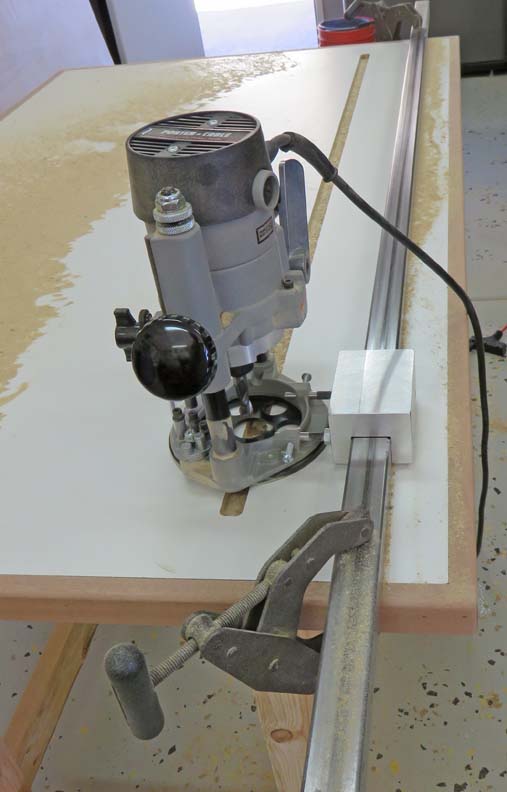
I'm cutting the slots for the T-Tracks in three steps.
This is necessary for two reasons: One, I'm using a 1/2" cutter and my
T-Track is 3/4" wide. The second reason, taking multiple cuts is much
more forgiving and is much safer. Speaking of multiple cuts, I set the
plunge router to cut about half the depth for the first pass and then
reset it the final one. I'll show you more
in a minute.
As you can see I've clamped the square tubing to my
bench top. However, I'm not able to cut the slot all the way to the ends
because of where my clamps are placed. That means I can only
cut to within about five inches of the ends (like you see below), then
I'll have to move the clamps and cut the remainder after I get this
slot to the 3/4" width first.
|
|
 |
|
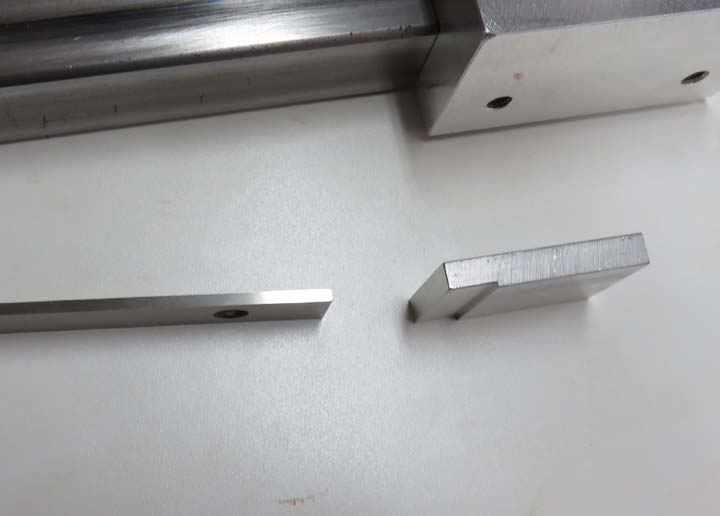
What you see below are two different size shims that I
used to end up at the 3/4" dimension. The slot that you saw above was
set with the 1/8" shim to start with. I placed this between the router
base and the aluminum block and tightened both #12 screws on the base.
This arrangement places the slot near the middle.
|
|
 |
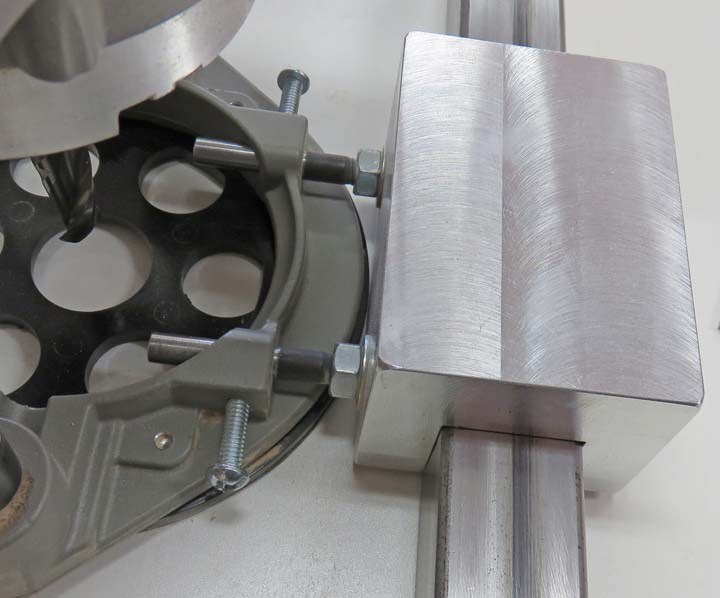
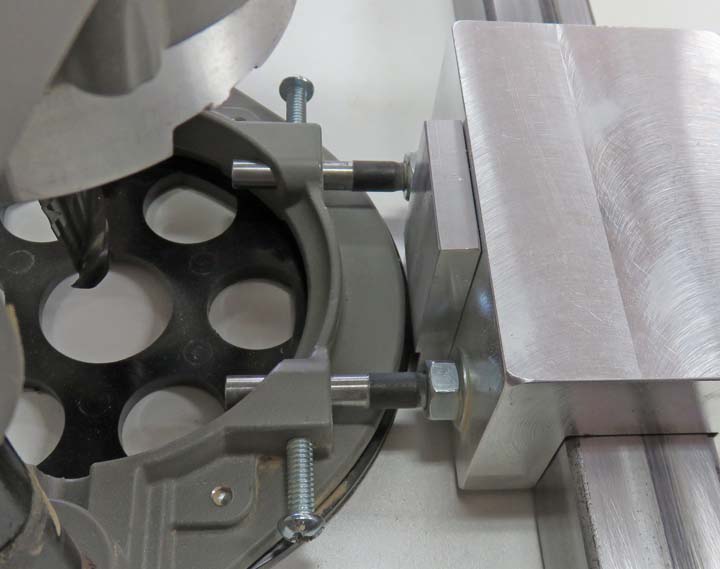
In this picture you can see the router base is against the block. This
is for the second of the three passes. And the same thing applies here,
two different depths as I move the router along the square tubing.
|
|
 |
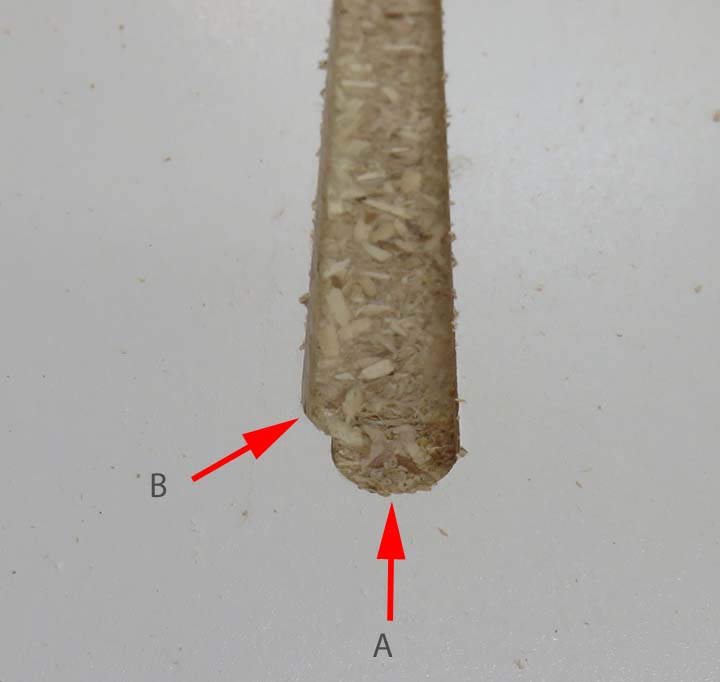
So here is what we have so far, cut A is the first cut. Cut B is my
second cut. And the last cut should end up at 3/4" wide, if I did my
math right. The depth is also finished here.
|
|
The third and final pass is set with this custom made shim. The size of
this shim is .270" because I'm using an undersize cutter. If the cutter
was exactly 1/2", I would have used a 1/4" shim here.
|
|
 |
|
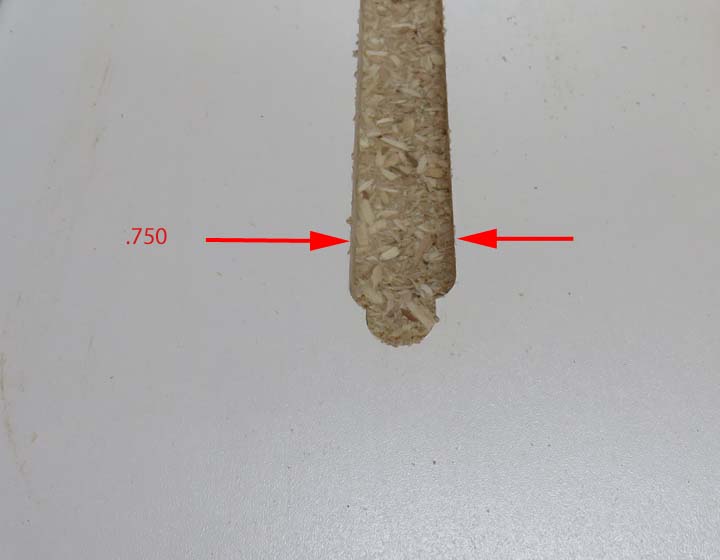
Here is what it looks like after my third pass. And my
width is exactly what I was after, as the T-track fits great and it
sits just below the surface too. At this point you should have a better
idea of how I went about all this. I did this process at four locations,
which was right over the 2 X 4 stringers on the base (four places). That was the easy
part, because now I want my last slot to be down the middle but I ran
into a snag while doing that.
|
|
 |
|
My last slot will be in the middle of the table (short
side). And to cut the slot to within five inches of the edge was the
same as before. However, for those slots I had the luxury of
repositioning my clamps a small amount and then do the last five inches
with no problems. That's not the case here because I'm in the middle of
the table now and there's no edge to move my clamps to.
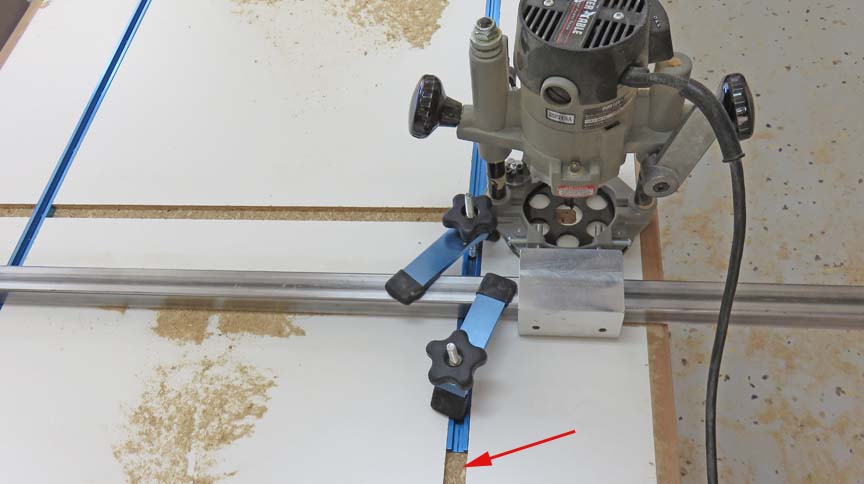
What I came up with was to install two pieces of T-Track
temporarily (arrow). That way I could use a clamp designed to work with
my T-Track to hold my square tubing like you see below. With these
clamps in place I was able to cut both ends easily. And once I was
finished with these last two cuts, I then removed the temporary T-Track.
Whatever works!
|
|
 |
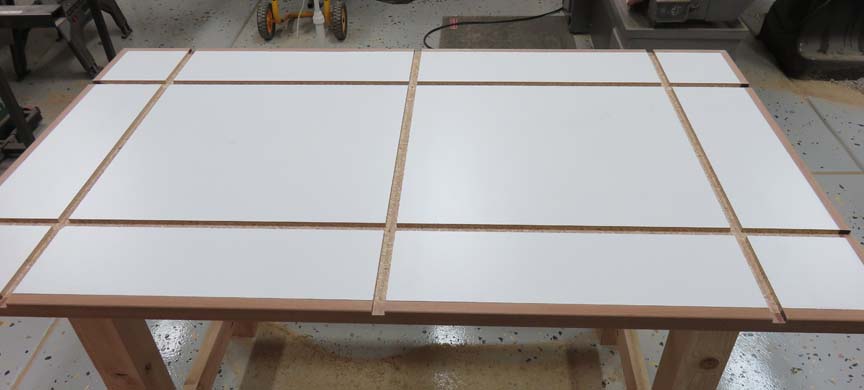
Here are all the slots for the T-track. On a side note, this made a huge
mess because I don't have dust collection built into this router. Next time
I'll use my Craftsman router because that does have provisions for dust
collection.
|
|
 |
|
Hardware
Powertec also sells intersections. These came with screws and
are cut with a 45 degree angle on them. This makes them very easy to
install.
|
|
 |
|
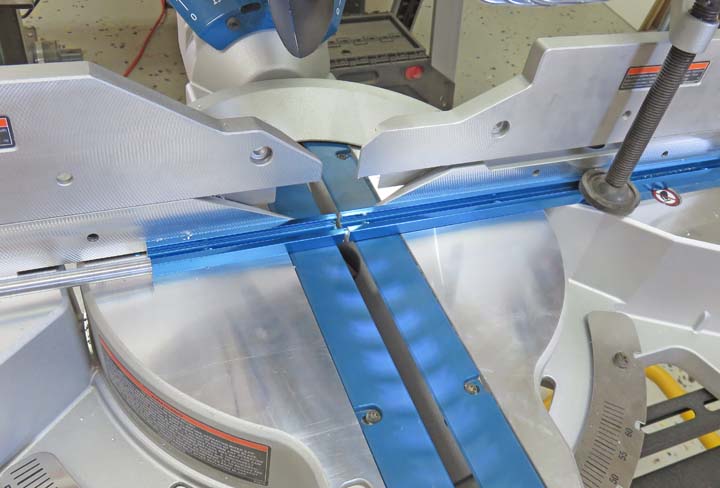
After all the intersection pieces were in place, I was
ready to cut all the remaining pieces. And to do that I cut each piece to length on my miter saw, which worked
great. Note the work stop on the left side, this helped keep each piece
the same length. Safety tip: use a fine tooth blade here and clamping it down while cutting is highly recommended.
|
|
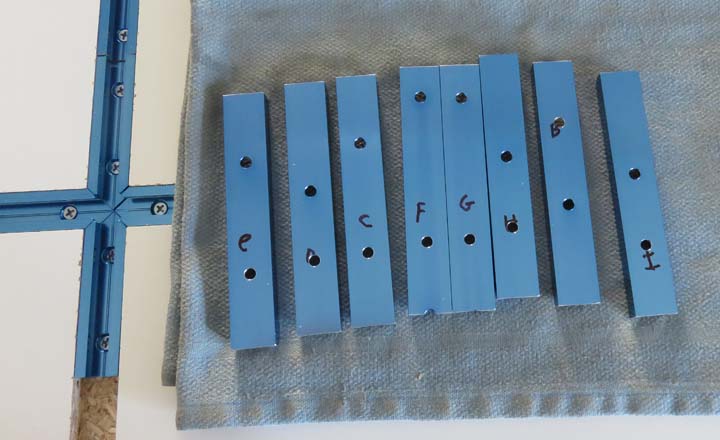
These are all the shorter end pieces and to make sure each one fit
correctly, I labeled each one and I used my milling machine to cut these to
the exact length I needed.
|
|
 |
|
1
2
3
4
5
6
7 |