|
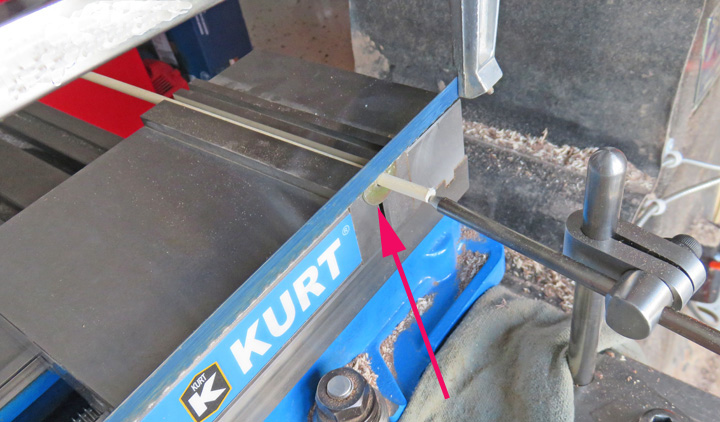
What I'm doing here is cutting some 1/4" wooden dowel pins that will be
1" long. To make sure they're all the same length I'm using my mill
stop and my vise to hold them. I'm cutting them with my hacksaw placed
against a steel washer (arrow) so the saw won't damage my vise.
|
|
|
|
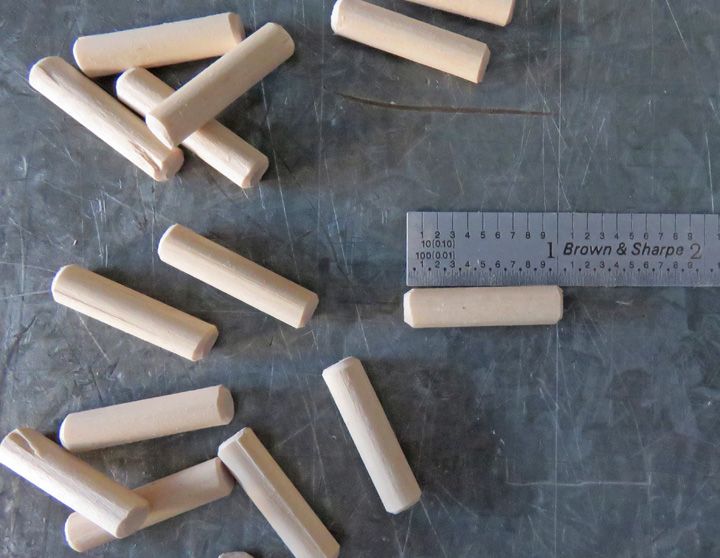
I chamfered both ends on my belt sander and now
they're ready to use.
|
|
 |
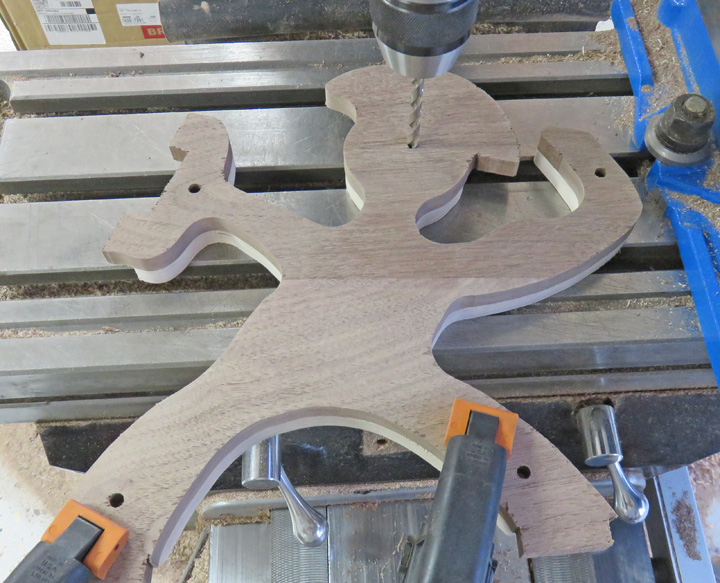
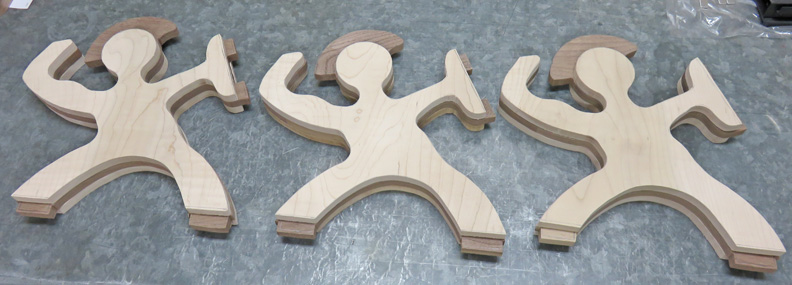
| Here you can see two of the three pieces that will be
glued together like a sandwich later on. But before I can do that I'll need
to sand the periphery while they're together so everything lines up. The plan is to use the
1/4" dowels in the holes that you see here. Using clamps to keep them
together, I drilled one hole, placed a dowel in that hole, and then
moved over to the next position, and repeat.
Once all five holes were drilled in the two pieces, I removed all the
dowels, placed the center of the sandwich over the piece that wasn't
drilled yet, clamped those pieces together and used the drilled holes as a drill guide like you see below. This worked out very well
and everything lined up good.
|
|
 |
|
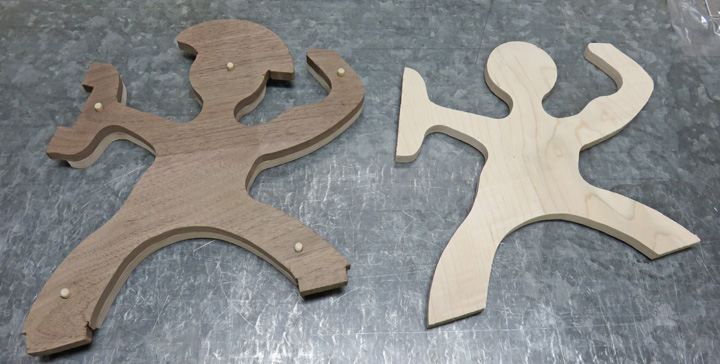
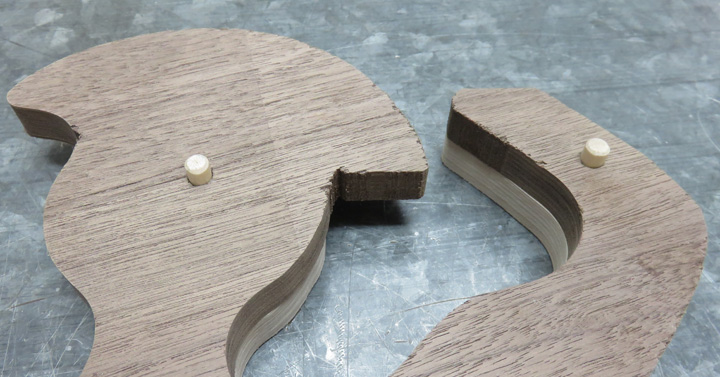
Here is one set all drilled with the dowels in place. I only drilled
halfway through the outside pieces so the holes won't show once I'm
finished.
|
|
 |
|
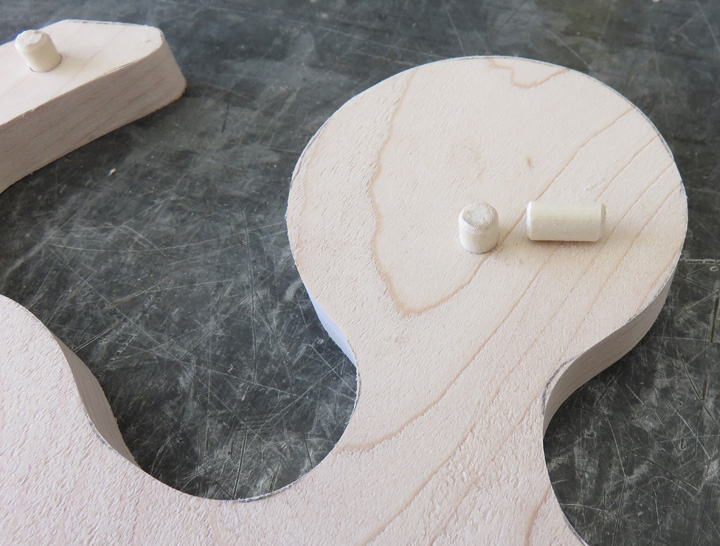
Here is a close-up of the dowels to give you an idea of what I'm doing.
Also notice the right side of the guys head that hasn't been sanded yet.
I'll be dealing with that area next.
|
|
 |
This was a lot of work up to this point but it's also been a lot of fun
too. Speaking of fun, the cool part of making a new project (for me) is figuring out what I need to do next, or how
I'm going to make that, gotta do this part before I can do that ...all part the project making
process as it keeps me thinking.
|
|
 |
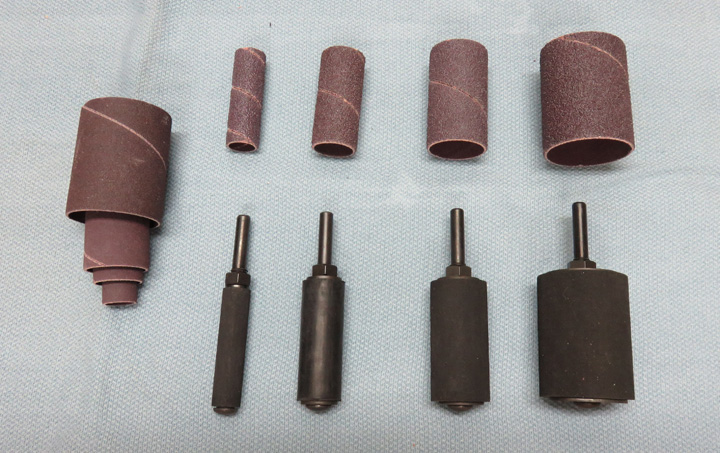
I bought a sanding drum kit online and this should work for sanding the
periphery of the little men. The men (stacked together) are 1 1/2" thick and the new sanding
drums are 2" long. The first sanding drum I used was 1 1/2" long (when I
worked on the individual pieces earlier), not exactly ideal for what I'm
doing here so this is why I bought the longer ones. The sizes are 1/2",
3/4", 1" and 1 1/2" diameters. The kit also came with two sets of drums,
each with a different grit. To make sure I didn't run out of sanding
drums, I also bought a few extras (not shown).
|
|
 |
|
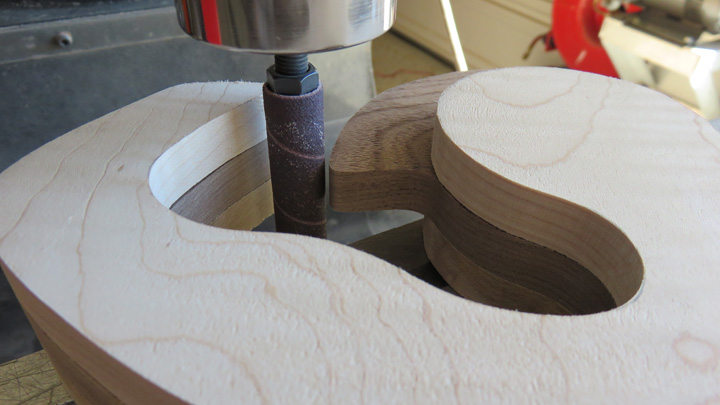
I put my sandwich together, along with the five dowels, placed my
sanding drum next to and just below my mill table and started sanding
the perimeter like I did before. I'm using the 1/2" drum here which
worked great for this small narrow area. I used the 1" diameter drum for
everything else.
Notice the radius to the right of the
sanding drum next to his head. If you go back and look three pictures
above, you'll see that area was just a saw-cut (no radius) before using this sanding
drum. I used the same RPM as before, 1800.
|
|
 |
After sanding the perimeter, I had an area that I couldn't sand around
because the center of the sandwich was in place. I ended up with a small step
on the guys head which needed to be sanded away (both sides).
|
|
 |
In order to sand just the outside pieces of the sandwich, I cut some new
dowels 1/2" long to keep the two pieces aligned. This worked out great
and I was able to remove and blend the step so it looks like it was
never there.
|
|
 |
|
1
2
3
4
5
6
7
8
9
10
11
12
13
14 |