|
Here is what it looks like when the rivet has been
squeezed all the way. I should have done this the first time
because it was much easier like this.
Again...live and learn.
|
|
 |
|
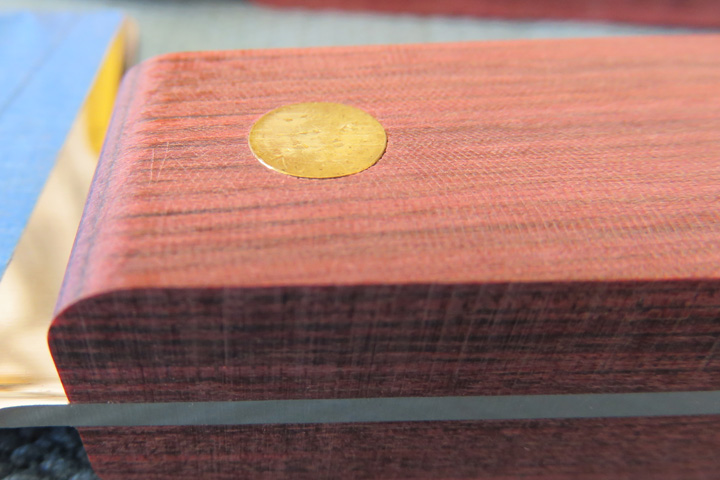
I still had a small amount of squeeze-out with the
epoxy which will need to be removed.
|
|
 |
|
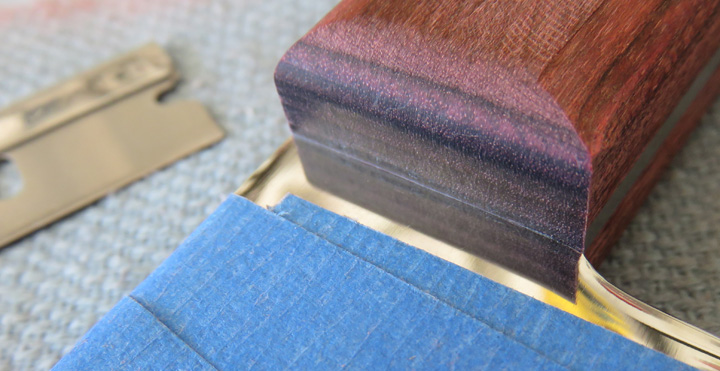
I used a razorblade for this operation which worked out
great. I worked the blade straight down towards the blade first, then
towards the handle, working a small section at a time. I then worked the
blade straight down again removing small pieces until it was gone. Now
it's time to hand sand all the sharp corners and end with 320 grit
paper.
I placed more tape around the blade and against the
handle before I started sanding. I also used a file to help form a
radius between the front and side of the handle that is right next to
the blade. The file removed material faster than using sandpaper only
and was easier to control. After the file I came back with paper and
blended everything.
|
|
 |
|
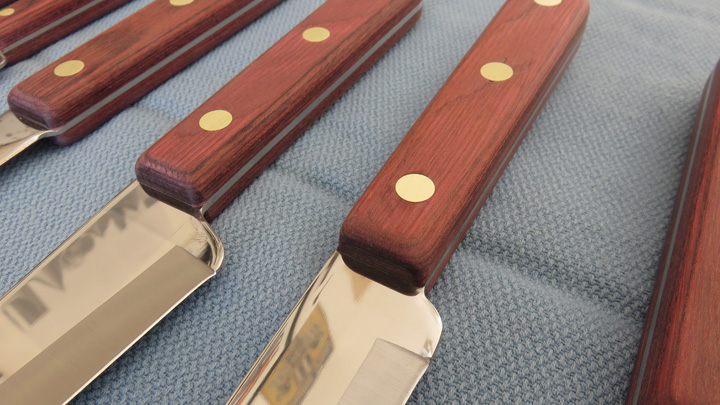
After many hours of work, here are the finished knives.
I'm pretty happy with them so far but I may put some mineral oil on the
handles later. Speaking of the handles, I made each one a different thickness
relative to the blade size:
| Type |
Handle Thickness |
| |
|
| Paring |
.570 |
| Utility |
.600 |
| Fillet |
.625 or 5/8" |
| Sm Chef |
.650 |
| Carver |
.730 |
| Chef |
.750 or 3/4" |
|
|
 |
To see what it would look like, I used a scrap piece of material,
applied some mineral oil and it looked pretty good but it did make the
color a little darker by one or two shades. No big deal because that
made it look that much richer to me. If I do use the mineral oil, I'll
talk about.
|
|
 |
|
Last Piece of the Puzzle
I bought this sharpening steel online thinking that it
would work for my project. Turns out it's not made very well but you get
what you pay for...right? Now a sharpening steel happens to be a big
part of this knife holder so hang in there and
you'll soon see why.
|
|
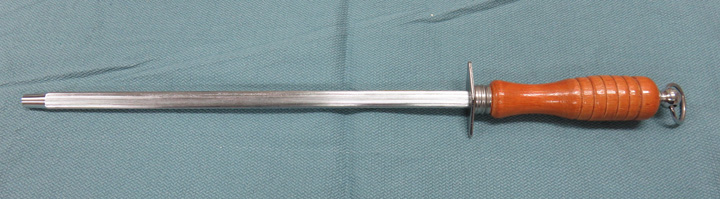 |
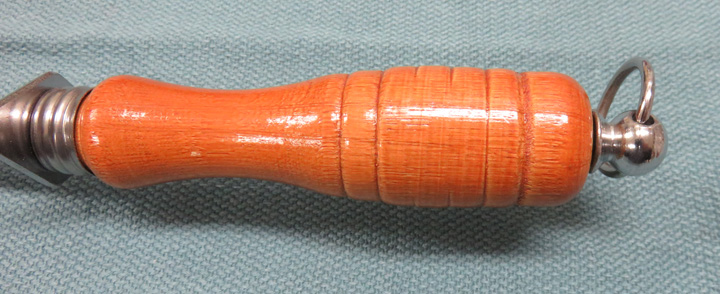
There are many things wrong with this piece, and the first one being the
handle. Some of the grooves are missing from one side because the handle
was off-center when the factory sanded it. Yes I could use it as is but I still have some
time before the big day so why not improve on what I have.
|
|
 |
|
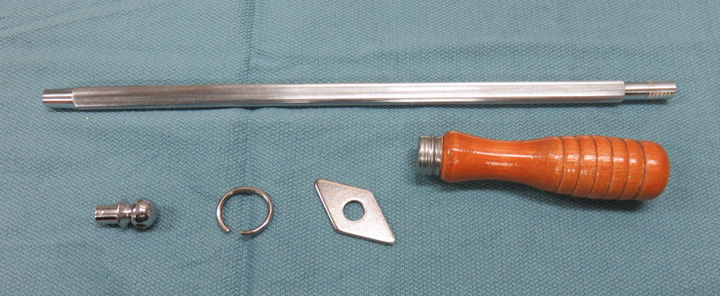
This sharpening steel consists of six pieces but I couldn't get the ring
off the handle without damaging it. What I plan on doing is
making a new handle but I think I'll keep the other four pieces. I'm not sure
how I'm going to make this handle yet but it looks like I'll need to use
a lathe and that means I'll need to use a machine at my work.
I know that I
said this entire project would be made at home but this was
unforeseen. On the other hand there are many choices of sharpening
steels on the market which means this step isn't a necessity. I'm making
a handle so everything matches but this project would still work and
look great without remaking the handle.
Speaking of
a lathe, I'd really like to have one of my own someday which would
complement my milling machine. Soon!!
|
|
 |
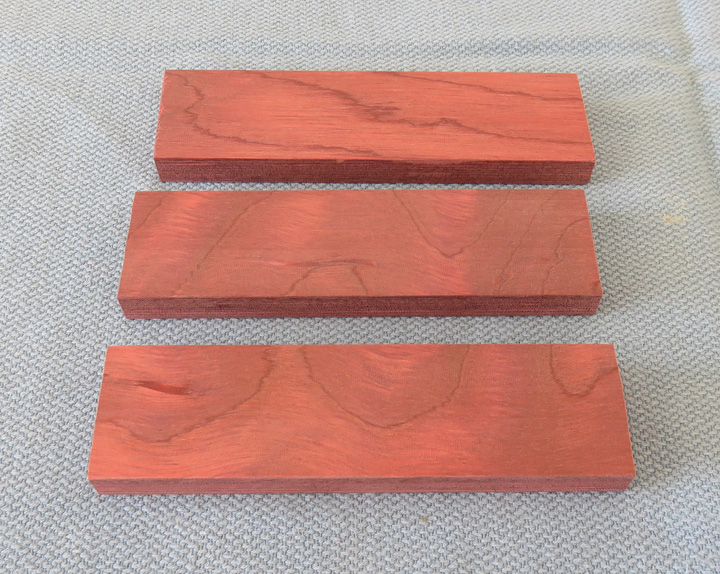
Before I get started on the handle, I measured the one that came with
this sharpening steel along with my
daughters as well. I really like the design of Tracey's so I
think I'll try making one like hers. Either way I'll need to glue three
pieces together to make one so I cut these from one of the blocks I had
leftover and milled the sides and tops like I did the knife handles. Now it's time to use more epoxy.
|
|
 |
|
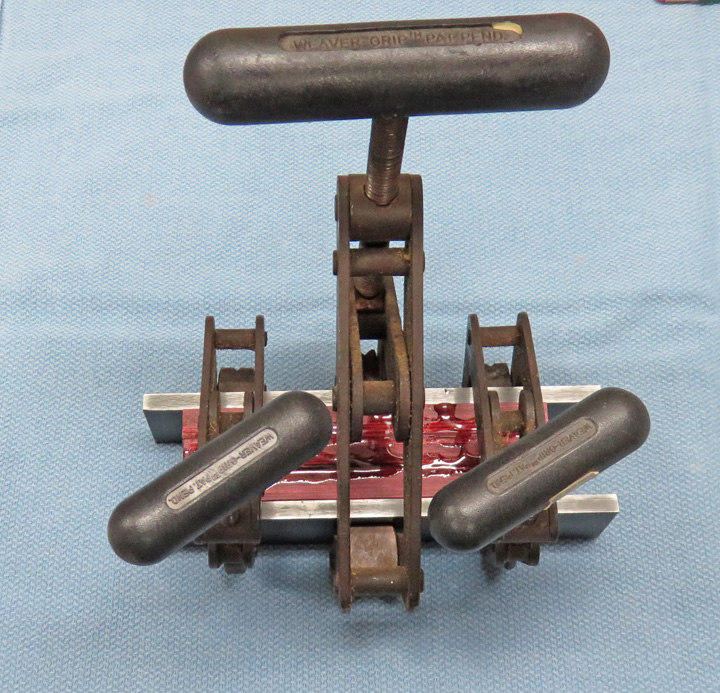
I've found out over the years that it's very important to
distribute the camping force evenly and to do this I'm using some 1/4"
machinist parallels. These are made out of steel, however, you could use wood
or aluminum
just as well. I have many
different sizes of parallels so it just seemed natural. In other
words, whatever works for you.
|
|
 |
|
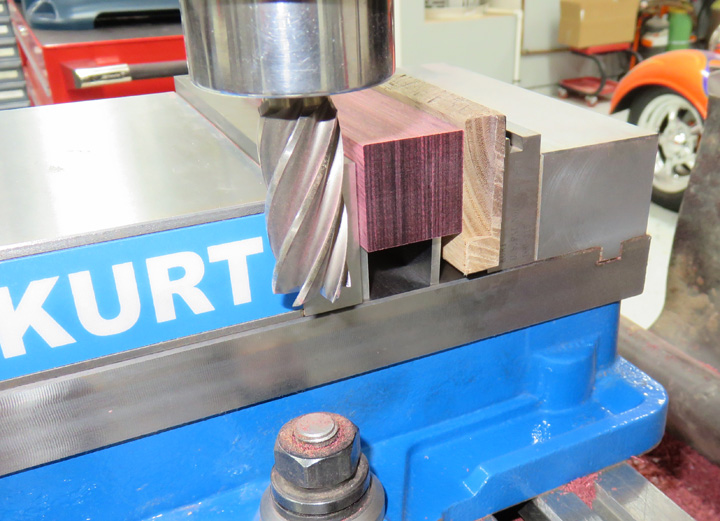
I cleaned up the block on all six sides making sure it
was
square and parallel. Here I'm cleaning up the ends and note the scrap
piece of wood against the solid jaw. Again this helps prevent chipping
the end of your work piece because even though this material is man
made, it still has a grain to it like wood has.
|
 |
|
1
2
3
4
5
6
7
8
9
10
11
12
13
14 |