|
What you see below is what's left of my old flag pole.
I've had this for about five years now and every year I have to fix or
repair it because of wind damage. BTW, my flag only lasts one year
before it has to be replaced because it gets shredded by the wind. This
old flag pole is made out of thin aluminum tubing and I've reinforced it
a few times over the years. But after I found the flag laying on the
ground during a windy day recently.
This two piece pole screws together but after years of
abuse from buffeting in the wind, the male threads are gone from one
piece. That figures because both threads were made out of plastic. And
I've had to make one half of the base because it broke in two pieces
some time ago. Well enough is enough so it's time to make a new one.
|
|
 |
|
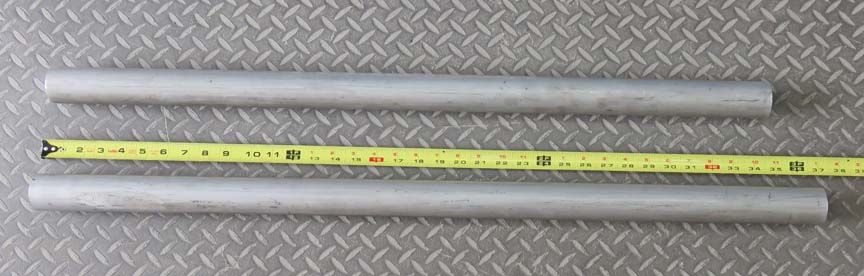
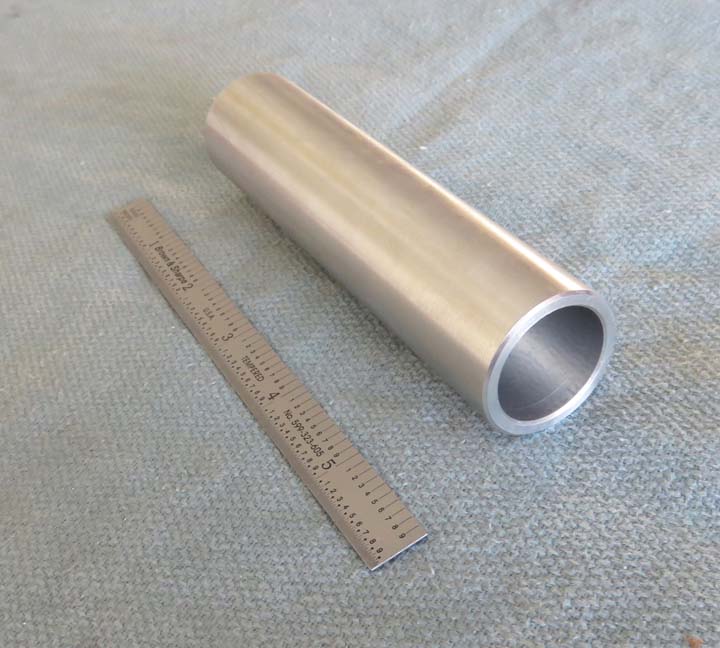
Big Aluminum Tubing
The material for my new one is still going go be
aluminum, but it will be much stronger. The old one was one inch in
diameter with a .020" wall thickness. However, my new one is 1 3/4"
diameter with a 1/4" wall thickness. Yes... I know it's overkill, but
that's how it goes when things break, you make the next one like a tank.
This one will have a two piece pole just like my old
one, but I'm not going to thread them together, I'll be using screws
instead.
|
|
 |
|
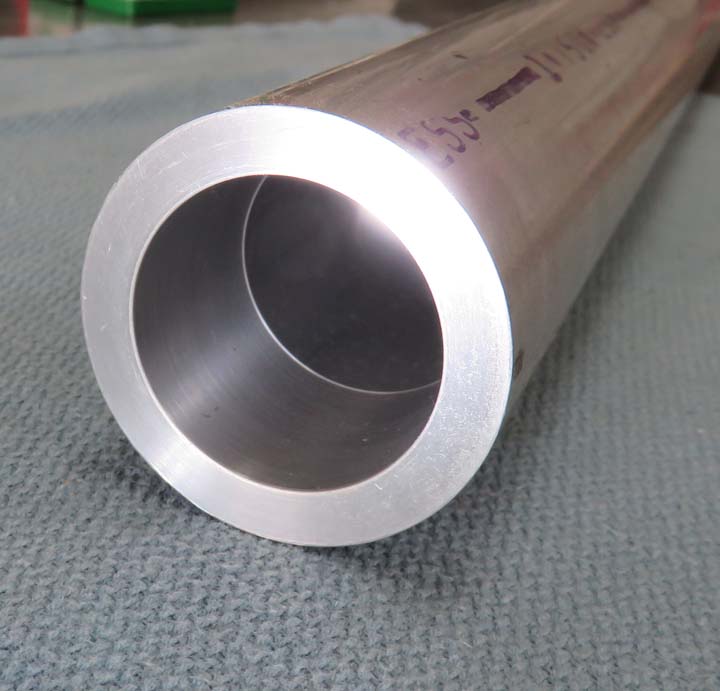
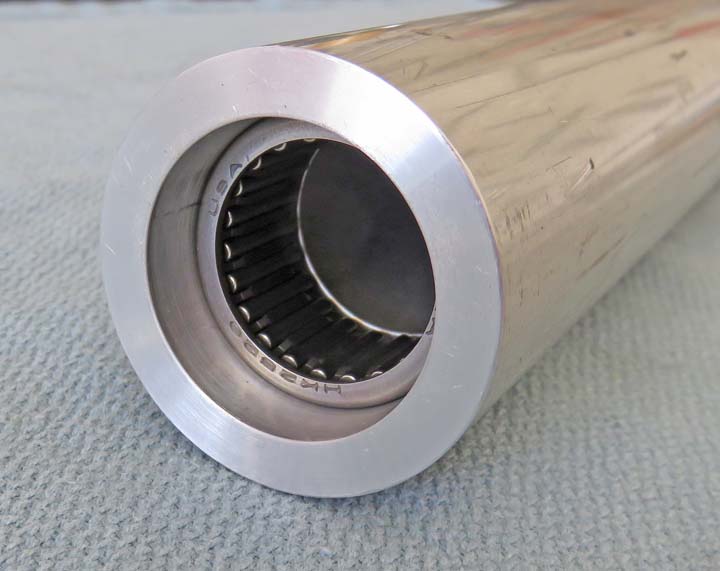
Now that's what I'm talk'n about....check out the wall
thickness of this tube. And I'm pretty sure the wind won't bend this
one. What I'm going to do is put bearings at both end of the upper
piece. The area that I machined below is where the bearings will go,
which I did on both ends. The reason for the bearings is so the flag pole
will rotate with the wind. This helps keep the flag from wrapping around
the pole.
|
|
 |
|
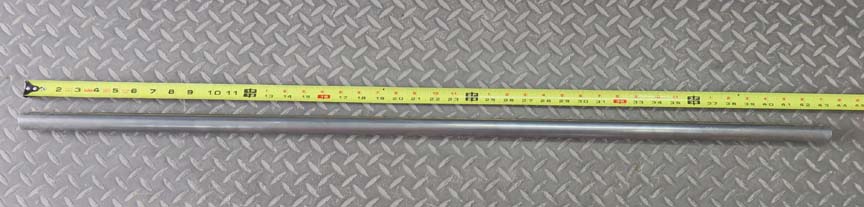
Steel Tubing The piece below will be placed through the upper pole,
pivot on the bearings and is made out of steel. I thought about using
aluminum for this piece but steel is much stronger. This piece has a one inch
outside diameter with a wall thickness of 1/8". Again, I've over
engineered things but I don't think it will break when I'm done either.
|
|
 |
|
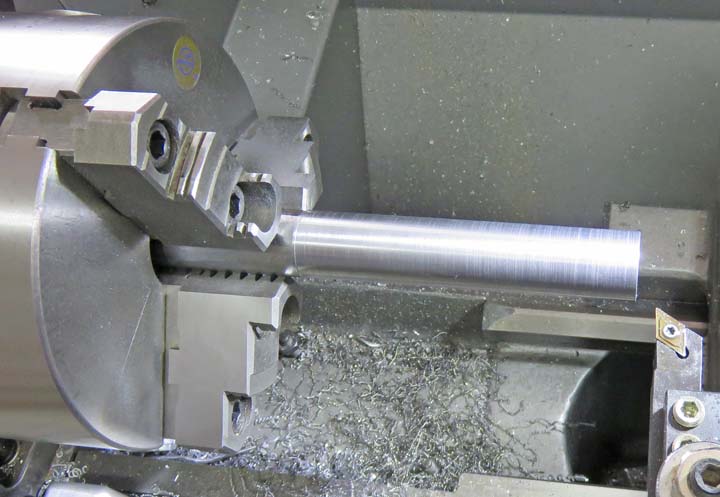
Machining I'm turning both ends of the steel
tubing so it will pass
through the bearings. BTW, I'm using metric bearings because the inside
diameter of the aluminum tubing is 1 1/4". So by using a metric bearing
that is slightly larger than the inside of the tube and slightly smaller than
the steel tube, I'm in business.
|
|
 |
I also bought a rubber seal that will go next to the top bearing to help
keep the water out. This is also a metric size.
|
|
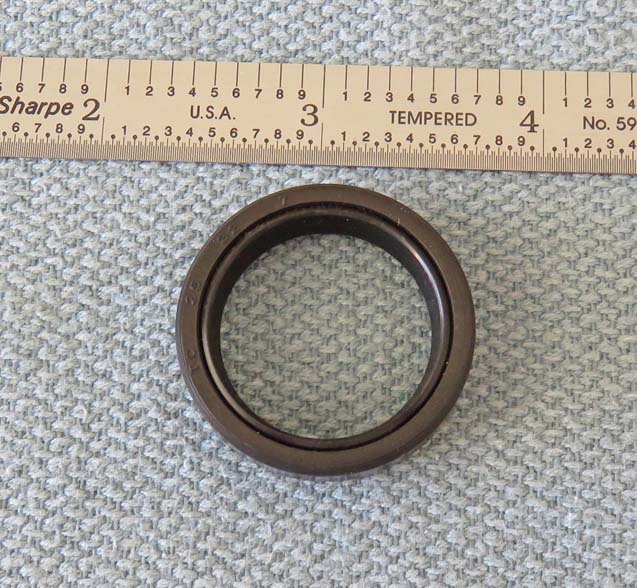 |
This is what I had in mind for the bearing and seal.
|
|
 |
The seal will sit just below the surface once it's in place. And here
you can see the needle roller bearing that I'll be using. The size of
the bearing is 32mm X 25mm X 20mm long.
|
|
 |
|
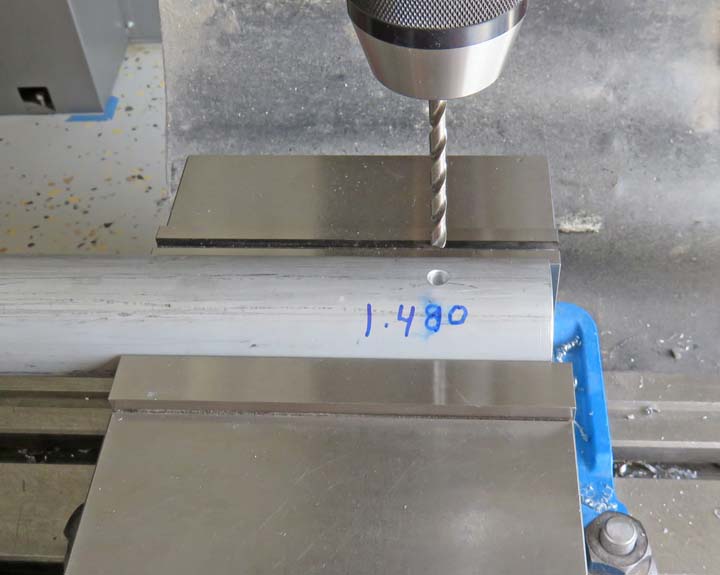
The way I plan to hold the two poles together is with
this aluminum sleeve I made along with some screws. This piece fits inside the
larger tubing and is 1 1/4" outside diameter (O.D.) X .985" inside diameter (I.D.).
This odd size for the I.D. is so the steel tubing (that I machined) will
side through this piece.
|
|
 |
Here I'm drilling a screw hole for a 1/4-20 flathead screw. One side of
this tube will
have clearance for the screw (below) but the opposite wall will have the
threads.
|
|
 |
|
1
2
3
4
5
6
7 |