|
Glock 17 Continued
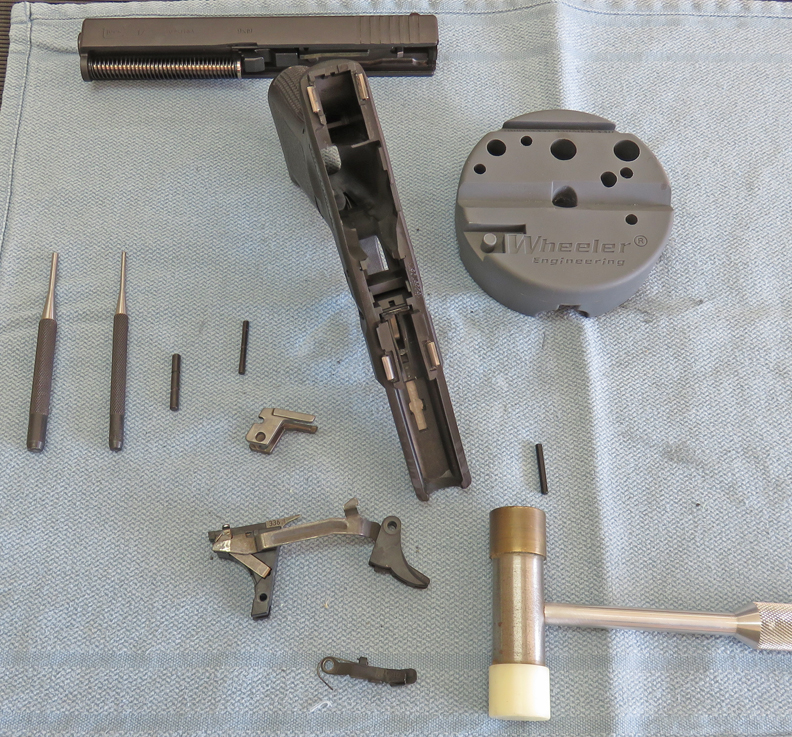
Now it's time to remove the trigger assembly to change
out the connector bar, which means almost everything has to come out. To
remove the three pins I used two different size punches with the frame
resting on that Wheeler universal bench block. This round block is made
out of urethane so it doesn't harm your weapon as your working on it.
And as you can see I have the frame stripped of almost every part.
Now this is the first time I've ever done this but it's
really not that hard to do. The key here is to take your time, going
slowly and being careful. See that assembly at the bottom with the trigger
attached? That's the piece I'll be dealing with next.
|
|
 |
|
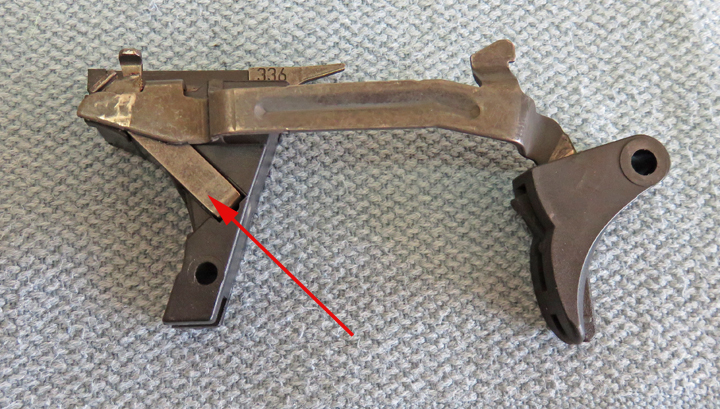
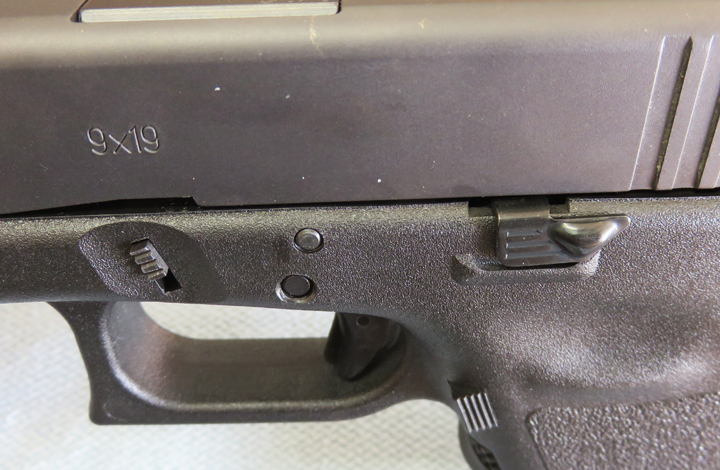
To lighten the trigger pull on a Glock you'll need to
remove and replace this piece (arrow). That part is called a Connector
Bar. If you look close you can see it has a lip at the top and there's a mating part that
rides against it. Keep this in mind.
|
|
 |
|
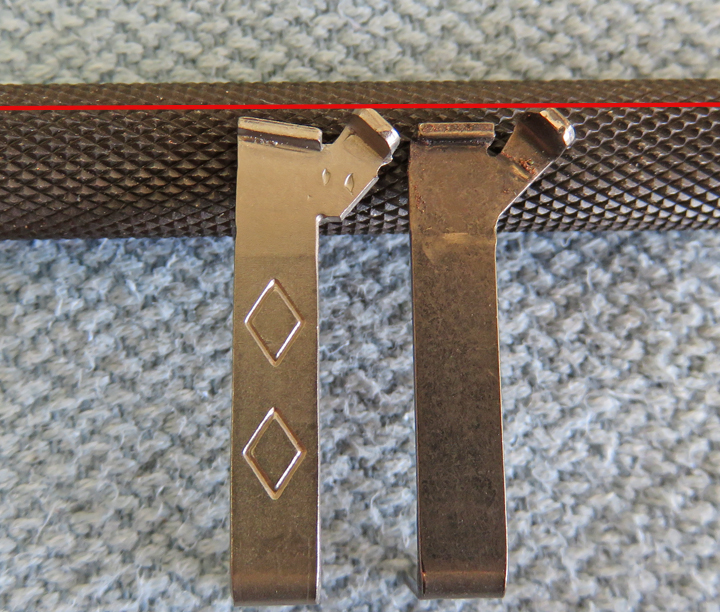
The new connector is on the left and as you can see the only difference
is the angle at the top. Well, that angle makes the difference between
over five pounds vs three and a half. Now this is new to me because I'm
use to a sear engagement type of mechanism. And those have two parts
that slide against each other that are under spring pressure. But this
type of gun is called a Striker Fire and as you can
see they are very different because they don't have as many moving
parts.
|
|
 |
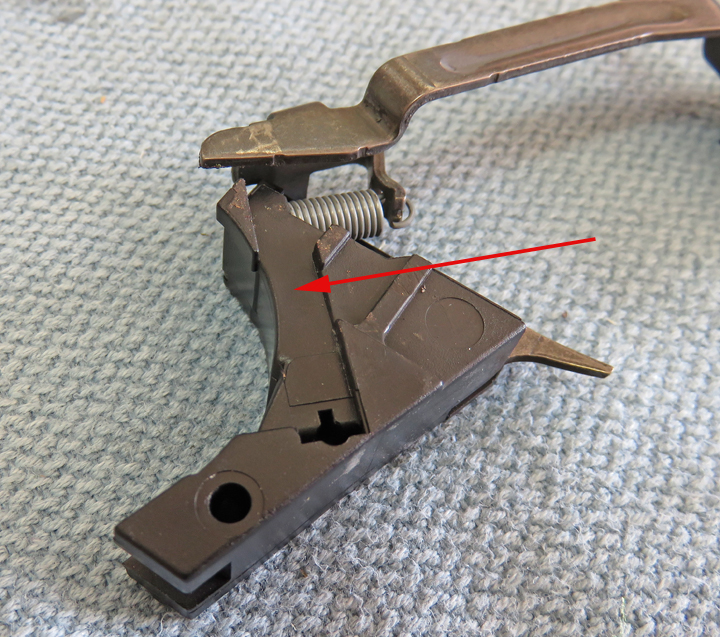
That slot where the arrow is pointing is where the connector goes. This
is a very simple procedure and only takes a few minutes to finish.
|
|
 |
|
After putting the gun back together, here is what I have
now. I read that after shooting a few hundred rounds the connector will
wear in to end up with the claimed 3.5 pound trigger pull. That sounds
about right and I look forward to having it even lighter. So far I'm
happy with what I see.
|
|
 |
|
Here you can see the other two parts that I put in, just
like my other gun... which
makes a huge difference. While I had the gun apart I could have
replaced the magazine release to the extended model. However, after
shooting a gun with that installed, I didn't like it. The reason is
because it sticks out too far in my opinion, making it easy to
accidentally bump, releasing your magazine when you don't want to. Let
me tell you, picking your magazine off the floor while at the firing
line in the middle of shooting is very embarrassing. And I realize that
it just takes practice to get use to it. But then again I'm not shooting
competition either where a quick magazine change is necessary.
|
|
 |
|
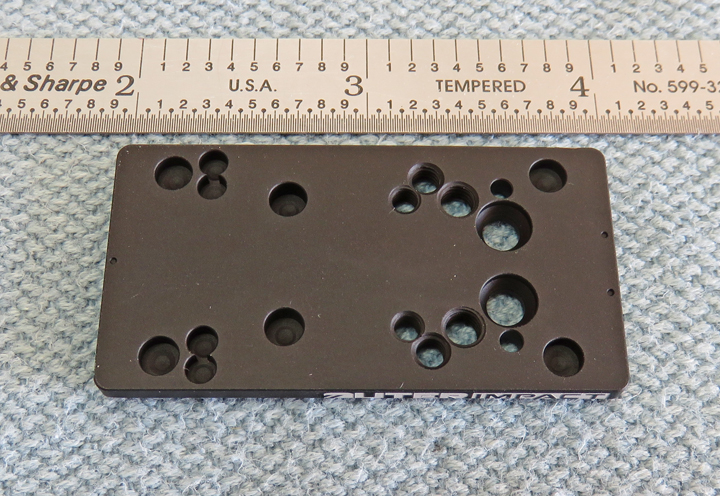
Here is the adapter plate for my new sight. This will
attach to the slide where the rear iron sight goes, which means I'll have to
remove it. All the hardware comes with it depending on the sights that
you might use.
|
|
 |
The adapter plate measures 1" X 2" X 1/8" and is made out of steel.
|
|
 |
|
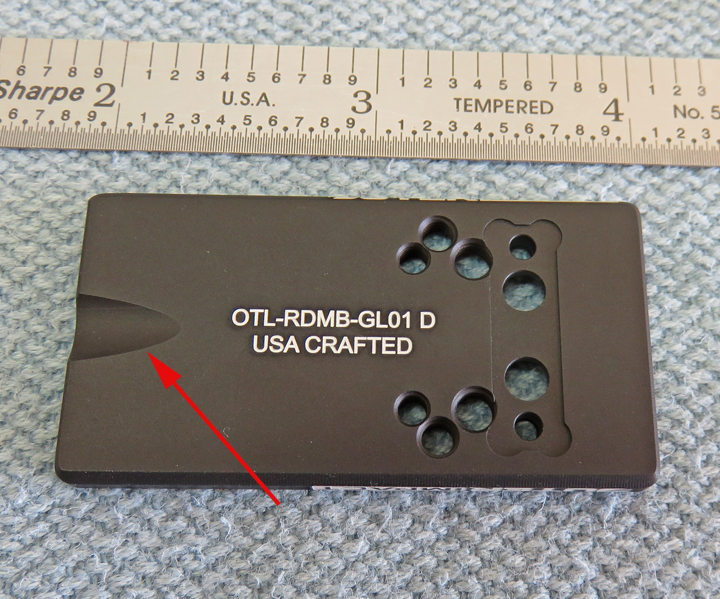
Here is the other side of the adapter plate. The arrow
is pointing to a relief because this side goes against your slide.
However, my gun is flat in this area which makes me think the notch is
for another weapon. I'm not sure. But I do know this plate is really
well made and I'm very happy with it.
|
|
 |
Here is what the Vortex sight looks like. This picture makes it look
bigger than it really is, but remember it's only one by two inches and
one inch high.
|
|
 |
|
1
2
3
4
5
6 |