|
Lathe Continued
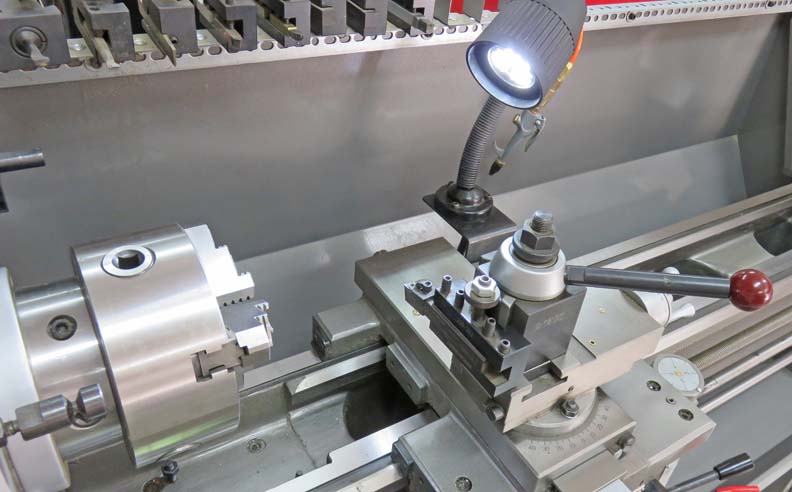
Here you can see the six inch, three jaw chuck. I
also received an eight inch four jaw chuck as well. You can see the
quick change tool post with a turning tool mounted in the tool holder,
which I'll talk about more later. Having a work light is very handy, and this one bends out of
the way or you can get it right next to your work. Also notice the air
hose right behind it, this is a must for metal working machines.
|
|
|
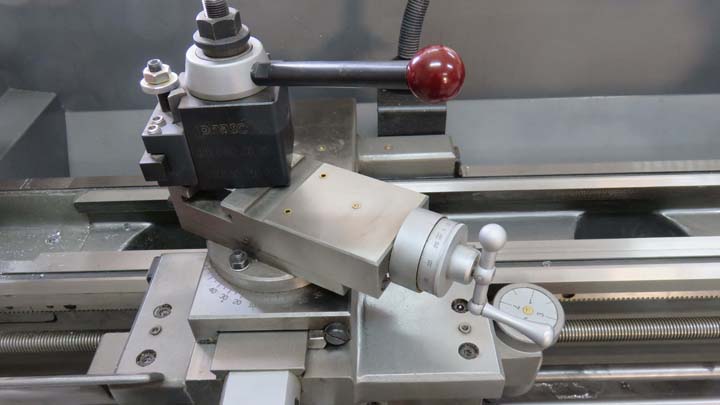
That small silver handle is to move the compound rest in and
out. This works great for turning a short taper of about three inches
long or less. This also works great for putting on a large chamfer that
excided the capability of your cutting tool.
On the tool holder there is a silver hex nut and below
that is a round
knurled jam-nut. These are for adjusting the holder up or down so your
cutting tool stays on center. Now this goes for all my tool holders and
is very handy when your
swapping tool holders with different cutting tools in each one.
|
|
|
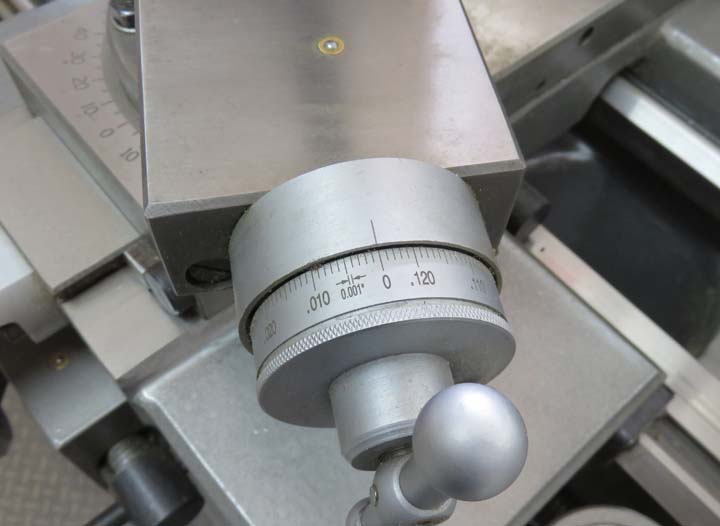
Here you can see the dial that you turn to move the
compound rest. You can also set the tension so it moves easy or hard.
This can be handy for different kinds of jobs depending what you're
working on. And it also has an adjustable dial that makes cutting something very
precise
and repeatable.
|
|
|
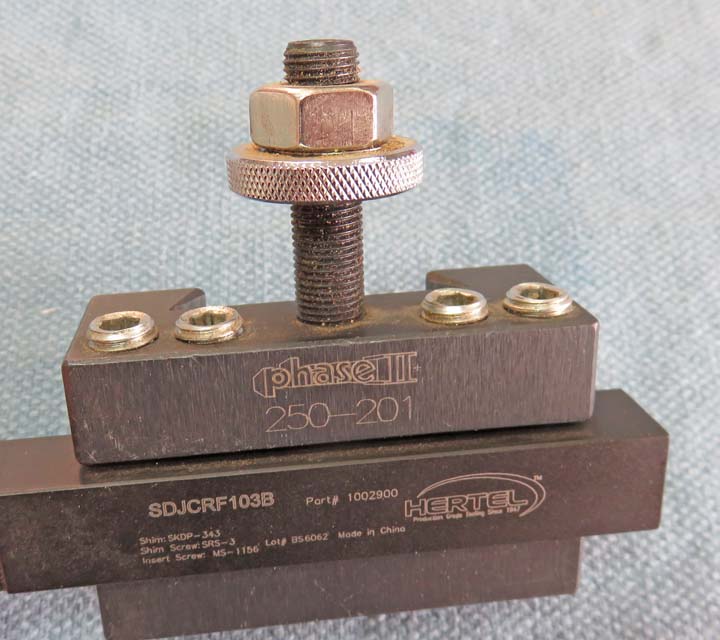
Here is close up of the hex nut and jam nut. This is very easy
to adjust and it works great. And there are all different sizes of tool
holders that you can buy. All my tool holders are pretty small (compared
to the ones in the industry) but then again these all fit a smaller machine.
The largest tool this holder will except is 5/8" in height. I do have some that
will take a 3/4" tool but that's big for a smaller lathe like mine.
Here you can see the set screws that hold the tool
in place. I tighten all four screws to hold my tools.
|
|
|
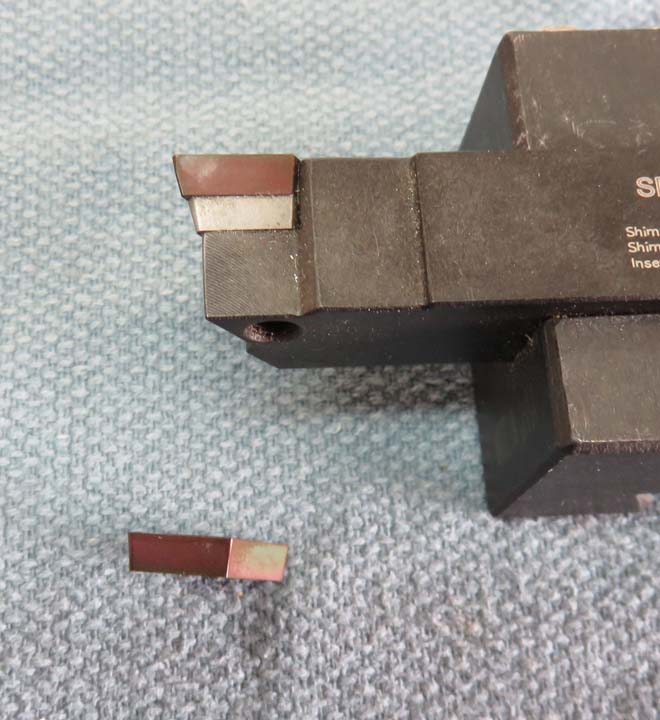
Here is a typical carbide insert tool holder. The screw
that you see in the middle of the diamond shape piece holds the cutting
tool in place. This cutting tool is made out of carbide and has two
cutting edges on it. Some carbide inserts have three or four cutting
edges depending on the style they are.
Changing inserts when they get dull is very easy. All
you do is remove that one screw, remove the carbide insert, blow out the
pocket that it sits in, turn the insert around and tighten the screw
again. At this point you would have a fresh cutting tip to work with.
Carbide inserts have a counterbore (or step inside them)
for the screw to locate on. This makes for a very positive lockup
system.
|

|
|
Here you can the rake angle on the insert. This one has
a positive rake angle and works great for finishing with. I also have
tools that except negative rake inserts, which work good for
roughing with. It just depends on what you're working on or how much
stock you're removing that determines what tool you will be using.
|
|
|
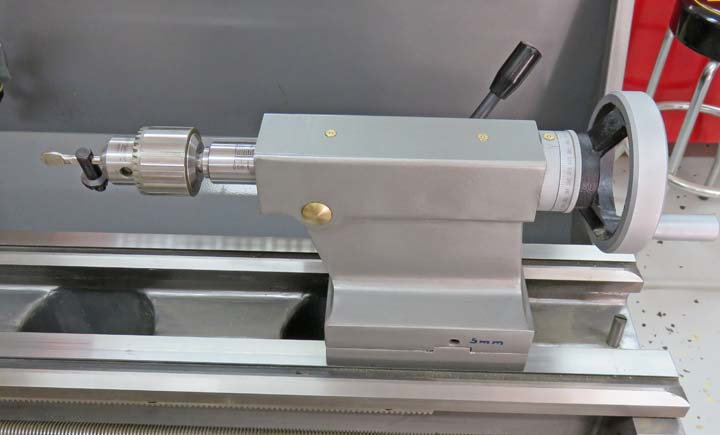
Here is the tailstock, which at the moment has a drill
chuck in it. The lever with the black handle is to tighten or loosen the
base. Once it's locked down, you can turn the round handle to drill
with. Or ream with, depending what's in the chuck.
|
|
 |
|
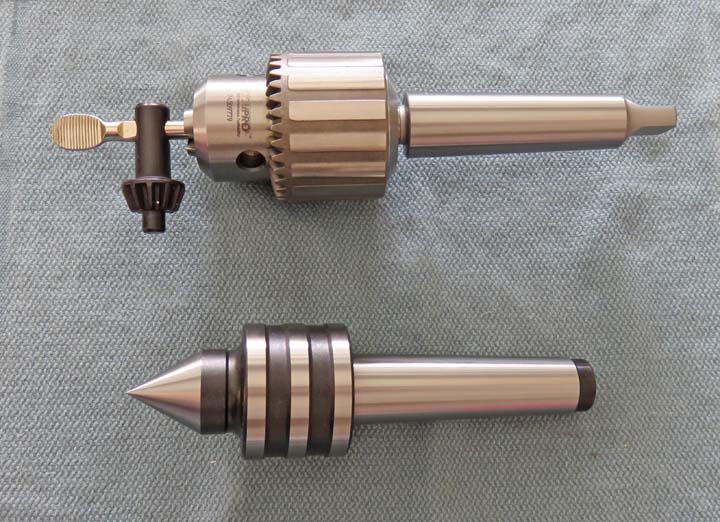
Besides a drill chuck, I also have a live center. The
name "live center" means the pointed piece spins on bearings but the
tapered shank doesn't. Using a live center is very handy for supporting
your work while you're machining a longer piece. To use it you need to
center drill the end of your work piece first (using the drill chuck)
then switch to the live center and insert the tip into the center
drilled hole. My live center has a 60 degree angle.
Side note: Center drills come in many different angles
besides 60 degrees. That means you need to be careful when using a live
center, making sure to use the exact same center drill angle so they match.
|
|
|
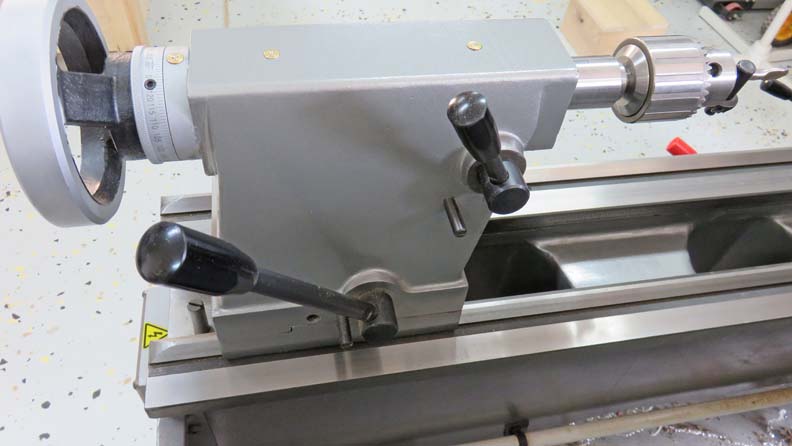
One the back side of the tail stock is a smaller handle
that locks the quill so it won't move. This is very handy when you're
using a live center for instance.
|
|
|
1
2
3
4 |