|
One of the things I like doing for people is making them hand made gifts and
for Christmas
this year I decided to make some 'cheese slicers'. I've
been wanting to do this for awhile now and this year I had some extra time
so why not. I'll be making four slicers but they will all be different
as I'll be using different species of wood for each one.
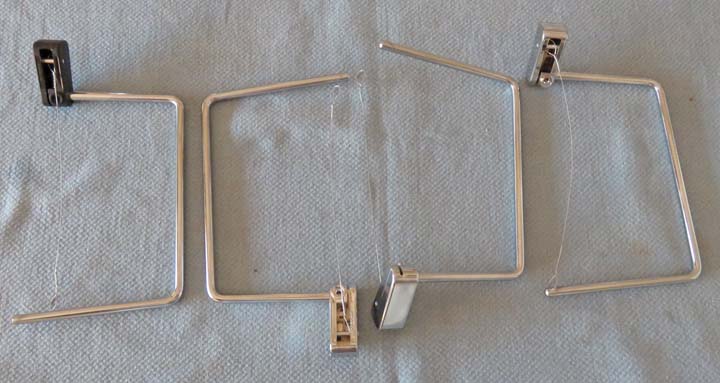
I bought these handle assemblies from a company called
CheeseSlicing along with
the cutting wires too. You have your choice of handle color (black or
chrome) and I bought four extra cutting wires while I was ordering in
case someone breaks one.
|
|
|
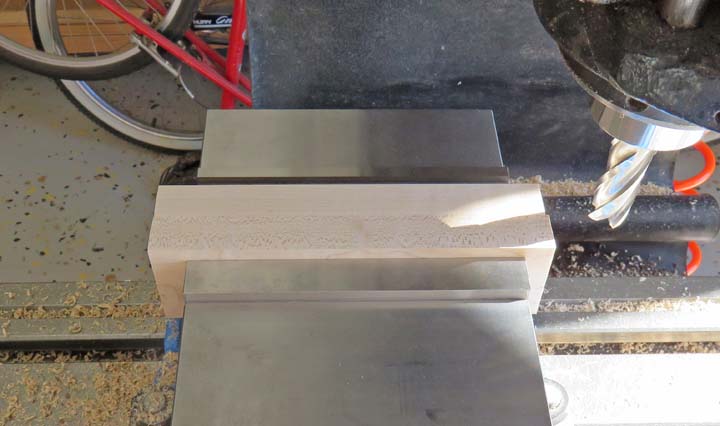
The first step was to decide what each one would look like so I
started drawing sketches on paper to get some ideas. I drew at
least a dozen patterns and picked out four that I'll be making here. The
next step was to machine the sides of the material so I could glue some
pieces together, which is what I'm doing below.
|
|
 |
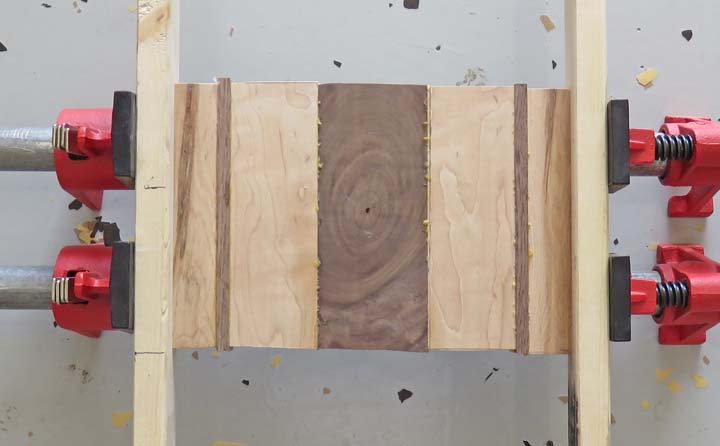
After the sides were machined, I glued them together and
clamped it over night. I own four clamps to work with but these two are much
better than the others so it took four days to glue them all. No big
deal because I started on these in the middle of Novenber which meant I had plenty
of time.
|
|
 |
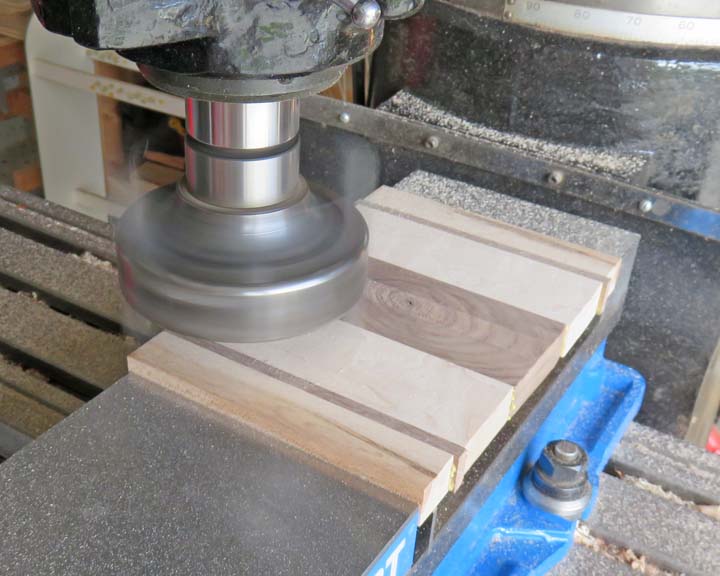
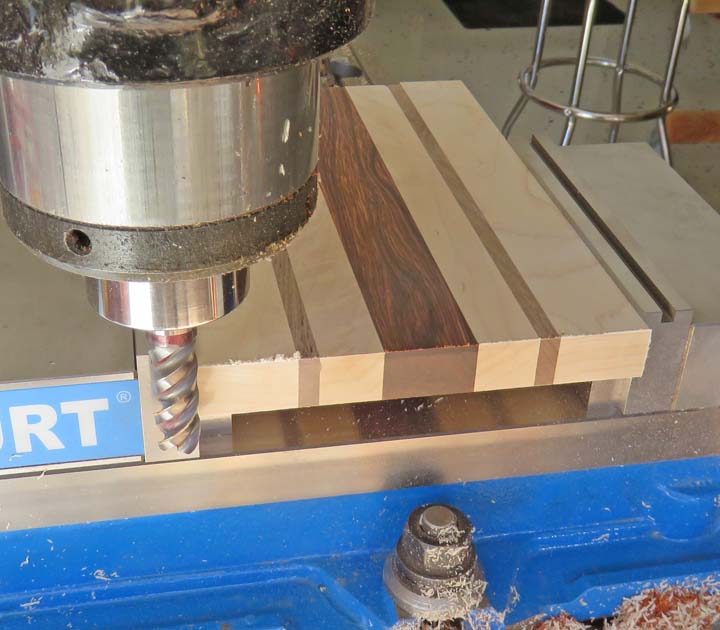
Here I'm machining the top and bottom surfaces with a fly-cutter. The
size of the cheese slicers will be 9" X 6" when finished. This Kurt vise
sure is nice because I can hold this 9" long piece, which makes is so
much easier than clamping something on the table, machining around
clamps, moving clamps, cut that area the clamps were resting on... and
then repeat. The material here is black walnut and figured maple.
|
|
 |
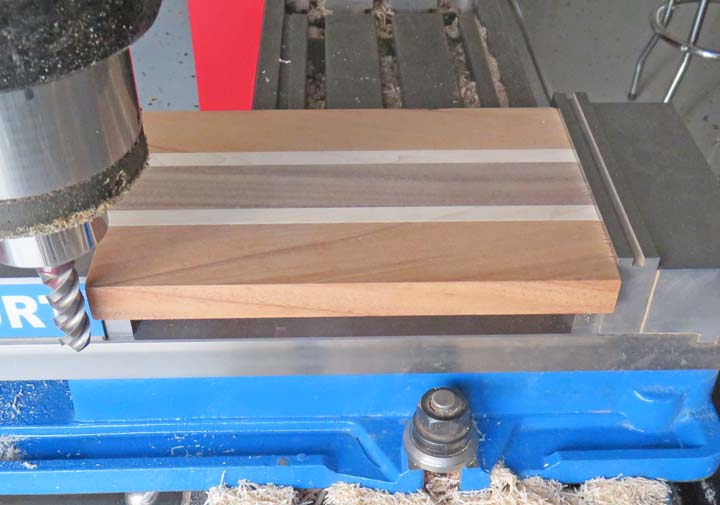
I'm machining the ends to length using a high helix 3/4" end mill. These
60 degree high helix cutters work better and are move forgiving than the
low helix ones (like ones with a 45 degree helix angle) for the
end grain work as they are less prone to chipping the ends.
|
|
 |
|
I also used them for the sides, which gives me a nice
finish as well. On the other hand, just about any cutter will work for
machining the sides.
|
|
 |
|
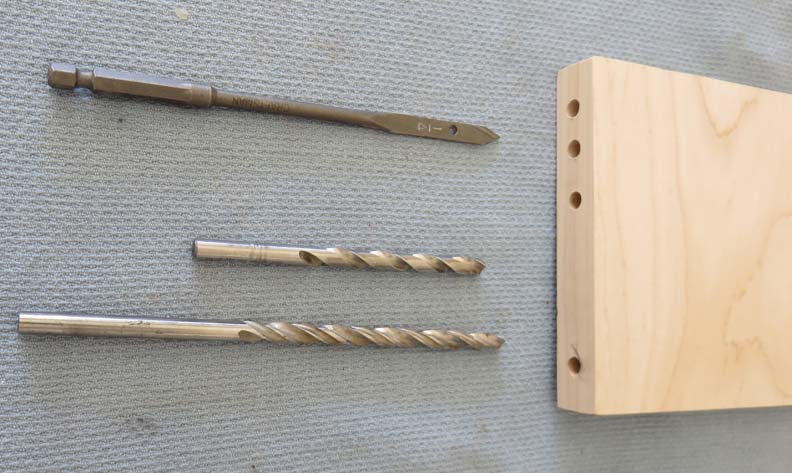
Next I'll need to drill one hole in each cheese slicer for the arm that
holds the wire. The diameter of the arm is slightly under 1/4" so I
wanted to drill some test holes to see how they fit. The depth of the hole
needs to be 3 3/4" deep, which means the drill that you see in the
middle won't work. A normal 1/4" long drill (or jobber length as it's
referred to in the industry) is 4" long which doesn't leave me enough to
hang onto for this drilling operation. However, I can use this jobber
length drill to start the hole with and then finish the depth with a
longer one.
The spade drill at the top is made to drill wood but it doesn't run
very true. With that being said, the test hole came out a little large
so I wasn't sure if I'd use this one or not.
The longer drill at the bottom is called 'a dreamer' which is a
drill/reamer combination. If you look close you can see the first 1/2"
of the tip is smaller than the rest, leaving only a small amount of
material to remove after the tip drills the majority of the hole. By doing it this way, the larger portion of this
tool leaves you with your desired hole size, in this case 1/4" diameter.
|
|
 |
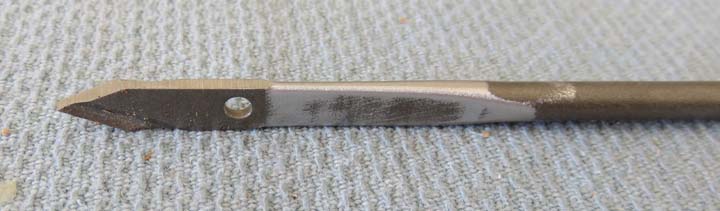
I tried removing or shortening the flutes to see if this would help but it
still left my hole too large....at least for me that is. I ended up
using the jobber length drill to start the hole (going as deep as I
could) and then switching over to the dreamer to finish with. This combo
worked good and if I ever need to drill a deep 1/4" again, I'll try to
remember that cutting tool.
|
|
 |
|
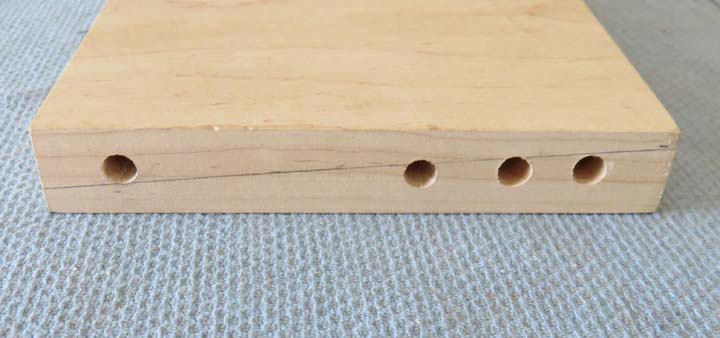
Now that I had the hole diameter and depth figured out, the other thing
I needed to do was make sure the hole was in right location. Here is
what I mean: see the pencil line on the test piece of wood? This line
represents the groove that will be machined into the cheese slicer that
the cutting wire will be placed in. What I need to do is find out where the
hole should be placed relative to the top and bottom surface. The reason
for this is because the slicing wire goes around the handle as the wire
rides in the groove, so you need adequate clearance for the thickness of
this cutting wire.
Another thing to keep in mind is the slicing wire groove has to be
deeper than the hole. In my case the wire measures at .015" thick. Plus
I'll need a small amount of clearance so the wire doesn't bind so I'm
adding another .015 thousands. This adds up to .030" of added depth to
the slicing wire groove (approximately 1/32).
Why is this so important? Well if you put the hole close to the
bottom, the groove would end up being very close to this
bottom surface giving the wood a weak spot. But if you placed the hole
above center this would give you some added material which would end up
giving you more strength.
|
|
 |
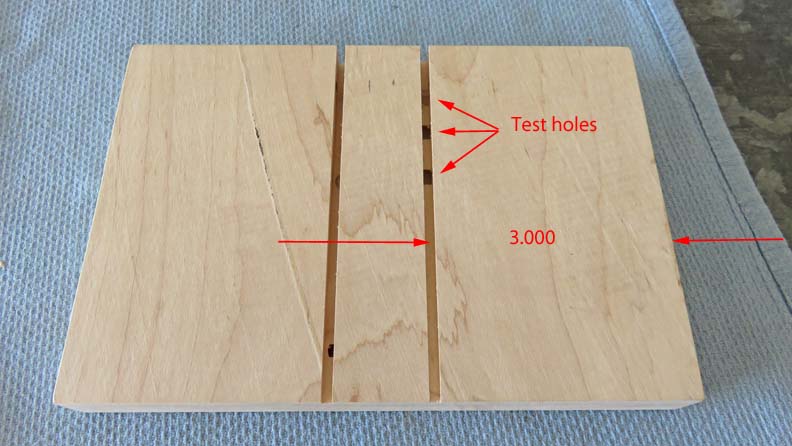
Another thing I had to keep in mind was milling the slot for the cutting
wire. This slot will be 1/8" wide and is deeper at the back, (like the pencil mark above).
I wanted to know what the thickness was at each test hole so I could
decide exactly where I'd be drilling my hole at. And after looking at
where the slot and the depth of each test hole intersected, I came up
with what I think should work. What I decided on was to drill my hole
above center by about 1/8", which will give me some much needed extra
strength.
|
|
|
|
1
2
3 |