January thru June 2008
33 Coupe Having Fun 19 4/03/08
One of the best shows I’ve ever been
to since I’ve had the car running is the “Wings and Fins” aircraft
& car show held at the Riverside Airport. We had a great time there
last year and I’ve been planning to go again this year, which was
held on March 29th. This show has a huge variety of new
and older vintage aircraft along with a big car show, lots of
vendors and good food too. Last year they had about 300 cars and
beautiful weather to go along with the 80,000 people that showed up.
The show is free to the public, which is why they have such a good
turn out.
The time between our last show and
this one (Wings and Fins) was about three weeks, so I thought I’d
take this opportunity to change a few things on the car before I
went. Why change things you ask? Plain and simple…I’ve been bored!
The things that I wanted to do or
change on the car were easy, but sometimes finding the time can
through a wrench in the works. The changes would be made to the
engine compartment and one thing in the rear of the car, which are:
painted valve covers, spark plug wiring looms, starter,
carburetor spacer, battery tray and a few other minor things.
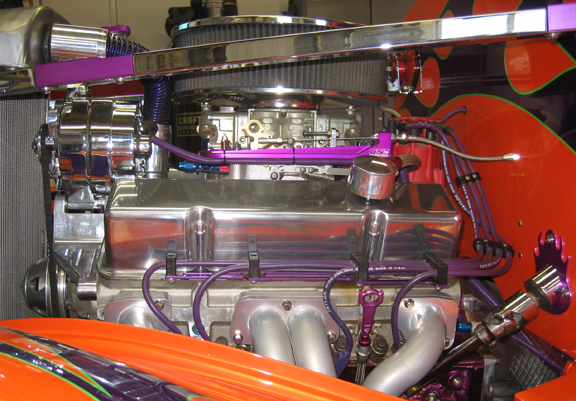
Here is what the engine looked like
before the changes. If you look close, you can see a throttle stop
right above my purple throttle bracket which happens to be a
stainless bolt. The bolt threads will be covered by a new
anodized piece that I made and right below the throttle bracket is
some linkage that goes to my throttle position sensor (TPS).
|
|
|
|
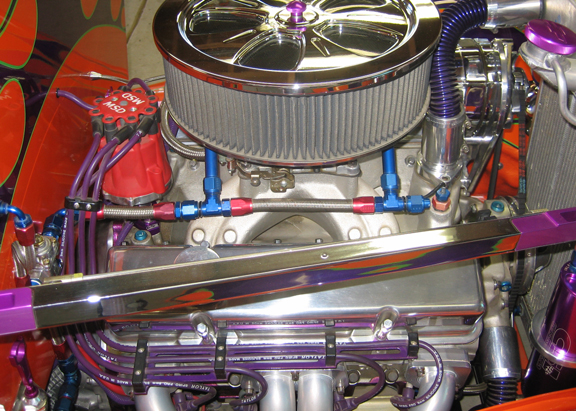
Moving to the other side, notice the purple sparkplug
wiring loom. I'm going to change that out for a chrome one. I like
contrasts and thought the chrome ones would look better against the
painted valve covers than these would. I'm also going to change the fuel
line that runs to the carburetor.
|
|
|
I ordered up the new parts and also
made a few items as well. I wanted to send in a few aluminum parts
to get anodized purple (what a surprise) and polish a few others.
One of the items that I thought would look good anodized was the
carb spacer, which I bought from
Reher Morrison. This
spacer is a two-piece unit which is comprised of one piece measuring
½” and the other being one inch thick. The top piece is called a
reversion plate and the bottom is more or less just a spacer,
stacking up to a total of 1 ½” and brings along some Pro Stock
technology with it. Reher Morrison claims that using this spacer
combo increase’s horsepower and pulls more fuel from the carburetor.
I have no doubt that it will because these guys have been building Pro
Stock engines for over 35 years.
One other item that I’ve wanted to do
for almost two years now is to have some valve covers that are
painted the same color as the car and to have the same graphics on
them too. The first person I thought of was the guy that originally
did the flames on the car, which makes since because he did a good
job. The first step was to spray them orange, and a week later,
Bart, my paint guy had them finished. Then Bart was nice enough to
drop them off
with the graphics guy for me. After waiting for over a year and a half and
two phone calls later, I decided to give them to someone else.
Larry told me about a local guy, Stan
Howton, and after talking with him, Stan said that he could do them
in a week. One thing led to another and sure enough, Stan had them
finished. And he did an awesome job!
They have the same colors in them (blue and
purple) as the car does and I'm very happy with them. I also
shinned up the valve cover hold-downs because they were getting a
little dull.
|
|

|
Once I had the box of anodized parts
back, the carb spacer was first to be installed. I had to hand trim
two of the three gaskets because the spacers had been CNC
milled and the wall thickness was much thinner than any normal spacer,
leaving the gasket hanging into the plenum area. Reher Morrison told
me about this cut-to-fit gasket process so it wasn’t a surprise, but takes time so you don’t
cut too much or rip it. The gasket surface ended up being less than
half of what it was originally so I hope it doesn’t leak.
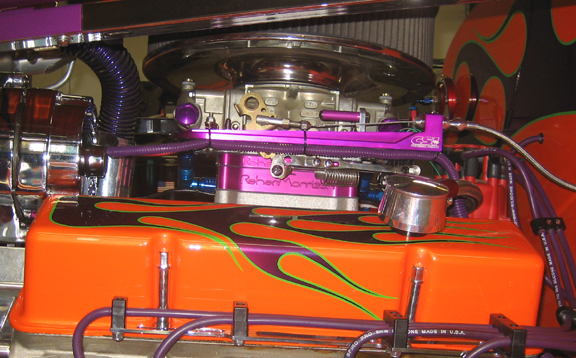
Once the carburetor was on, I noticed
that I would have to lengthen two of the four new studs that hold the carb down with because I didn’t take into account my throttle
bracket thickness (1/4"). After cutting and welding on some longer pieces,
I was back in business. Also notice the new purple spacer I made coving the
threads of the throttle stop bolt.
It's hard to see in this picture but I shinned up the TPS bracket on
my buffing wheel too along with the heads of a few bolts.
|
|
|
Now that the carburetor is installed, it
was time to install some new fuel inlet fittings that I thought would look nice
(purple). This meant that I wasn’t able to use my existing duel fuel
lines so it was time to make a new one (which was the plan the whole
time). I bought a few new AN fittings and some braided steel tubing to
make up my new fuel lines but one of the fittings (T fitting) was back
ordered. After calling Summit Racing and asking them about them drop
shipping the fitting directly to my house, they assured me that it would
arrive in a couple of days instead of a couple of weeks (back ordered
items take much longer if you don’t call). This was great news so I
placed my order for all the stuff I needed with the guy on the phone.
A few days later, everything came in,
except my T fitting, but I still had a few days before the show, so I
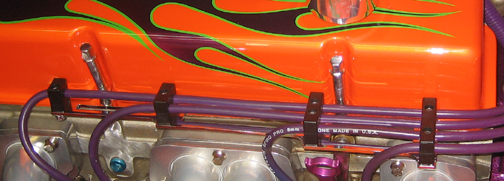
worked on other areas of the car to get ready for the big day. I also installed my new sparkplug wiring
looms which are now chrome. When I
took the old looms off, I took the time to polish all the stainless
screw heads that hold on the black wire separators. And while I had the buffer all warmed up, I polished the
two hold down screws on my distributor cap too. It’s the little things that
make the difference. And again, I was bored!
|
|
 |
|
Things were coming together pretty good but one thing I didn't plan on was
my throttle cable being to short after I installed the carb spacer. This
wasn't good news because in two days, I'd needed to be ready so this
meant fixing what I had. The throttle cable assembly has two main parts,
the cable and the cable housing. After pulling the cable loose so I
could do some measuring, all I needed was about a half inch longer cable
housing to make it work. I started pulling the housing out of the
aluminum adapter a little at a time making it longer and longer each
time I moved it. I should have stopped on my last try because I
accidentally pulled the aluminum adapter off the end of the housing. No
big deal I thought, I'll just slide it back on. This sounded good but
the housing is made out of braided steel (like my fuel lines) and when
it exited the adapter, the end of the cable housing frayed out twice as
big as the opening was.
I was in trouble now unless I could somehow get this housing back
into the adapter. After trying to persuade it back in with a small flat
screwdriver, I quickly found out this wouldn't work so it was time to
get serious. I started digging through stuff till I found a bronze
bushing that happened to have the same size inside diameter as the
outside of the housing. My plan was to cut the bushing through one wall
only, and then spread it open enough to slide it over the housing. I
then used some pliers to squeeze the bushing shut again and now all I
had to do was slide it towards the frayed end. Working the bushing
slowly towards the end made all the stainless wires come together on the
housing, allowing me to maneuver the adapter back in place.
Once I had the throttle cable working again, I cut the bushing off
and was back in business. Now all this took a couple of hours because I tried a few
other things that didn't work before this. But it seems like you try all
the easier stuff first in hopes that it will work. After carefully placing the housing in the
correct spot, things seemed to work just fine so I was happy again...kinda.
All this extra work ate up precious time so I wasn't able to install my
new starter or work on my battery tray. And now all I could think of was
if my fuel fitting would arrive the next day or not.
|
|
1
2
3
4
5
6
7
8
9
10
11
12
13
14
15
16
17
18
19
20 |
|
21
22
23
24
25
26
27
28
29
30
31
32
33
34
35
36
37
38
39 |
|
40
41
42
43
44
45
46
47
48
49
50
51
52
53
54
55
56
57
58 |
|
59
60
61
62
63
64
65
66
67
68
69 |
|