|
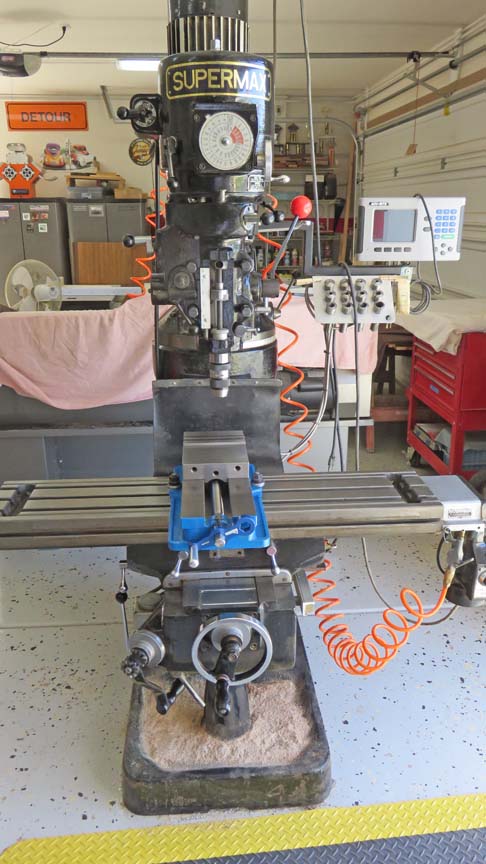
Supermax Milling Machine w/42" Table
I acquired this milling machine from my work in December
of 2012. It was gray back then but I painted it black a few months
later. I also bought a digital readout or DRO and installed it right
after I painted it.
As you can see it's made by Supermax, which is a clone
of the American made company 'Bridgeport'. Bridgeport mills are the
industry standard which work great and last for years. So far my machine has
been working pretty good, but I did take it apart when I first got it
and fixed a few things.
One other thing, trying to buy parts for this is almost
impossible anymore, and I've had to make a few things over the past two
years because I couldn't find replacement parts. This doesn't surprise
me because the machine was new in 1980 but the company went out of
business some time ago. The machine weighs about 1900
pounds and is very solid. And when a machine is solid, it works that
much better. Also, just like the lathe, this machine has a lot of levers,
handles
and dials as well.
|
|
 |
|
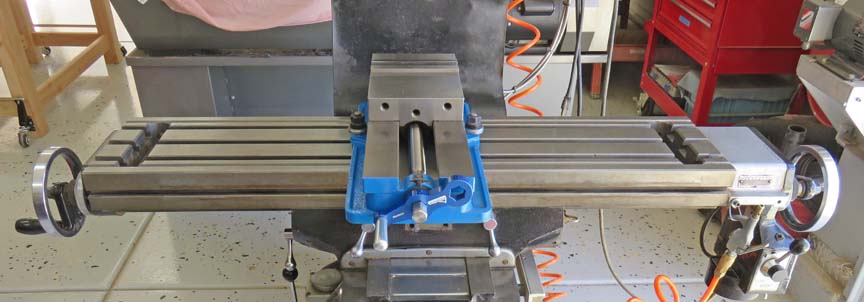
The table is 42" long but they make models that are 49". However, this
table only travels about 23" in the X axis (left to right) which is more
than enough...most of the time. And like most older milling machines
like this one, it's
worn in the middle.
|
|
 |
|
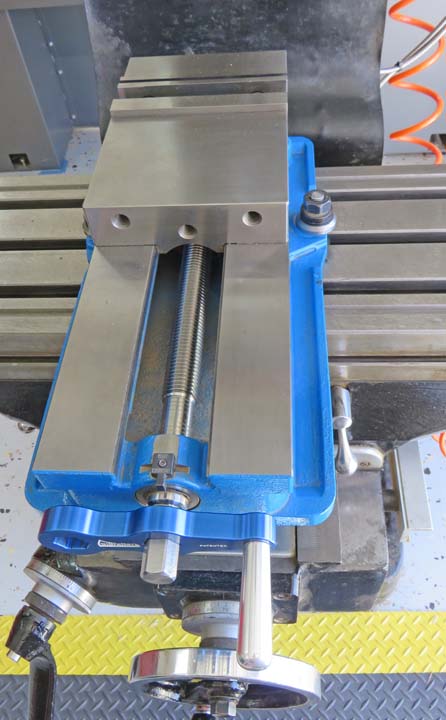
I bought this Kurt vise new right after getting the machine. I don't think
you can get a much better vise because these things work really great. It has
hardened jaws so they last a long time and the body is cast iron, just
like the milling machine. It also came with a work-stop that is stored
near the blue handle. Speaking of, that blue handle works
much better than the one that came with the vise because the other one
is very long and you can't spin it very fast. This blue handle on the
other hand can be spun very quickly, making it very easy to move the
jaw. The handle can be used like you see
below or moved to the outer position for more leverage. Kinda like
having your cake and eating it too.
|
|
 |
|
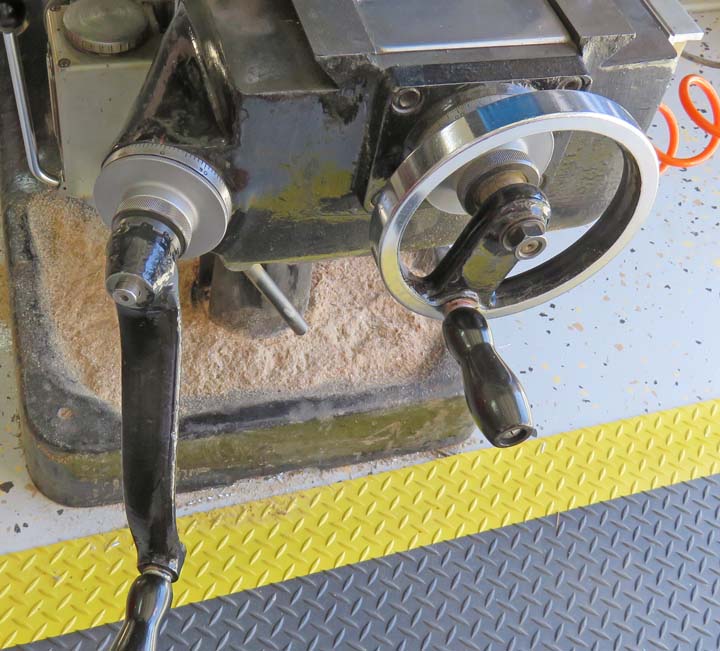
The round handle on the right is for the Y axis (in and
out) and has about 13" of travel. I'll explain a little more about
this dial in detail below.
The long handle is to raise and lower
the knee. The knee is the large center piece, which encompasses the X and Y
axis. This is how you would set a precise depth of a drill or most other cutting
tools. Then you would reset the dial to zero (by loosening a lock nut) and
then turn the
handle your desired amount. Each full revolution equals
.100" so ten turns would equal one inch.
|
|
 |
|
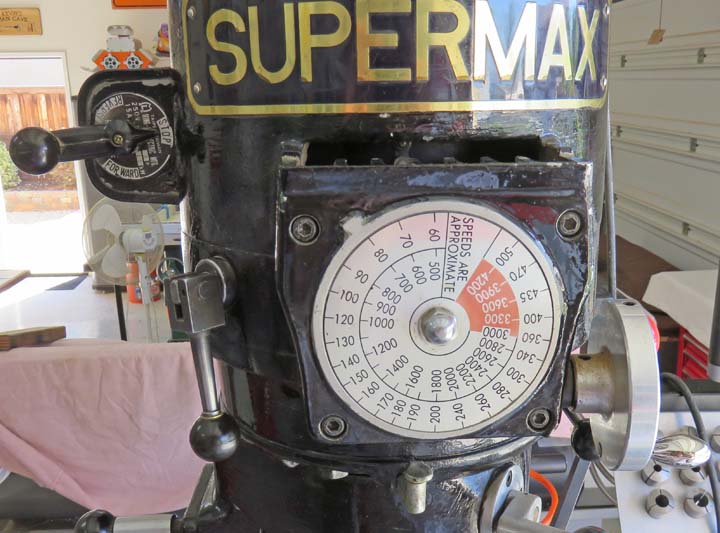
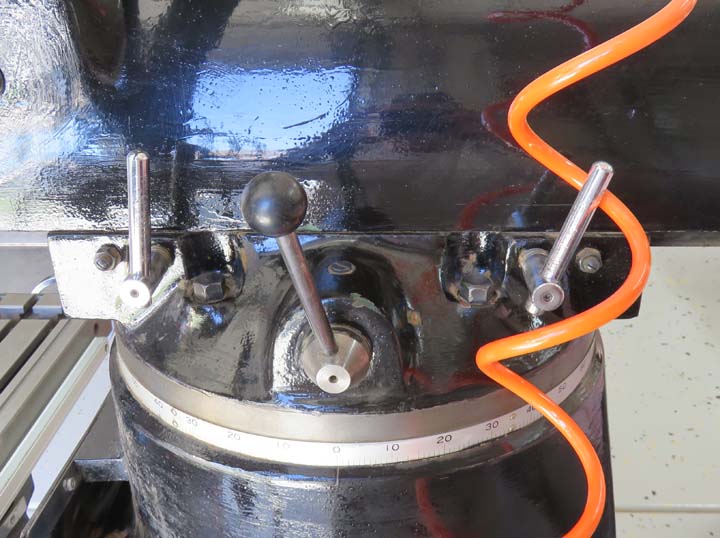
That round dial with all the numbers on it represents the rpm
of the spindle. The outer ring of numbers is for 'low range' and the
inner ring is for 'high range'. The small round handle to the right
moves the dial and changes the speed, but only when the motor is
running.
The handle at the top left is the power switch. Pull
that handle downward and the spindle turns forward while it's in high
gear. But when you change to low gear, you push the handle upwards to go
forward. Just little things you need to remember.
The handle to the left of the rpm dial is a brake. Push or
pull it and the spindle stops once you turn off the power.
|
|
 |
|
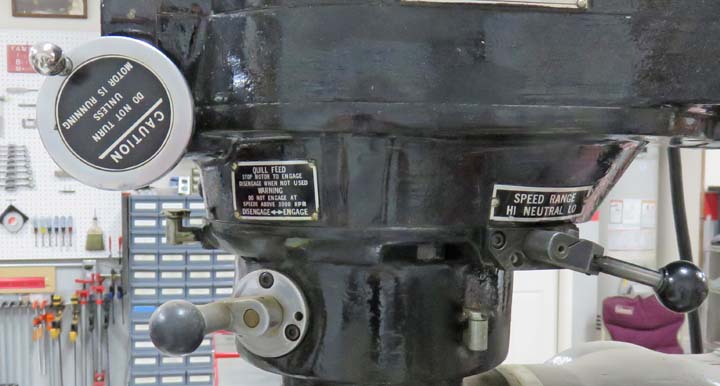
To change from high to low range, there is a handle on
the side of the machine, which you can see to the right. And right
now it's in low range. This handle, like changing the RPM, only gets
moved when the motor is off.
The handle near the bottom is to engage/disengage the
feed for the quill. You might use this if you were boring a hole using a
boring head. All you do is pull outward on the handle and move it over
to the other hole and you're done. However, this handle can be moved
while the motor is running.
|
|
|
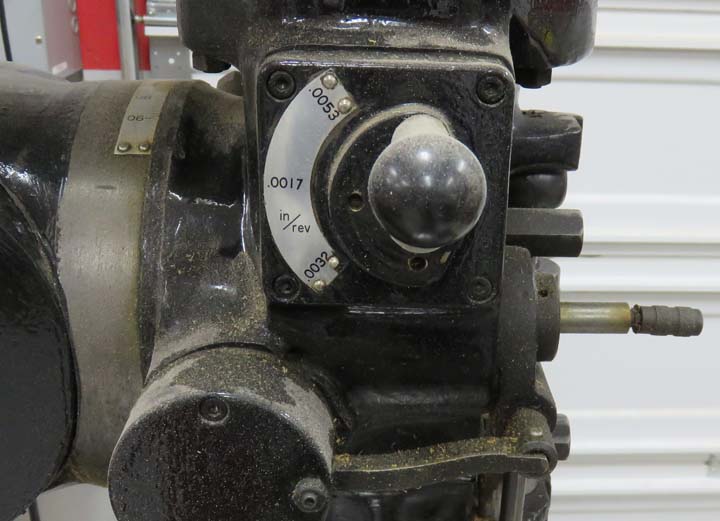
When the quill feed is engaged and being used, you have
three different feed rates to choose from. And yes you can change feed
rates while the motor is running. Again, you pull on the knob and place
it to
the feed rate that you want. The feed rates that you see below are in
"inches per revolution". Depending what the material that you're cutting
determines which feed rate you might choose.
See that small shaft sticking out at the right of the
picture? That's a small knob that changes the feed direction, either up
or down. Normally you would feed in the downward direction but if you
wanted, you'd pull on that knob and the feed would change.
|
|
|
Here you can see that same shaft with the knob at the
end but looking straight at it (to the left). And this knob turns slowly
while it's engaged. Now to engage the feed for the quill, you push that
lever (below the shaft) to the left. And when the quill travels down to
that knurled nut (silver), it disengages the feed and the lever moves
back on its own.
|
|
|
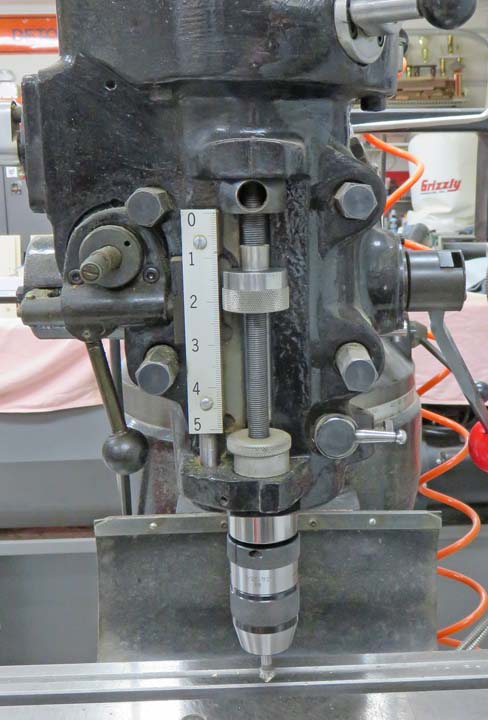
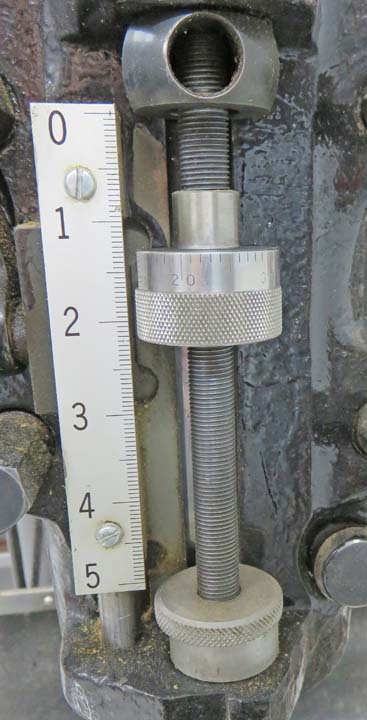
Here is a close-up. That black piece with the hole in it
is attached to the quill. And when this comes in contact with the
adjustable nut below it, this moves the threaded shaft and disengages
the feed. Now when you're not using the feed, you can still use this
adjustable nut to set the depth of the quill. Say for drilling a hole,
or the depth of some other cutter. I've set this with a six inch scale
many times, if the depth isn't critical.
|
|
|
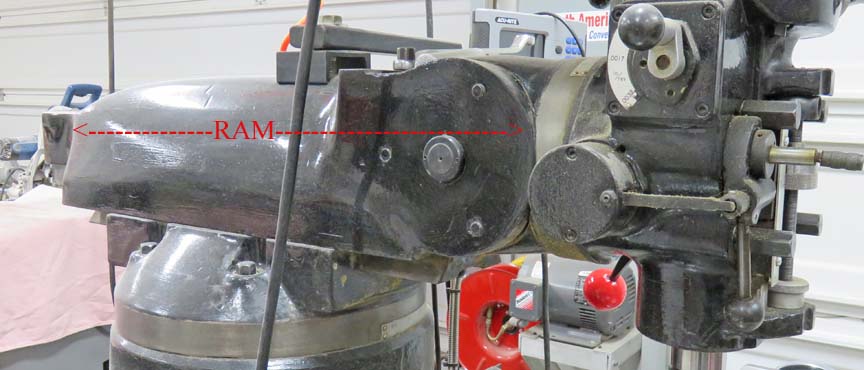
Those two chrome handles tighten or loosen the ram right
above it. The ram rides on dovetail slide ways and moves in or out when
you're standing in front of the machine. This is a very useful feature
to be able to machine different size work pieces.
The handle with the black knob moves the ram (that large
solid piece above them) once they're loosened. I use this feature all
the time depending on what I'm working on. The ram is what the spindle
head is bolted to.
See the two nuts between the chrome handles? There are
four of those, two on each side. I'll show you more on the next page.
|
|
 |
|
Here is better look of the ram from the other side. Once
those two chrome handles are loose, you can move it with the lever on
the other side. The ram has about 12" of travel and I've used all of it
depending what I'm doing.
|
|
 |
|
1
2 |