|
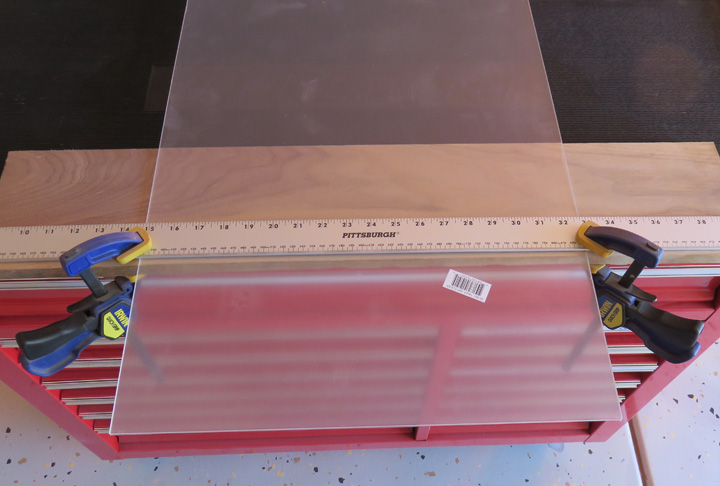
I bought some Lexan sheet (Polycarbonate) to cover all
the pictures with. The sheet size is 18" X 24" which is more than enough
for both plaques. The thickness is 3/32" which should work great for
this project.
|
|
|
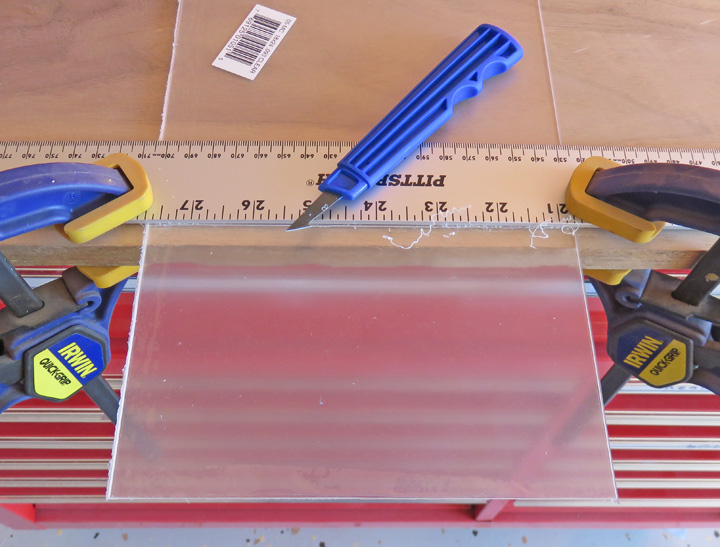
I also bought this scraper tool to help cut it with. What you do
is score the plastic a few times by dragging the barbed edge towards
you, making sure to cut from end-to-end. Then place that scored line along a square edge
(piece of wood is what I used) and then snap it. I
used clamps to score the edge so it stayed put and just used my hand to
hold it down while snapping it. This worked pretty well
and was very easy to do.
|
|
|
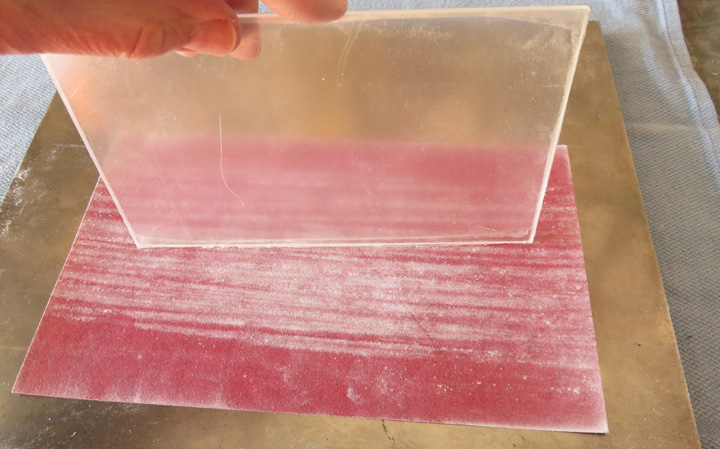
I used 150 grit sandpaper placed on a flat steel plate to finish the edges with. This was another step that went fast
and easy. I could have machined all the edges in my milling machine but
this made life that much easier.
|
|
 |
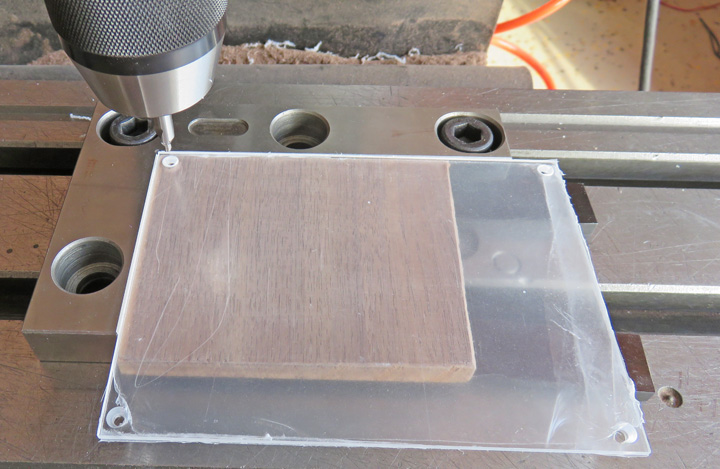
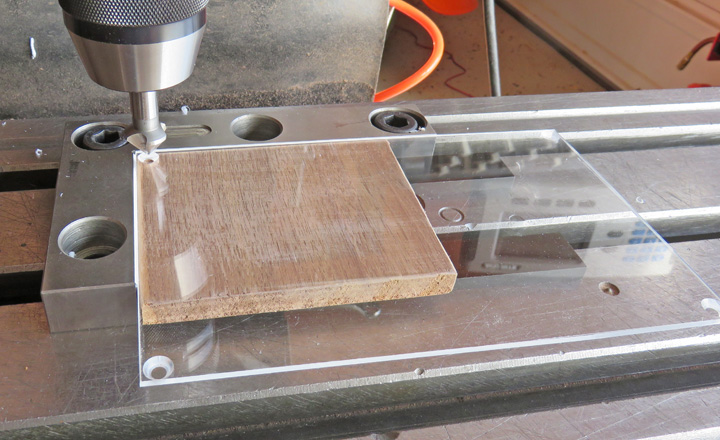
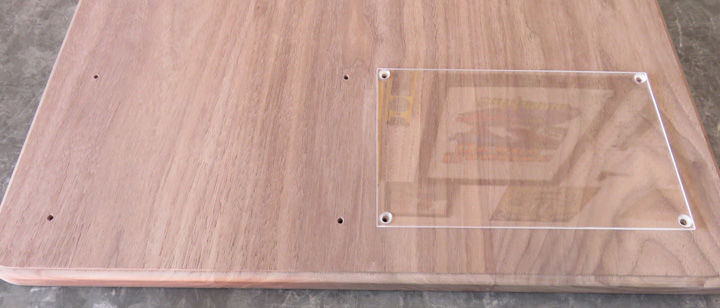
| I'm putting holes in the plastic to fasten it down with. By using a nest and a thin piece of wood
below, I could turn the plastic 90 degrees and then drill each hole.
Here I'm using a #2 center drill to make a starter hole which is slightly less than 1/4" from each
corner. The reason I'm using a center drill here is two fold: it's short
so it doesn't flex or walk like a normal length drill can and second it
puts a hole through the plastic which is large enough for my
countersink. When using a countersink and thin material you need to have
some kind of through-hole for the countersink to work correctly because
they're not designed to be used as a drill. This saved me a step
because otherwise it would have been, center drill, drill and then countersink.
|
|
 |
|
Once I had clearance holes in all the plastic pieces,
I used an 82 degree countersink for my flathead screws.
|
|
 |
|
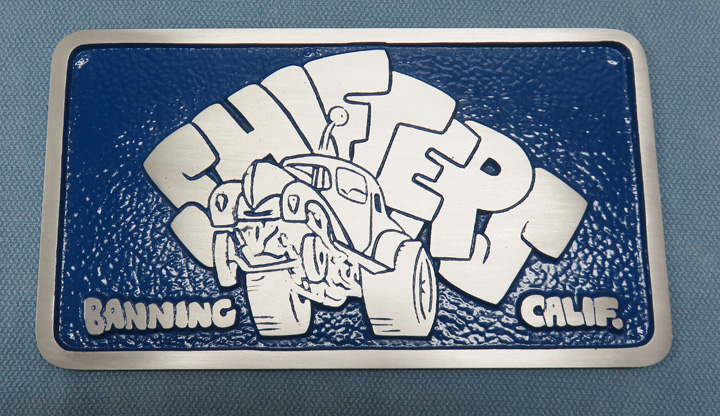
I painted the whole plaque and then sanded the top to
reveal all the detail. I used a dark blue paint, not exactly like
Larry's Camaro, but it's close.
|
|
 |
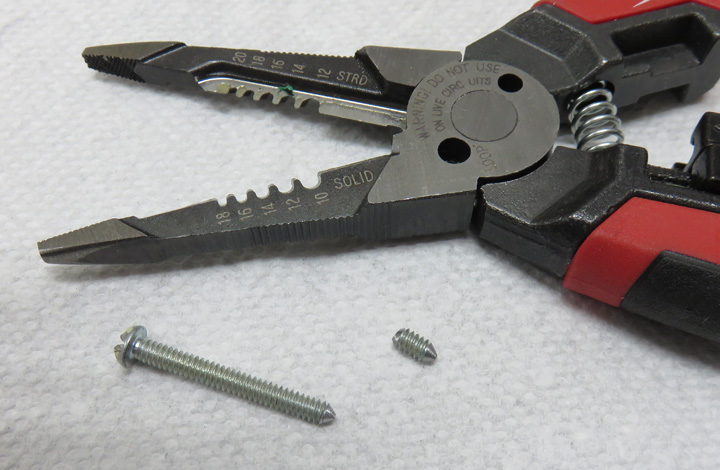
I drilled and tapped two 8-32 threads into the back of the aluminum
plaque (casting) and now I'm ready to mount it to the wooden plaque. To locate
the casting in exactly the right spot, I made some small transfer
screws out of a long 8-32 screw. I used my belt sander to put a point at
the end and then cut it with my wire cutters (larger hole near
the center).
|
|
 |
|
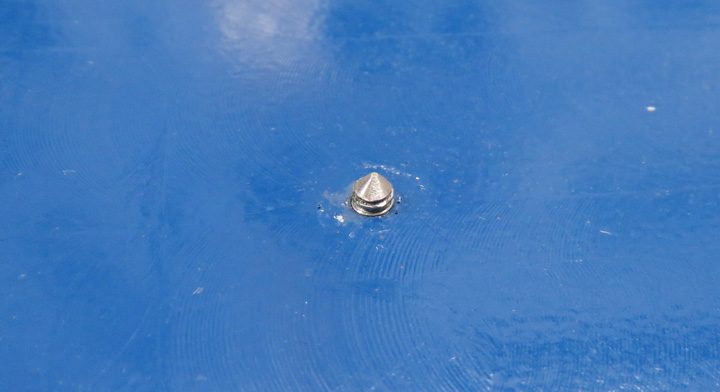
Here are the two transfer screws threaded into the
casting.
|
|
 |
|
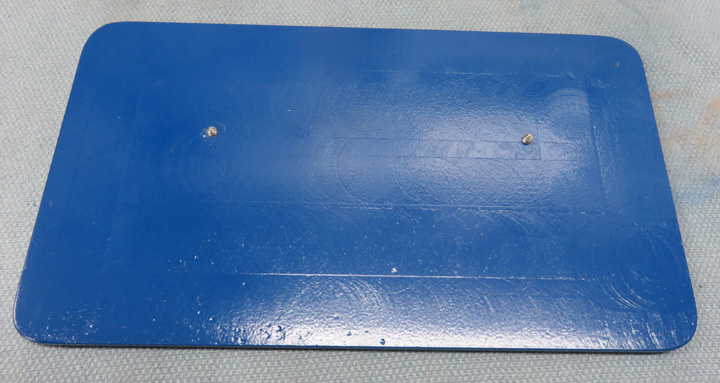
A close up of one of them. All I did was
carefully measure
where I wanted the casting placed and then with some easy hand pressure
I pushed down on it. This made
small dents in the wooden plaque which told me exactly where to drill my
holes.
|
|
 |
|
I'm laying out the spots for the pictures here. The size of the two pictures
near the bottom will be 7" X 4.5". To locate the pictures I
measured from each side and bottom the amount that I wanted and then
used an awl to make a dent in the wood. This dent would be the location
where I drilled a hole 1/2" deep for my flathead screws. I'm also
putting a picture at the top that will be 5 1/2" X 4" which will be of
our buddy Gary.
|
|
|
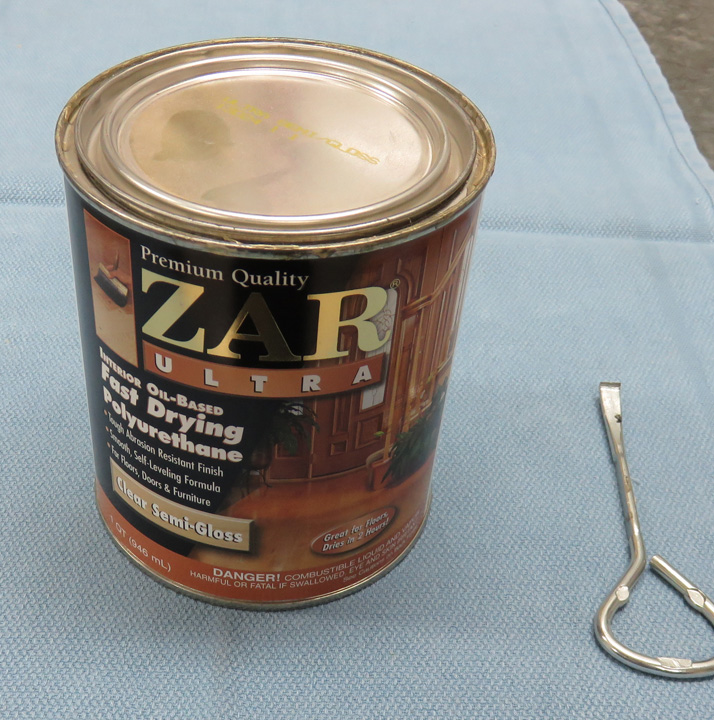
Now that everything fits and looks right, it's time to
put a clear finish on the black walnut. I used Zar Ultra on my gun vise
awhile back and it worked great so I thought I'd use it again. I brushed
the first coat on the front side and then let it dry overnight. The next day
I sanded that first coat lightly with 400 grit paper before applying the
second coat.
This is an oil based product and to apply it I used some
cheap paint brushes that were 2" wide and tossed them out when I was
finished. I also put one coat on the back the same day I was putting on
the second coat. With this product being oil based it smells bad for
days so I'm glad I was able to have Larry's present sit in my garage for
almost a week before giving it to him. I did the same thing to my
project once Larry's was finished, let it hang out in the garage for a
week and bleed off some of the smell before bringing it in the house.
|
|
 |
|
Here is Larry's birthday present which came out like I
wanted. The picture at the top is from the handout they gave everyone at
his funeral. I scanned it in and then printed it full size. The picture
that has our three cars in it was taken by me back in 2006 at the Cherry
Fest Car Show in Beaumont, CA. I didn't know it at the time but this
would be one of the last car shows that Gary would ever attend before he
passed. The picture of Larry's car was also taken by me at the Optimist
Car Show in Redlands, CA. a few years ago.
I used #6 brass flat screws for all the pictures and
note that I clocked them all the same way.
|
|
 |
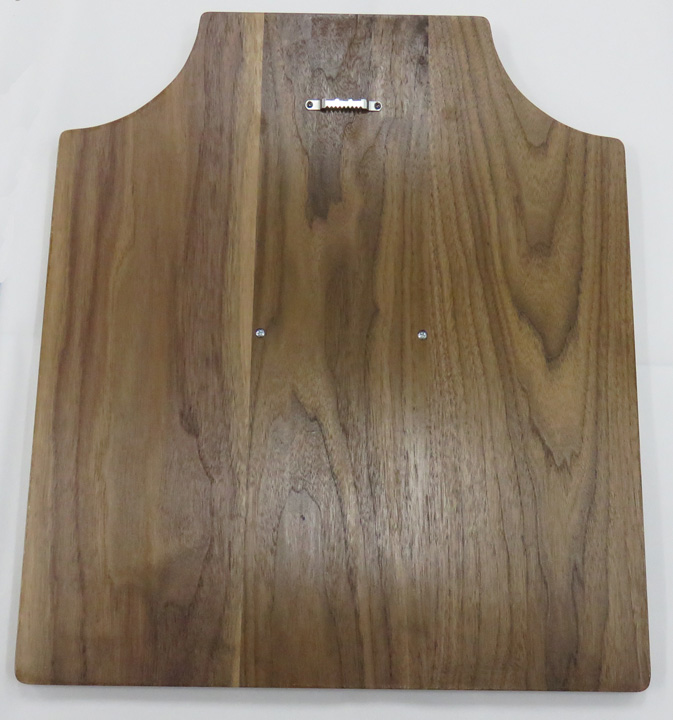
I screwed a hanger on both our plaques so it's easy to place on the wall, or Larry can
prop it up against something if he'd like. In this shot you can see the
three pieces of wood much easier.
|
|
 |
|
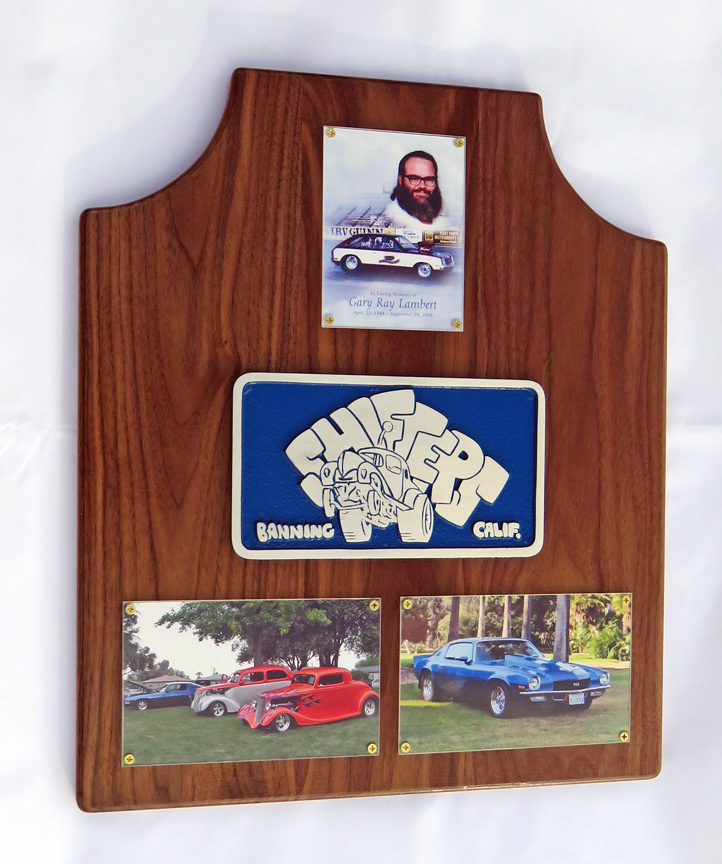
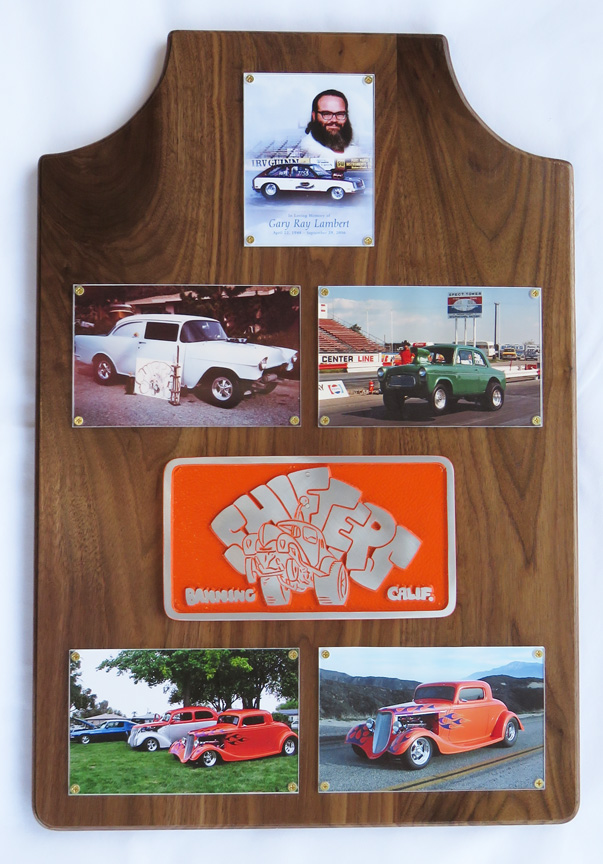
And here is the one that I made for myself. The same
picture of Gary is at the top but I added something special underneath
it.
The 55 Chevy on the left was the Shifters Club Car back in the early
70's. The day I was introduced to Gary back in 1972, my buddy and I had
been dirt bike riding that day and we stopped by. This visit and the
whole experience that day ended up being a core memory for me
because as we were leaving, Gary told me that I could come back and visit if I
wanted. That put a big grin on my face after he told me that and I took
him up on his offer a few weeks later. And since that day we've been
friends. Just thinking about it all over again, that's exactly what I
have on my face right now, a big grin again! The green
car to the right is a 1958 Anglia, which is an English Ford. This was
originally a street car but soon became a dedicated drag racing machine
which was a lot of fun. We'd go to race tracks all over southern
California and had a great time doing so. My Shifter's
plaque in the middle is something I'll treasure for the rest of my life.
Even though the car club fell apart years ago, it's a huge part of who I
am today. The picture at the bottom left is the same one
that's on Larry's present, which is at the Cherry Fest Car Show in
Beaumont, Ca. in 2006. And my car on the right will be nice to look at
once in awhile after I sell it.
If you liked what this project represents and some of
the history that went into it,
I highly recommend that you check
out more about each car (in much more detail) along with some
really great stories of Gary and I by clicking on the link above.
|
 |
|
1
2 |