|
My daughter Tracey is a Sci-fi fan and loves the show
Star Trek so I wanted to make her something special for her milestone
birthday of 40 years old coming up in September. Also, Star Trek has many
different shows and movies besides the original series from the late
60's and she likes most of them.
Now Star Trek Next Generation introduced having a
Klingon as a main character for the first time and his name was Worf. If
you're not familiar, Worf is a badass dude that doesn't take any crap
and is a warrior where he comes from. One of the weapons that Worf uses
on the show is called a 'Bat'leth' (pronounced Bat - lith) which is a four foot long curved
blade with four spiked protrusions on it which is really cool looking.
Anyways, I'm going to be making this Bat'leth for Tracey
and send it back east where she lives. But I hope it doesn't get damaged
while in transit because we all know how that can be.
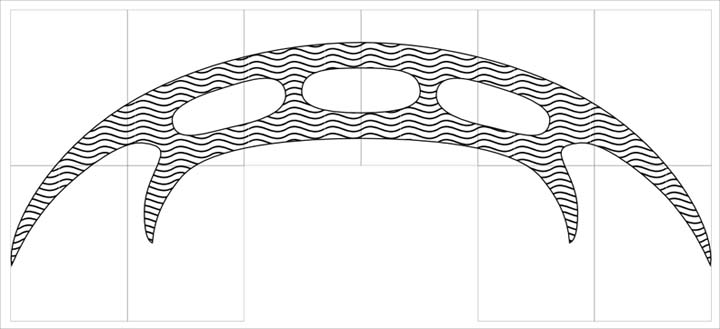
Concept
What you see below is a drawing that I found online and looks to be the
same shape as the one on the TV series. I say this because I found many
pictures that didn't look like this at all, so I'll be using this one as my
model. I say model because I need to make my own drawing of it and to do this
I printed this one out, which is how I started this project.
|
|
 |
|
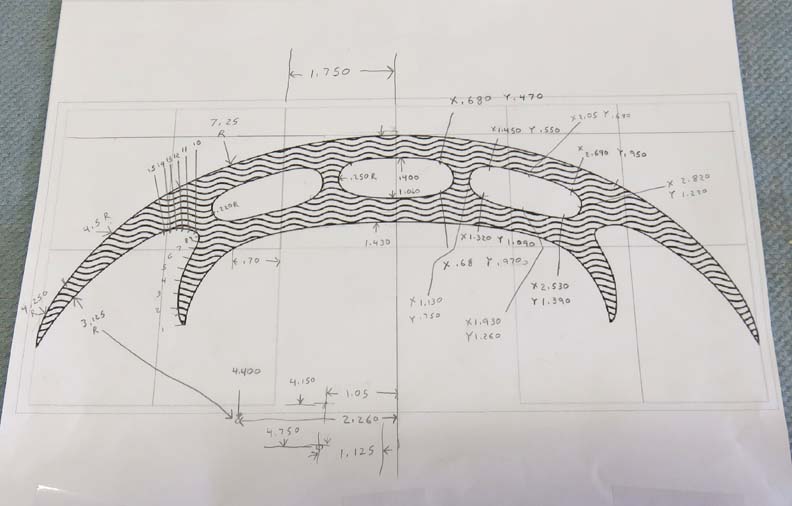
With my picture now printed on a normal size sheet of
paper (8 1/2 X 11), it's time to do some measuring. I needed a reference
zero to start out with so I chose the middle for X zero and top
of the arc for my Y zero. I used my six inch scale to take all of my
measurements with, wrote them on the paper below and then used those
numbers to draw it in my CAD system. Once I had all the dimensions and
with everything looking correct, I enlarged it to the size I wanted,
which is 44" from end to end. Yes you read that right, it's going to be
44" long but that's about the size of the one on Star Trek.
Anyways, this took me about three hours to draw over the course of a
couple of days but I think it came out great so let's get
started.
|
|
 |
|
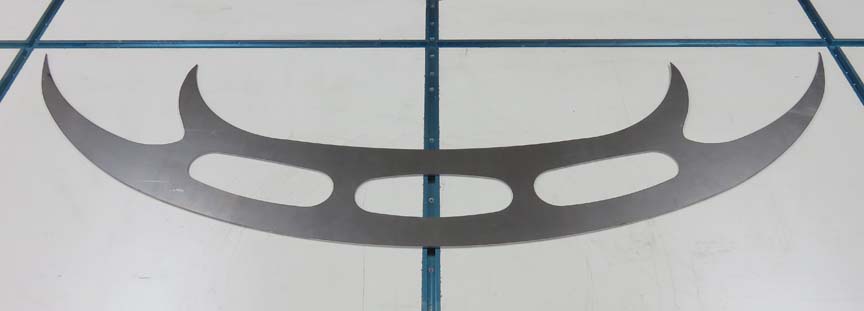
Metal Working
Once I had my CAD drawing finished, I called
R & I Industries in
Ontario, CA. to see if they could cut this out with their plasma torch.
I've used this company before on other projects and they do a great job.
In fact, I had them cut out all the gears for
my daughters Escape Room a
few years ago and one other project.
After talking to them for a few minutes, I sent them my
CAD file and they said yes they could cut this out for me. Now I could
have tried using a jigsaw to cut this out myself but that would have
required a lot of hours on my part and I'm sure it wouldn't have looked
this good. The material here is mild steel and is 1/8" thick, and
I'm very happy with the work R & I Industries did for me again. Now it's
time to start refining it.
|
|
 |
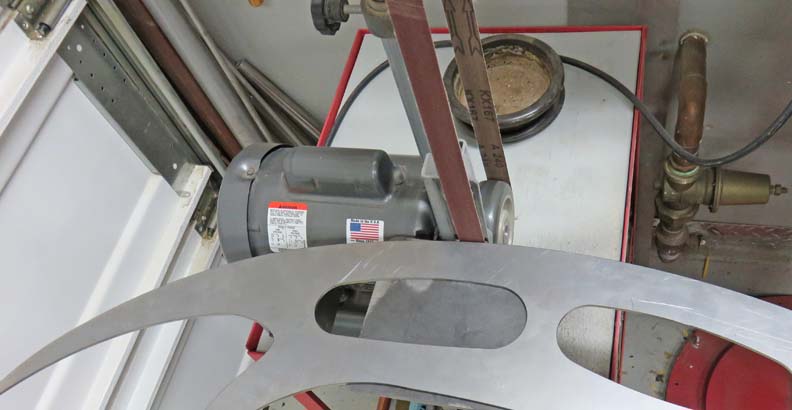
I used my belt sander for the convex radius along with a 180 grit belt.
|
|
 |
|
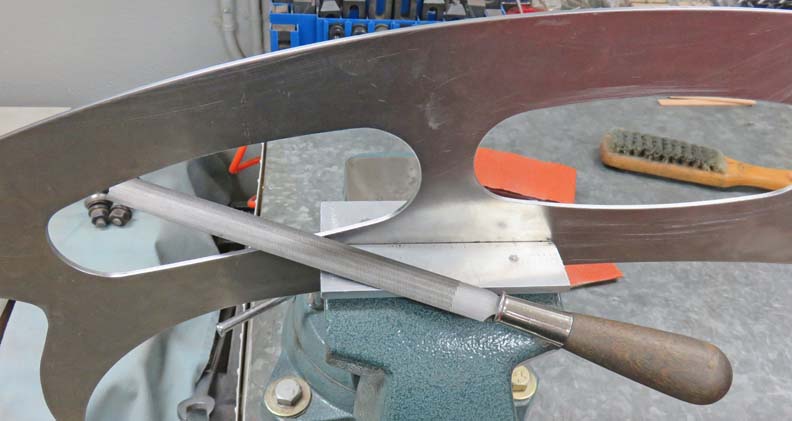
Next up, a lot of hand work using my file. I thought
about using my Dremel here but I have more control using a hand file in
this situation because I'm rounding over all the sharp edges here. Now
the areas I'm addressing are the three open areas that your hands
will be placed (my file is resting on one of them) along with the large
convex radius I previously used my belt sander on. This is a slow
process but a necessary one.
|
|
 |
|
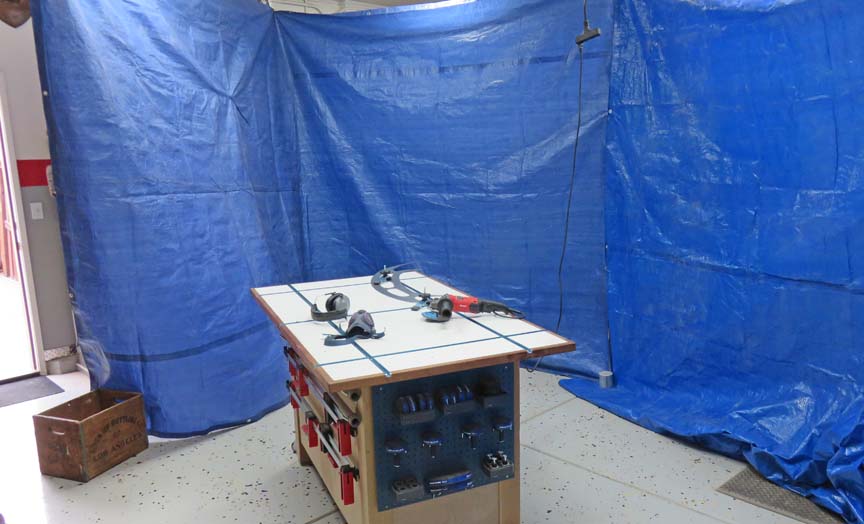
The next day it was time to do some dirty work using my
grinder so I hung up two tarps to help contain all the flying metal
dust. What I'll be doing is putting an edge on the reminder of the
weapon (about half of it) so I put on my dust mask and ear protection
that are sitting on the mobile work bench and went after it.
|
|
 |
|
Here you can see where I started grinding my first of
many edges. I'm using a 120 grit flap-wheel with the project clamped to
my work bench (blue clamp behind the handle and one at the other end not
shown).
|
|
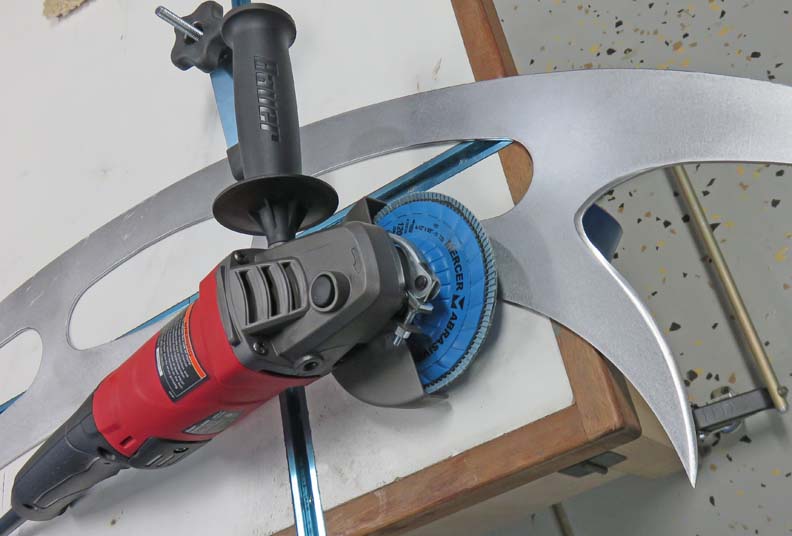 |
This process went pretty fast and worked well as long as I
directed the grinding grit towards the tarps or the ground.
|
|
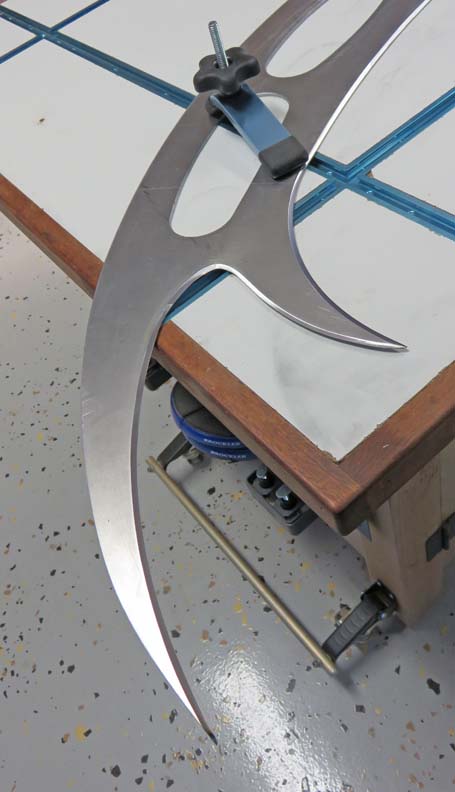 |
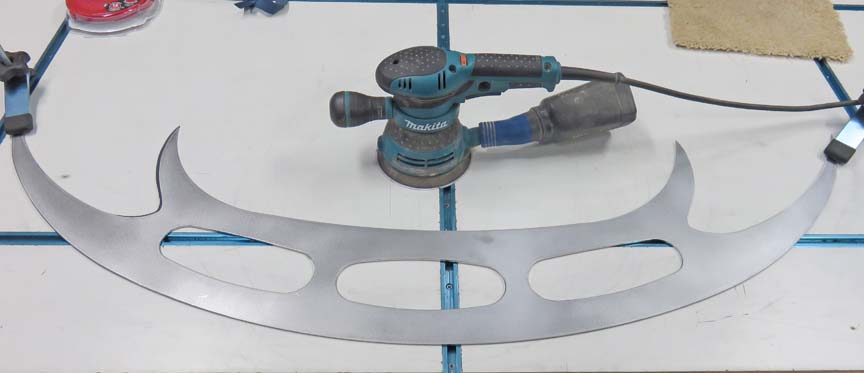
Next I used my DA sander on both flat surfaces using 180 paper. Again
this step went pretty fast.
|
|
|
|
1
2
3 |