Here you can see what the front looks
like after sanding the screws flush. I used a belt sander to get the
screws close and then went with my sanding block to finish them. I have
a small amount of adjustment built in if I need more screw length
because after the paint has been applied, the bracket will be away from
the back surface by the thickness of the paint. To compensate for that,
I can just make the countersink on the bracket a little deeper if need
be. The reason I'm adjusting the screw length this way is because I
won't be able to sand the front surface once the whole plaque has clear
on it after paint.
|
|
|
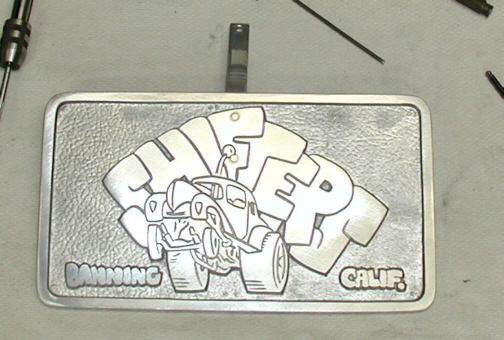
The plaque came out great and I'm very
happy with it. The top surface needed to be sanded between each paint
process. I went over to Bart's place and did the sanding between the
base coat and the color coat and then he shot the whole thing with clear.
The clear will help the raw aluminum stay nice because now it won't oxidize.
|
|

|
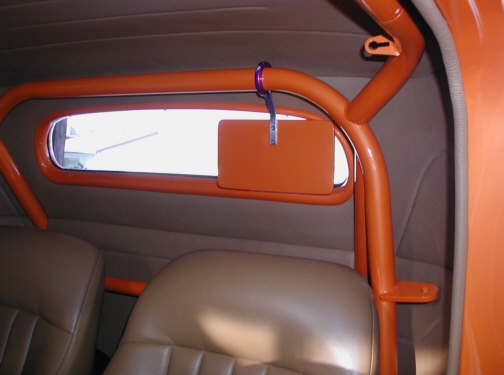
Putting the plaque back in the car was a snap because
all the fitting was done before paint. Speaking of paint, I didn't have to
adjust the length of the screws at all so that was nice.
|
|
|
|
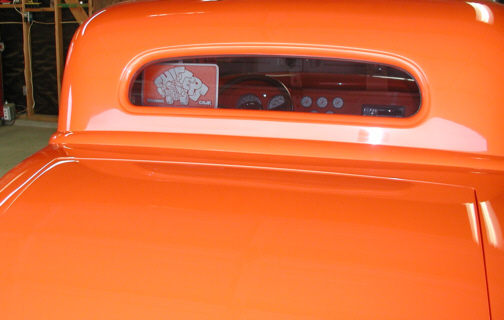
Here is the picture that I've been wanting to see for
over 30 years. I would love to say that it was worth the wait but that
wouldn't be true because I wanted to be a member of the Shifters a long
time ago. On the other hand, I've very proud to wear the car club's colors
today. In a way, I've felt like a member for years because I knew most of
the guys back then and now.
Now when I drive around town or go to car shows,
people will see that plaque in the rear window and know that I'm a member
of the Shifters Car Club. A big thanks goes out to Gary and Larry for
making one of my dreams come true.
|
|
|
|
1
2 3
Main 33
Coupe Page |