|
When I'm working on a project and then find out that I
need a certain tool or fixture or some do-dad that needs to be made to
help me while making something, it seems to take away from the moment
that you're in. Call it being in 'high gear' or what you want, but most
people don't want to stop and make something if they don't have to,
they want to keep going and finish what they're working on.
The one exception is knowing before you start the
project that you'll need to make some kind of tooling or fixture to be
able to produce the part in the first place. That's different than being
halfway through making whatever it is and then find out that you'll need
a special 'little thing'. And normally this special little thing doesn't
take that long to make in the first place. But that's not the point,
it's because it breaks our rhythm which is the real problem.
With all this in mind, I wanted to make a few things
that I know I could use along the way and decided today is a good time
to make that happen.
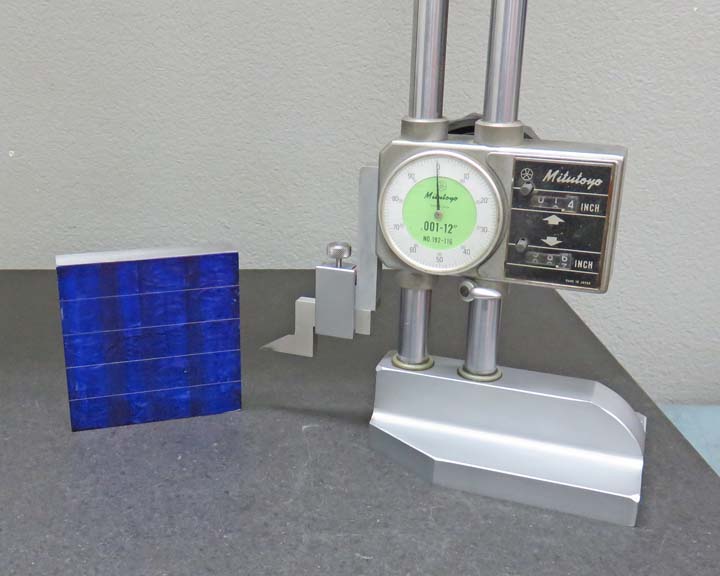
Reducing Sleeves
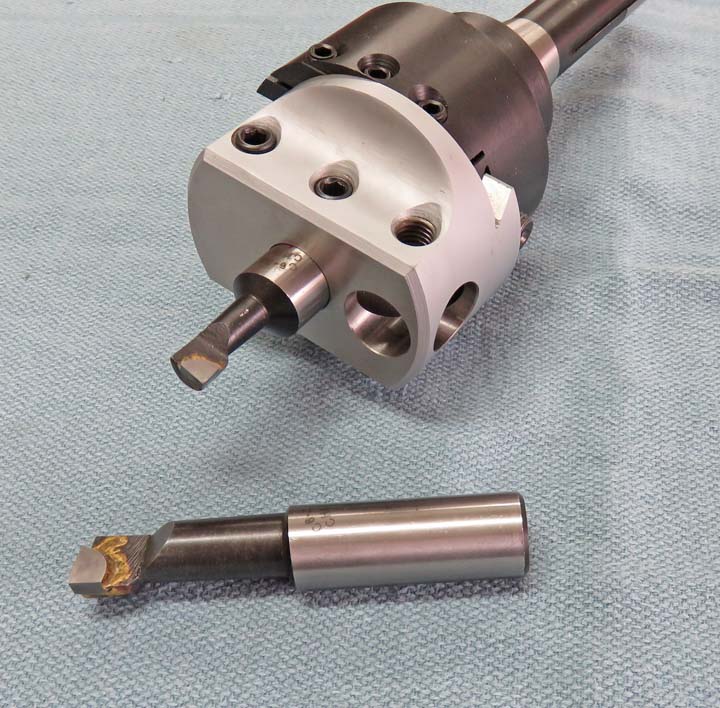
The first item I'll be making is to help me while using
my boring head. My boring head uses 3/4" boring bars (the shank
size) which
works for most things, but if you want to bore a smaller hole, you need
a smaller boring bar. To make that happen, you need a reducing sleeve
(bushing) to be able to hold the smaller bar with. I'm making two
different sizes, one will be 1/2" and the other will be 3/8" inside
diameter. The outside diameter will be 3/4" so it fits my boring head.
Below you can see a 3/4" diameter diameter boring bar that's in
my boring head and another one next to it. The smaller boring bar
(that's in the boring head) has a
minimum bore diameter of about 7/16" but that won't cut it when you have
a smaller hole to deal with.
|
|
|
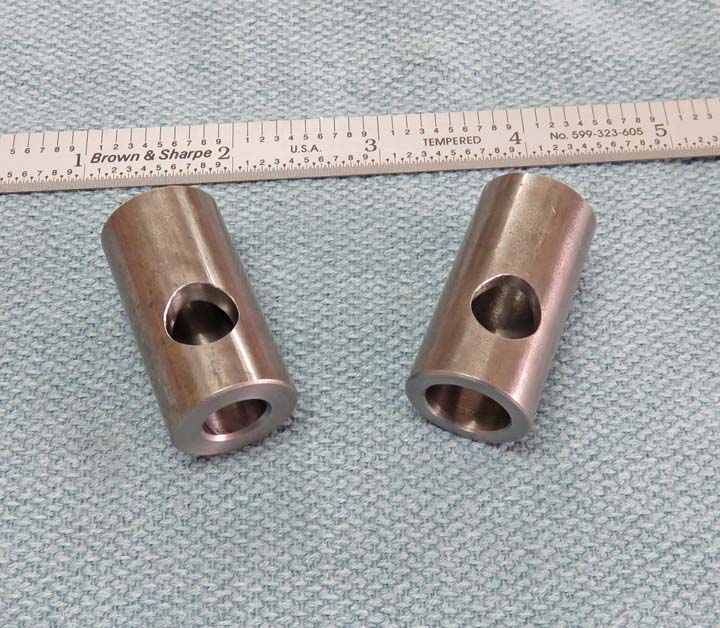
Here are the two reducing sleeves that will help me when
I need to bore something smaller. The outside diameter is 3/4" but
the inside diameter is 1/2" and 3/8" depending on which one I might
need. The hole in the side is for the screw that clamps the boring bar
in the boring head.
|
|
|
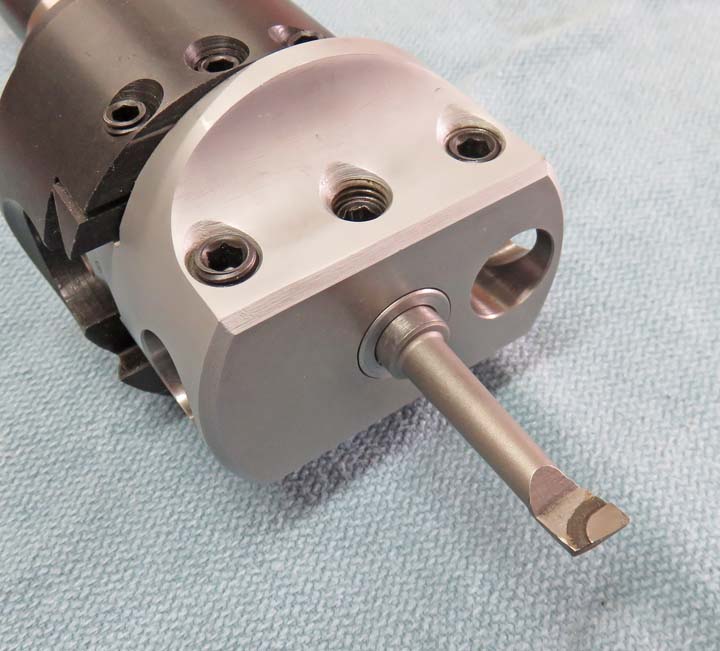
Here you can see I'm using the 1/2"sleeve, which should
work out pretty good now that I have them.
|
|
|
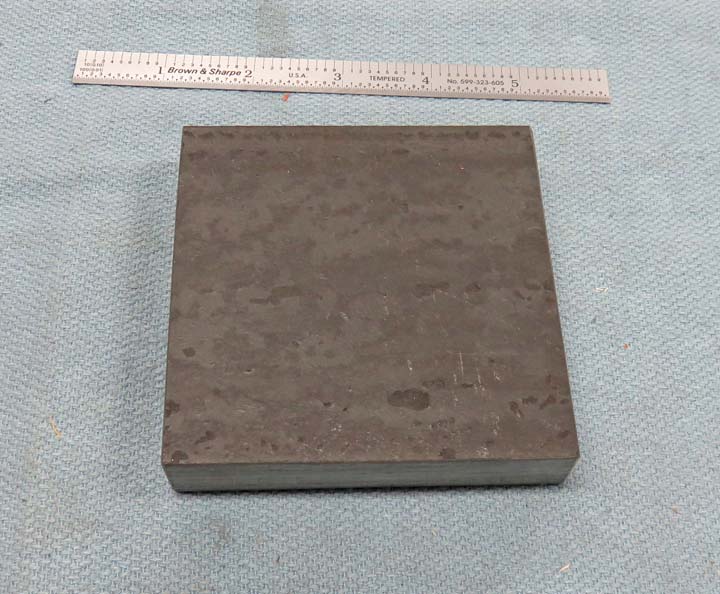
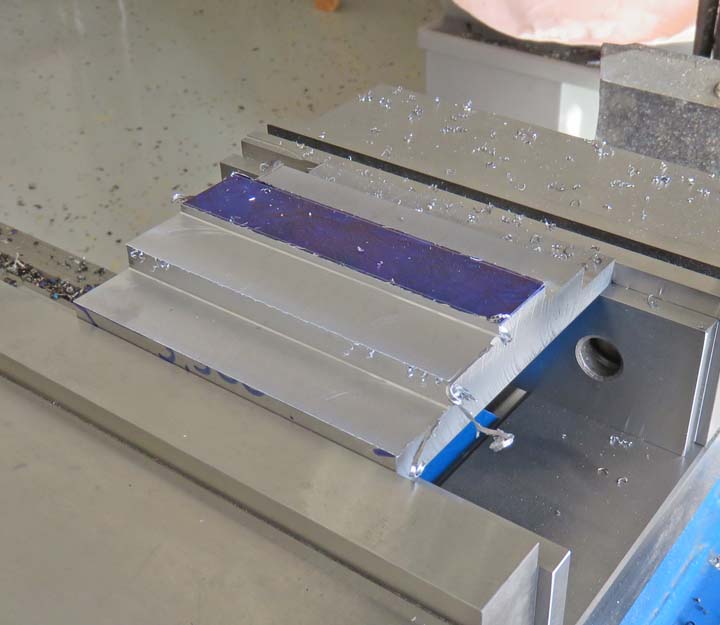
Bolt Cutting Fixture
This fixture will come in handy
for cutting bolts to length using a hacksaw. I've cut hundreds of bolts
with a hacksaw over the years and it can sometimes be a challenge. This
is a block of mild steel that will end up with a bunch of threaded holes in it.
|
|
|
The block is 3 1/2" square and 3/4" thick. Here I'm
laying out some lines that are .700" apart. Each area will be a
different height and will have threads on each level.
|
|
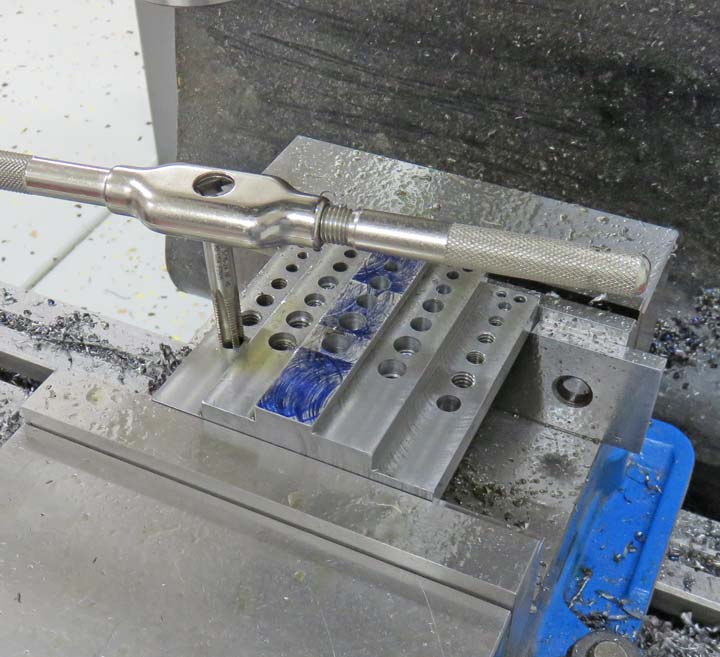
Here I'm roughing out the different heights, which are 1/4", 3/8", 1/2",
5/8" and 3/4". These are all very common sizes.
|
|
|
Here I'm tapping one of the many threads that I'll be
using. Also notice that I put a relief on the three deeper threads. This
is so it will be quicker when I'm using the 1/2" thru 3/4" thread
lengths
because there's no need to have full threads on those taller areas.
|
|
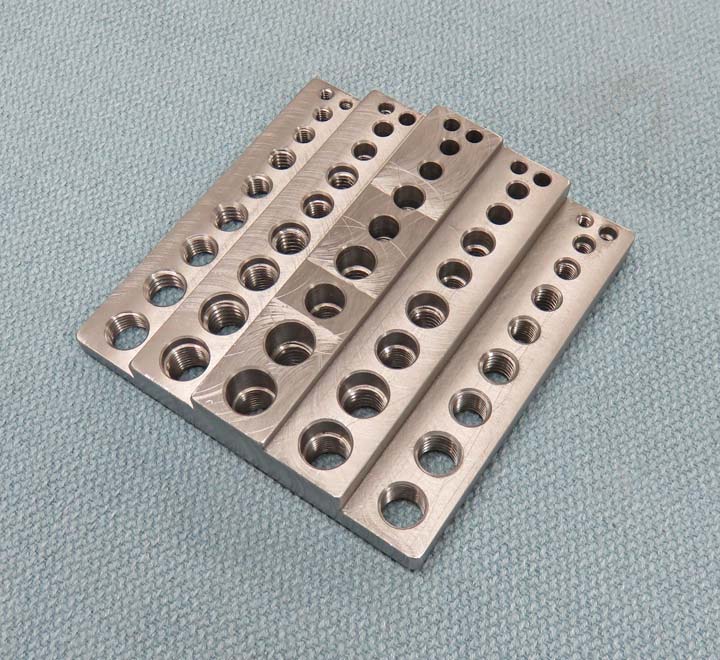
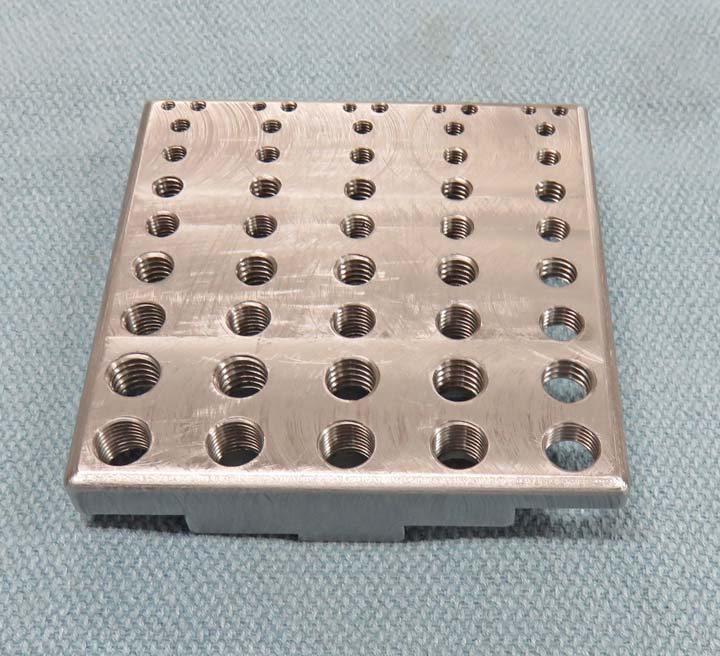
This is what it looks like all finished. There are 50 holes in all and
range from the smallest, 4-40 to the largest, 3/8". I also have fine and course
threads for the 1/4" thru 3/8" because you never know.
|
|
This is the back and you can see I made it easy on the hands by putting
a nice radius on all the edges.
|
|
|
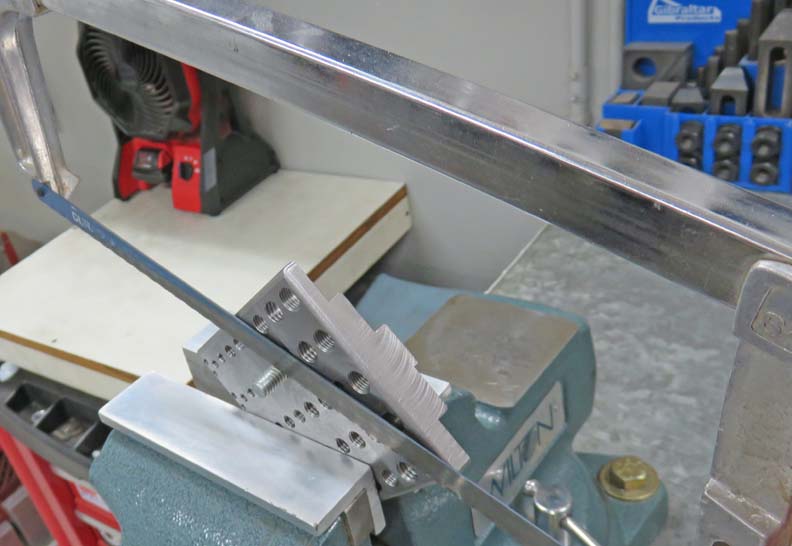
All you do is thread in your bolt, grab the fixture in
the vise and then cut it off with a hacksaw. I should have made this a
long time ago.
|
|
|
Height Gage Aids
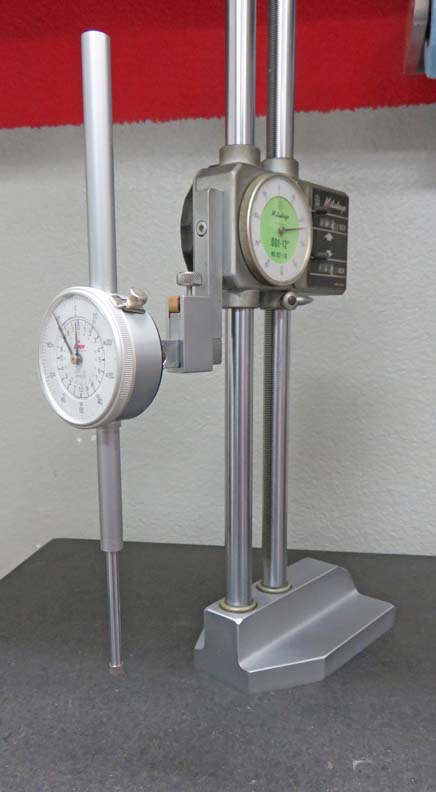
I made two different items to help me when using my height gage.
Normally you would use a height gage to scribe lines on your work piece,
which I've done many times. But sometimes the need arises to use this
tool with an indicator. And a height gage works great for this because
you can adjust it up or down fast and easily.
The second item I'm making for my height gage is to help me measure from hole-to-hole with.
I've had the need for this once before and while I'm making stuff, I
figured why not make this one too. Below is
how I normally use my height gage, with the scribe in it. This works
great and is what I used to layout the lines on my bolt fixture.
|
|
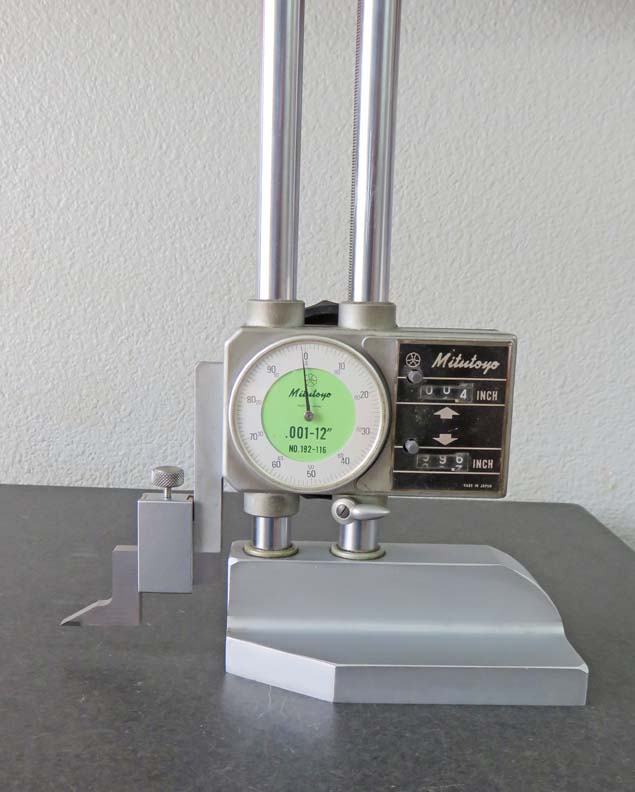 |
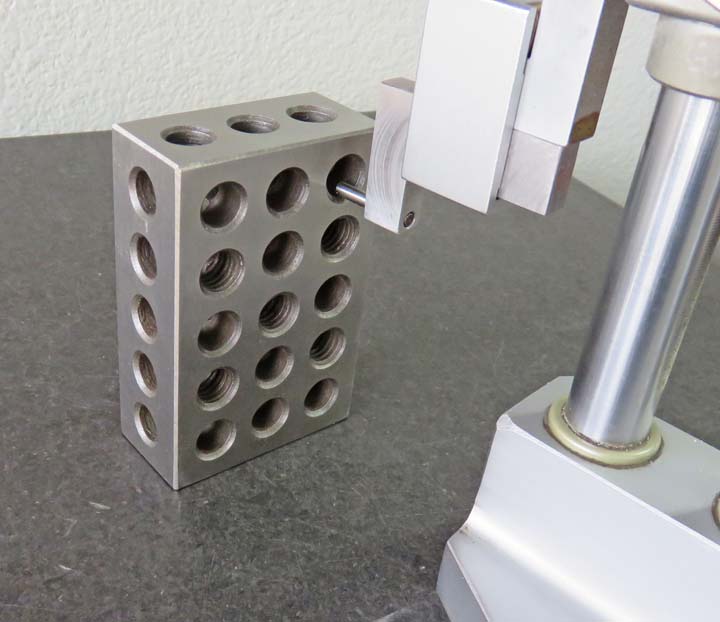
Here is the part I made to measure from hole-to-hole. That pin is .125
in diameter (1/8") and it's easy to use.
|
|
 |
|
In this example I'm using my 1 X 2 X 3 block for
demonstration proposes. If I wanted to find the distance from one hole
to another, this would be an easy way of doing that. All you do is touch
the bottom of the hole with the pin, zero out the dial on the height
gage and then move to the next hole. Then I just have to read the height
gage dial to see the distance.
If you're thinking, why don't you just use your calipers
for this? Yes you can use calipers for holes that are 'in-line' easy
enough. But when they are staggered, say up and over or not in
alignment, this will make life much easier. Simple to make and
it should come in handy.
|
|
|
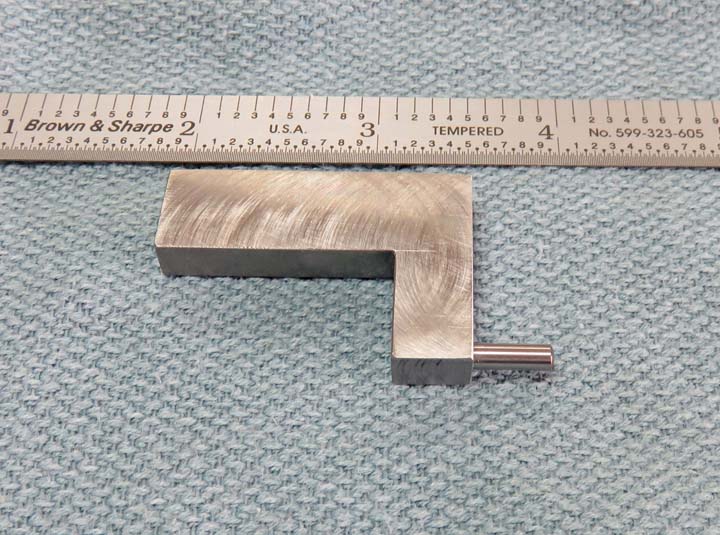
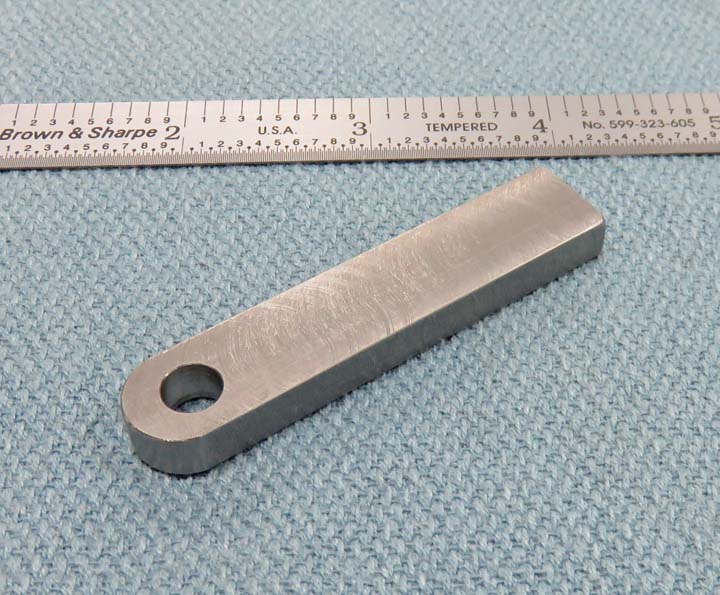
What I'll be making next is a piece that gets clamped in the height
gage that will hold a dial indicator. This is also a simple part to make
and measures 1/2" X 1/4" by 3.0" long. The hole is .257" diameter, which
is just larger than a 1/4" (so it clears the bolt).
|
|
 |
|
Here you can see how it looks and it attaches with a
1/4" bolt. The back of most indicators like this have provisions for a
1/4" pin or bolt, depending on what you need to do. Now when I need
to measure something or bore that smaller hole, I'm ready to go!
|
 |