|
Working With Wood Continued
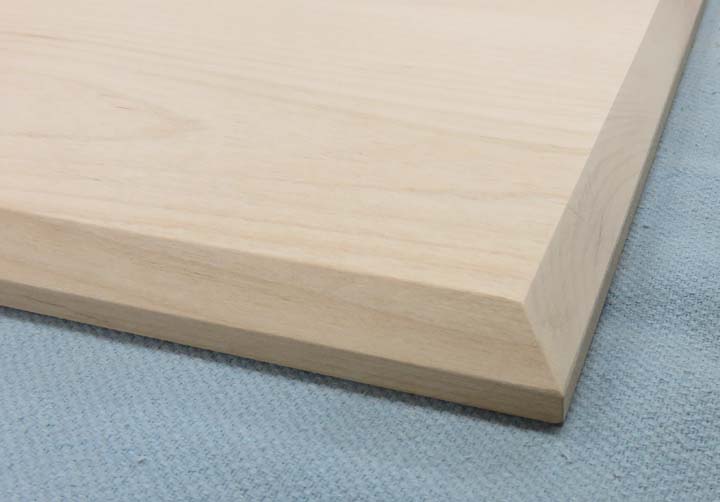
Here is what it looks like up close.
|
|
 |
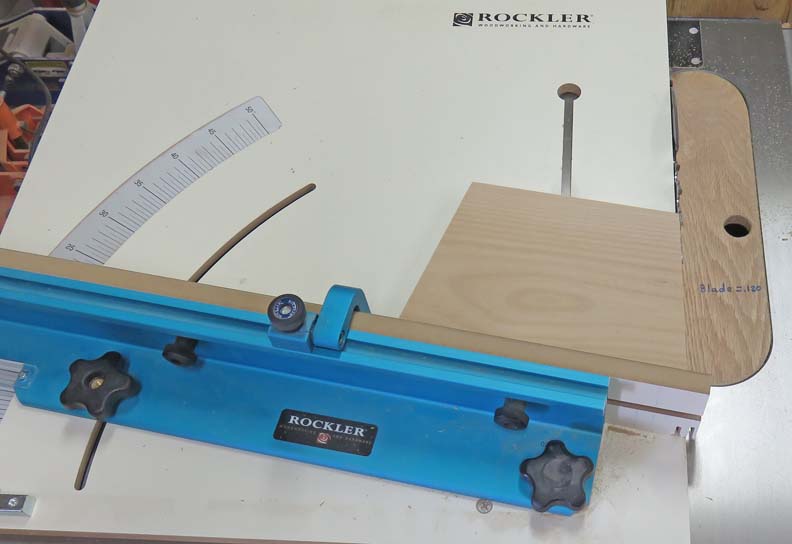
Here I'm cutting a 10 degree angle on the
head and foot boards using my cross-cut sled.
|
|
 |
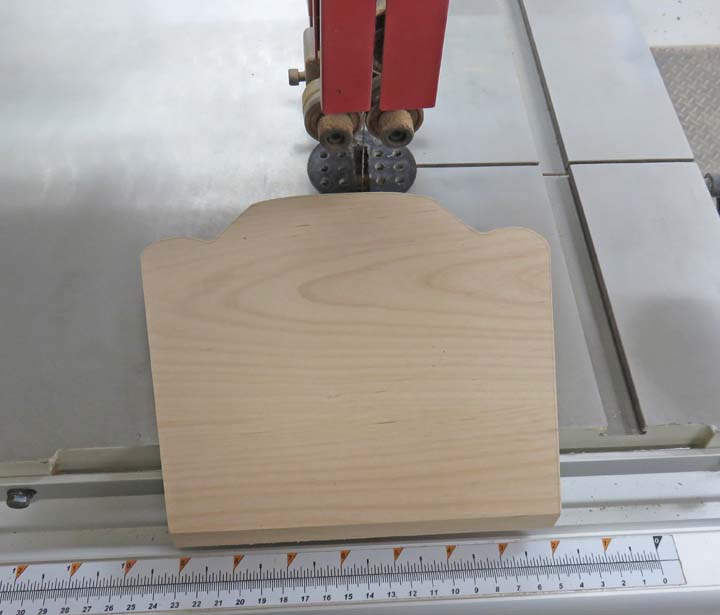
Then I used my bandsaw and cut to my line like I did before.
|
|
 |
|
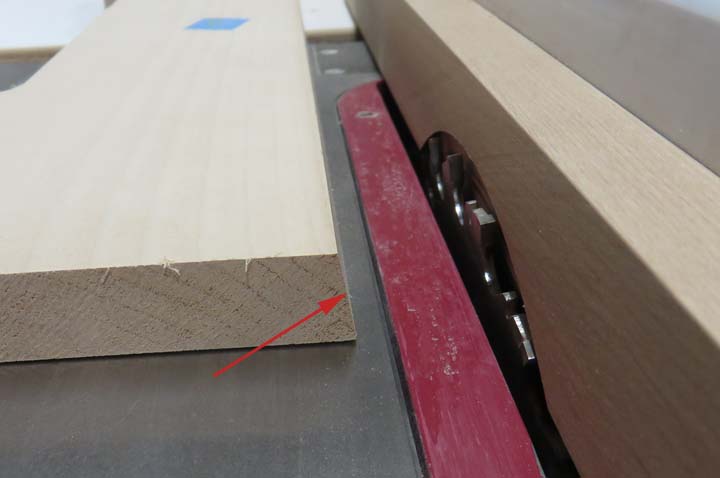
I should have put a matching 10 degree angle on the bottom
of the side pieces before I cut them on my bandsaw because now I painted
myself into a corner. Now if my work piece was a rectangle (before
cutting on the bandsaw), this would be
very easy to cut on my table saw by tilting my blade to 10 degrees, and then run them
through. However, now that my opposite side isn't parallel any longer,
I'll have to get creative.
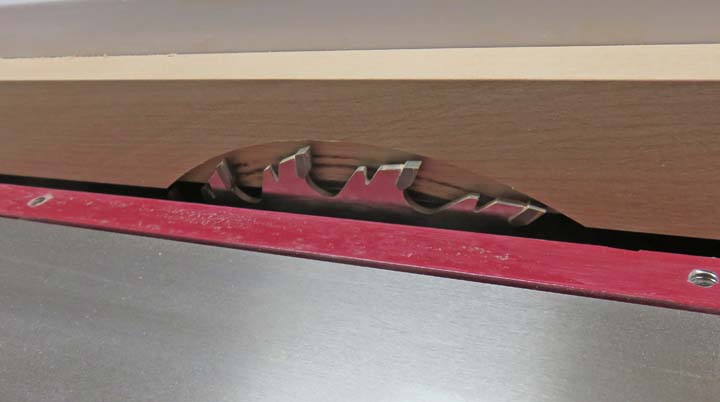
What I came up with is to use a sacrificial fence
(arrows), which will be used against the only side I have left to work
from on my side pieces. First I drilled some holes to use clamps that
are holding my sacrificial fence to my saws fence. Then I tilted my saw
blade 10 degrees and slowly raised it into my sacrificial fence creating
a
void.
|
|
 |
|
I ran a test piece through here until I was happy and
then ran all my side pieces through. Here you can see the angle that I
wanted (arrow). This worked out well, but it took some extra time.
|
|
 |
Here's a better look at my setup. Note: next time I'll try not to get
ahead of myself.
|
|
 |
|
I used my spindle sander and did a bunch of hand sanding
to one of my six side pieces. Once I had this piece all cleaned up like
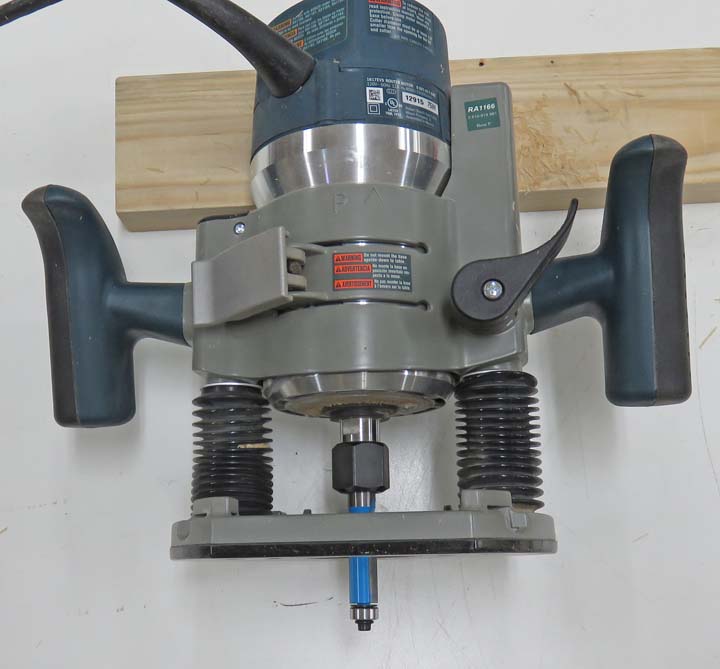
I wanted, I used a flush-trim bit in my router along with my side piece
as a template to cut the remaining pieces.
|
|
 |
|
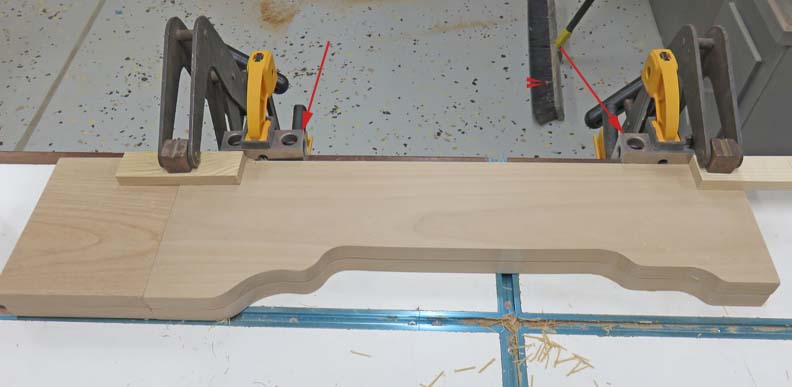
My template is on the bottom which worked on well here.
The arrows are pointing to my 1 X 2 X 3 blocks that are clamped in place
which are acting as a straightedge. Then I clamped the two pieces
together and an extra piece (on the left) to help my router during entry. This worked
great and went fast.
|
|
 |
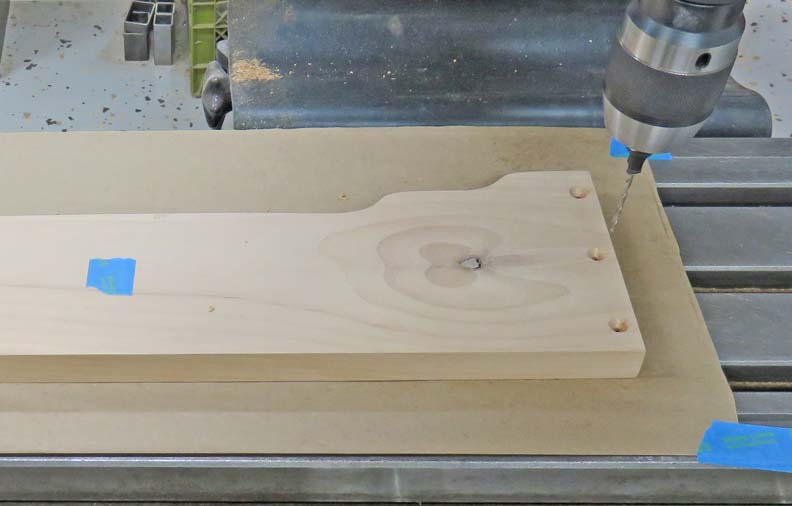
Next I drilled all the side pieces for some screws.
|
|
 |
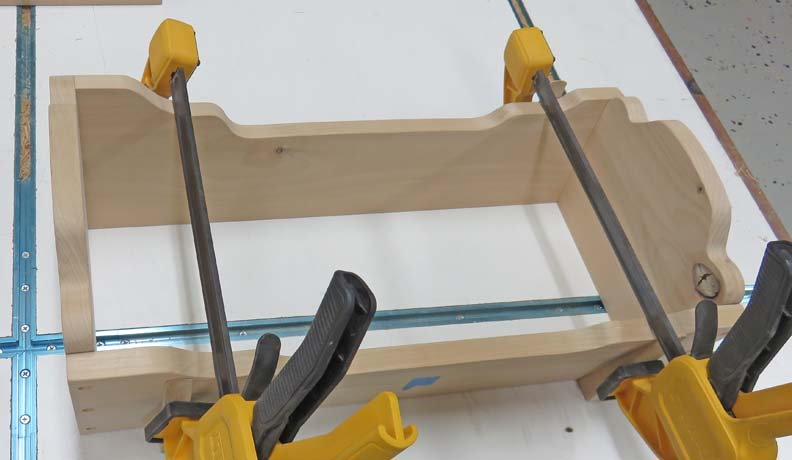
Here I'm test fitting my pieces together before transferring my screw
holes.
|
|
 |
|
1
2
3
4 |